
Editable configurable labels
happy_shop

AI ile Benzer Model Bul


Baskı Profili(0)
Model Dosyası(0)
 0
0 0
0 0
0
Yayınlandı:2026-03-15 14:06:47
2
0
 000
000Create labels for anything you want. Set the height of the label, enter the text you want, and export the stl file.
You can also configure the label thickness, select whether to indent or raise the text, set the margin size, choose whether or not to have a raised, lowered or no border, and adjust the rounding on the corners.
See below for step by step instructions, and a link to the configurable Onshape document.
You will need a (free) Onshape account to make a copy and use the document, but Onshape is a cloud-based parametric CAD application that you access through a browser so there are no downloads.
Link to document: Onshape Configurable Labels
You'll need to make your own copy of the document. Follow the link and you'll be given that option.

You can edit the label text in the Label_Text field in the configurations menu at the left hand side. The model will take a few moments to re-render. The label will expand to fit the text.

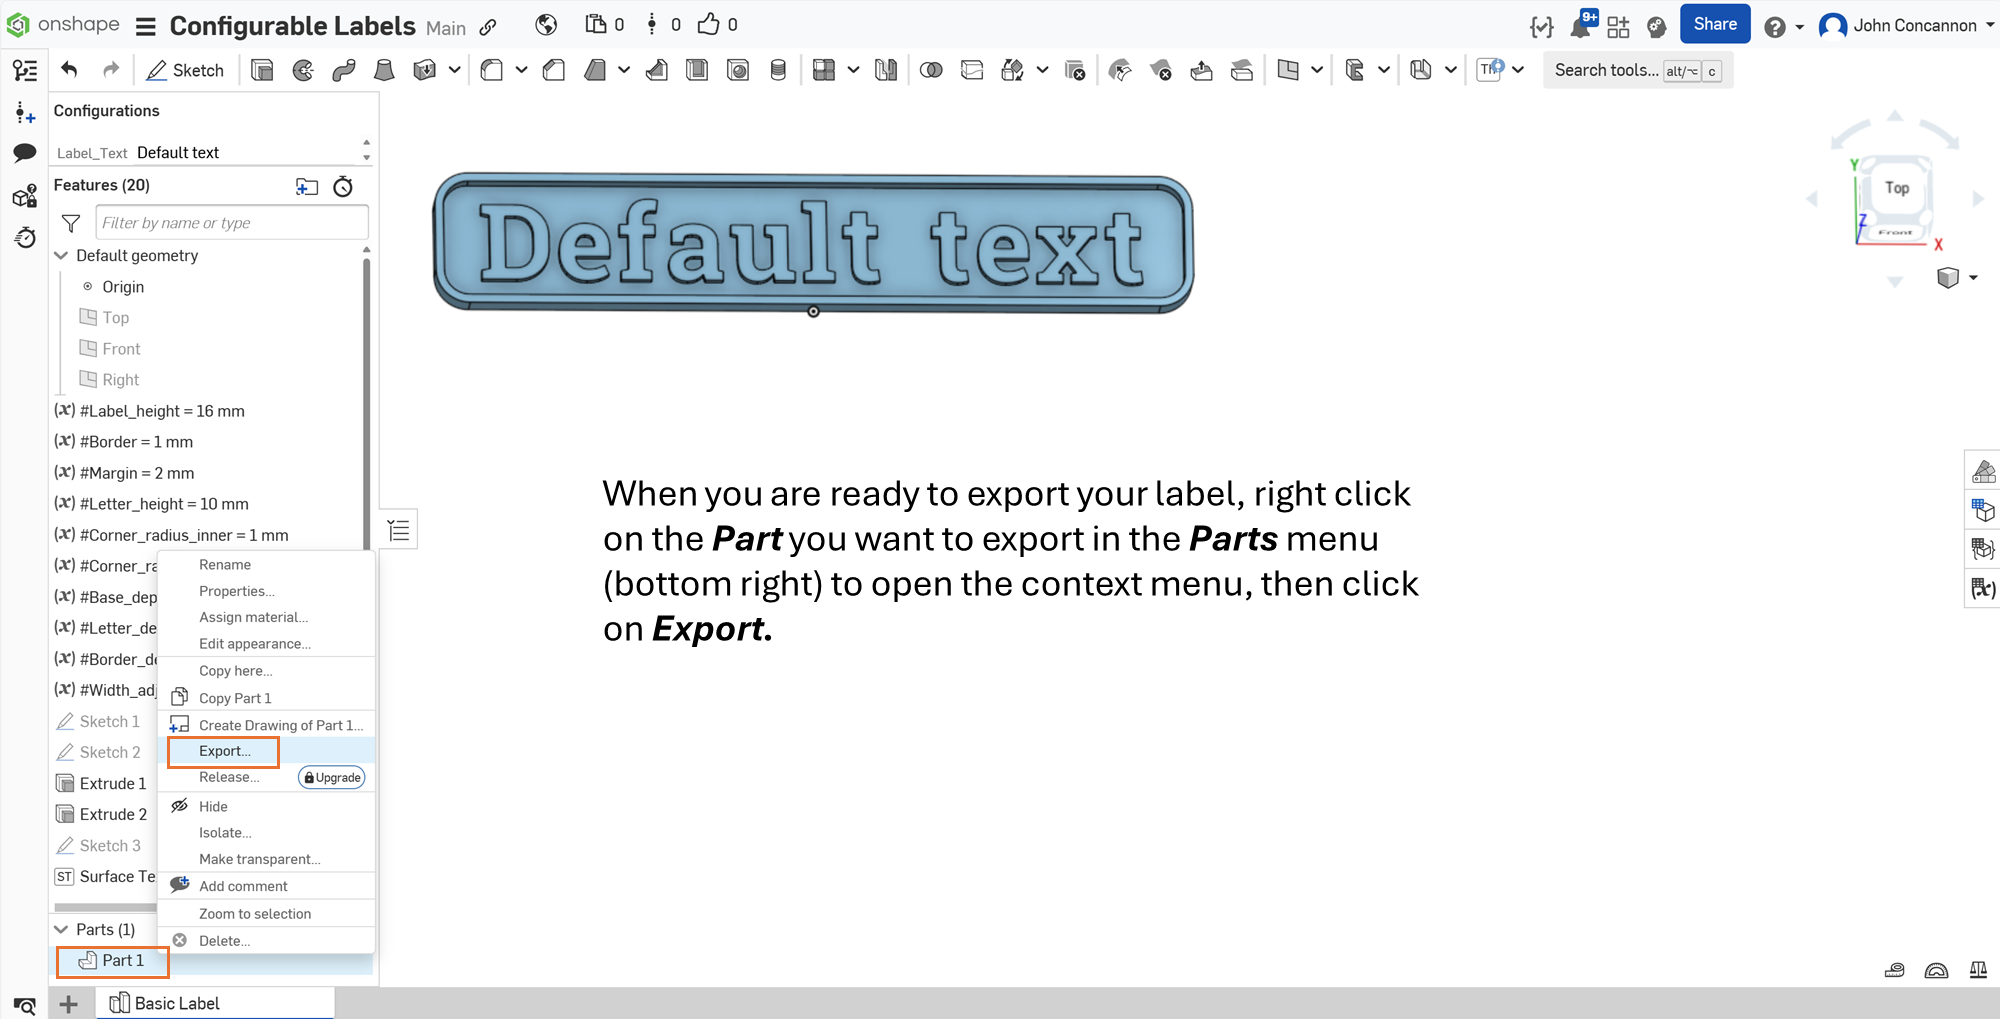
When you are ready to export your label, right-click on the Part you want to export in the Parts menu (bottom left) to open the context menu, then click on Export.

THAT'S IT. YOU'RE DONE. YOU CAN NOW CREATE ANY LABEL YOU WANT IN MOMENTS.

THE REST OF THESE INSTRUCTIONS ALLOW YOU TO FURTHER CUSTOMISE THE LABELS:
There are a number of other configurable features.
The height of the label is set by editing the (x) #Label_height variable in the default geometry (left hand side). You can also set the border width and and a margin width between the text and the border.

The height of the text is determined by the label height, margin and border width.
The length of the text is determined by the text height and the length of the text string entered.

You can set the corner radius narrow …
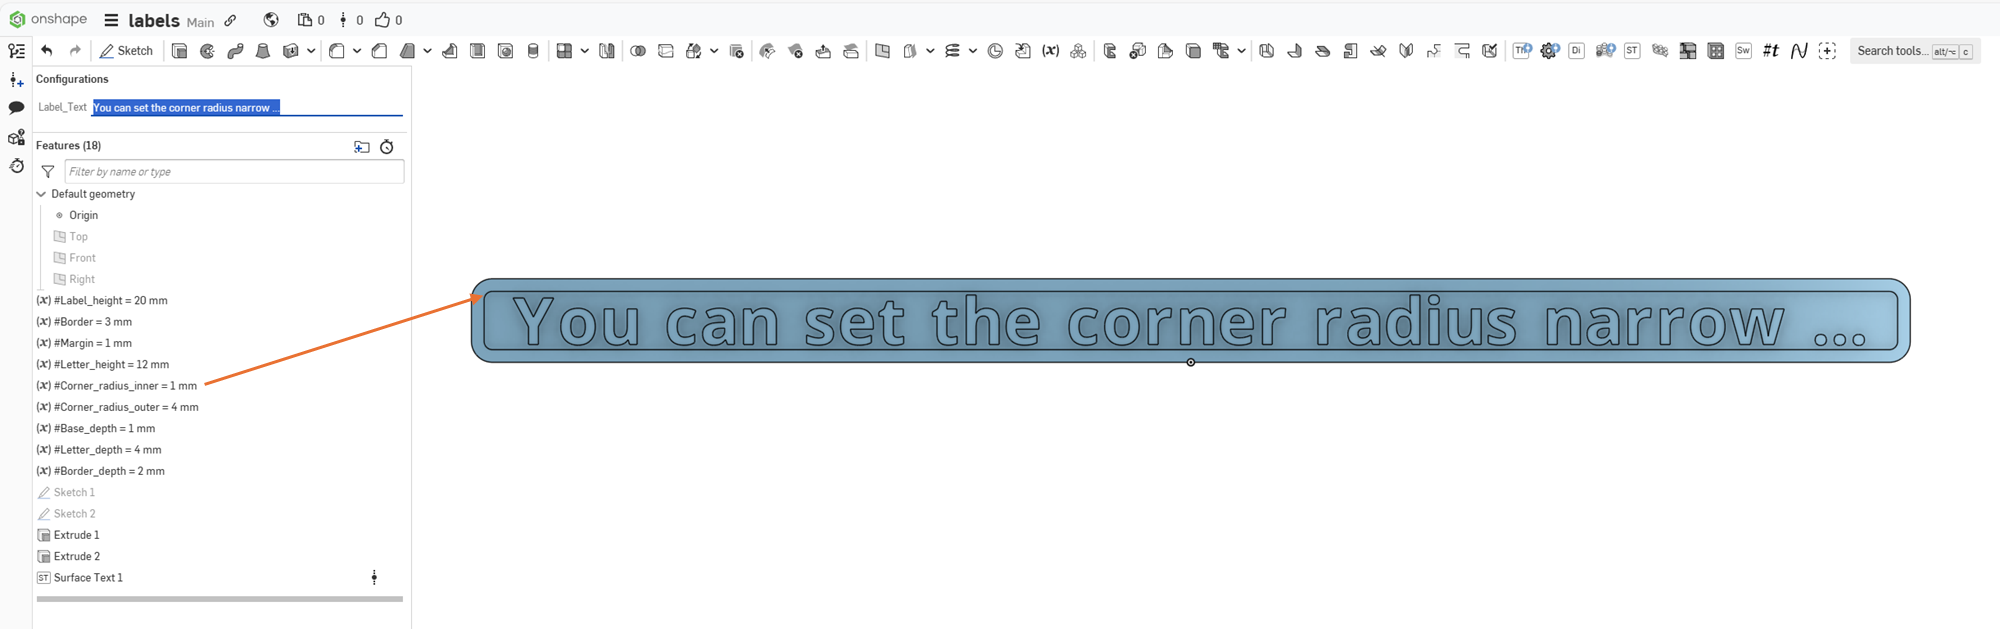
… or wide

… but don't set it wider than half the label height minus the margin and border.
You can set the text depth by editing the (x) #Letter_depth variable. You can set the base and border depth in the same way. Setting the border depth to the same as the base depth effectively removes a distinct border.

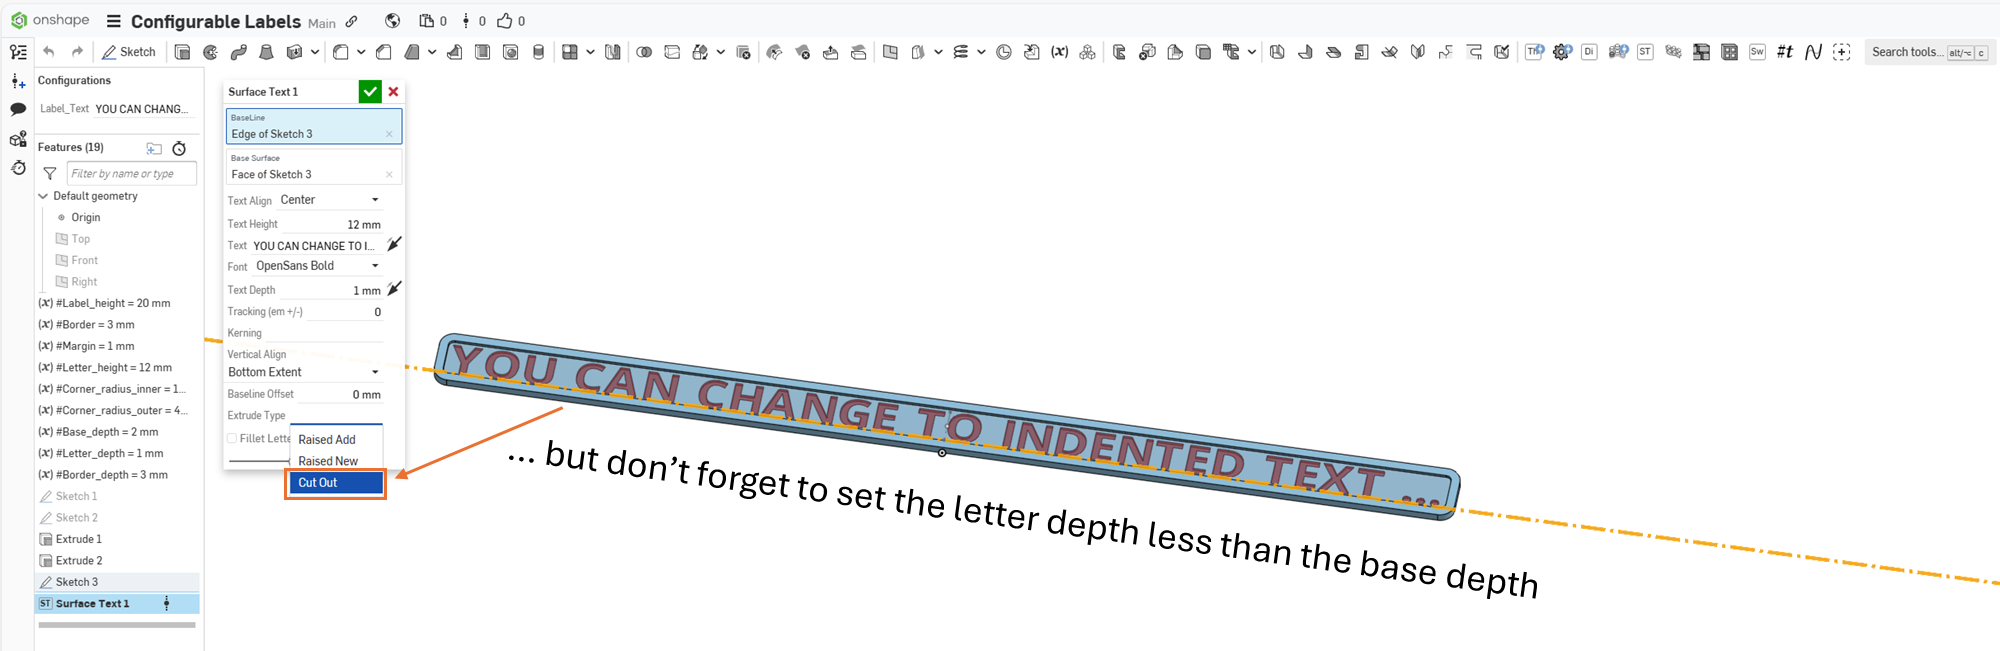
If you want to change the font, or indent the text, you will need to edit the Surface Text feature. Double click on the Surface Text 1 feature.

To change the font, select a new font from the Font drop down menu on the Surface Text feature context menu. If you find that the length of the label does not adjust enough to accommodate the new font, you can add a manual width adjustment by editing the (x) #Width_adjustment variable

To indent the text instead of raising it, select Cut Out from the Extrude Type drop down menu on the Surface Text feature context menu. You will need to adjust the (x) #Letter_depth and (x) #Base_depth variables to prevent cutting all the way through the label.
Feedback
I'm not an Onshape expert, and no doubt I'm doing this the hard way. It's also quite possible to break the model by setting the variables in such a way that the model won't generate properly, so bear that in mind. However, please provide any constructive feedback or request for features in the comments.
Background
I went looking for a 3d label maker app, but couldn't find one. Sure, you can just convert an image file to an stl, but you have to create the image files for each label, then convert it, and you are limited in your control over the output.
Alternatively, I could use 3d modeling software like Tinkercad, but that meant re-creating each label from scratch.
Instead, I used the configuration options in Onshape to create a basic label model creator. Since it worked for me, I thought I'd share it.
