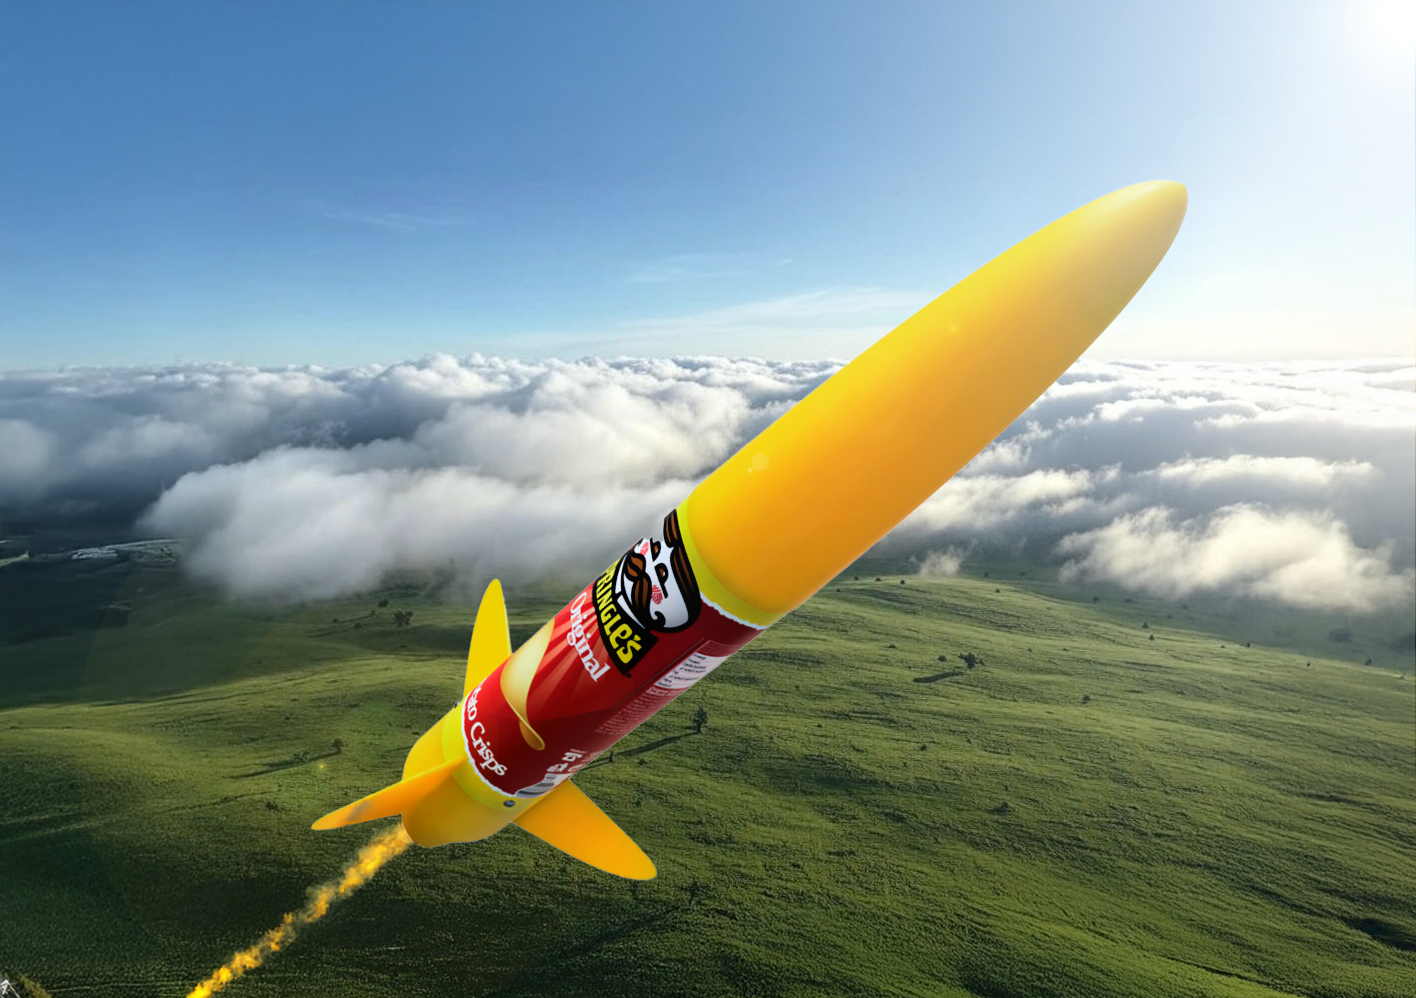
Pringles SPRINT – CHECK BACK FOR UPDATES
Post launch pictures and I'll add them to the default photos for this project!!
Thank you Truthornothing for the launch picts!
Alpha.05 UPDATE
- Forgot to include the rail button template for the fin can
Alpha.04 UPDATE
- Minor model tweak to the nose cone shoulder to thicken the base of the threads. I've changed out the part so any future downloads will have the fix.
Alpha.03 UPDATE
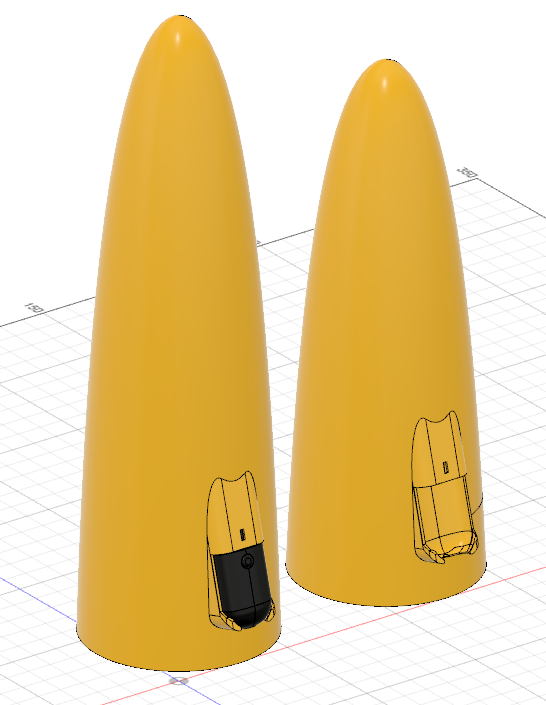
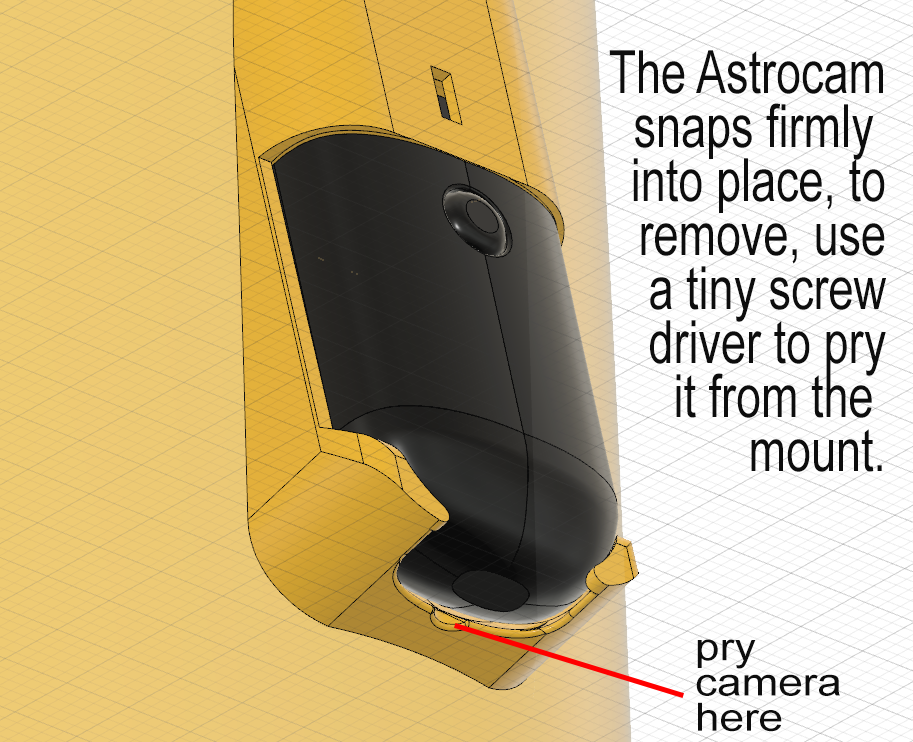
- Modified the Nose Cone Shell(s) to accommodate an Estes Astrocam.
Alpha.02 UPDATES
- Shorter nose cone shell that prints in the smaller print volumes
- Updated nose weight support from BT-20 to BT-50 to allow for avionics that will fit in that tube.
- Updated nose cone shoulder to support the BT-50
- Adapters from BT-20 to BT-50 incase you've already printed the BT-20 versions
- Updated Nose weight pod to work better with the BT-50 support tube
- STEP and Fusion files that include all the updates
Notes
- Even though I've updated the internal tube to be BT-50, please make sure that tube and the outer shell are properly ventilated to measure atmospheric changes
- For the long nose cone you will need 225.3mm of BT-50
- For the Shorter nose cone you will need 180mm of BT-50
- If you've not printed the BT-20 based components you can supersede those parts with the new nose cone shoulder and nose weight pod.
- The newer weight pod can still be used with the BT-20 but I think the original is sturdier.
- The longer nose cone is more authentic to the original Sprint design but at first glance you might not notice the other is shorter.
- You can download the “Update Alpha.02.zip” that also includes a Rocksim with the shorter nose cone.
Designed for the LUNAR Chip Can Challenge!
I've designed various parts that can be used to turn a Pringles (or similar) can into a high powered rocket. Why? Because those cans are just asking for it.
So how high can a can of chips fly? What better way to determine that than to design it around a known competition design, the Estes' Astron Sprint!
Consider this a starting point for a Pringles Can Rocket. Even though I tried to cover all the needed construction details, it's possible I missed something. Unfortunately I don't live in an area that allows me to easily test fly the design. So, it would be really good if you know something about high power rocketry before you let the chips fly!
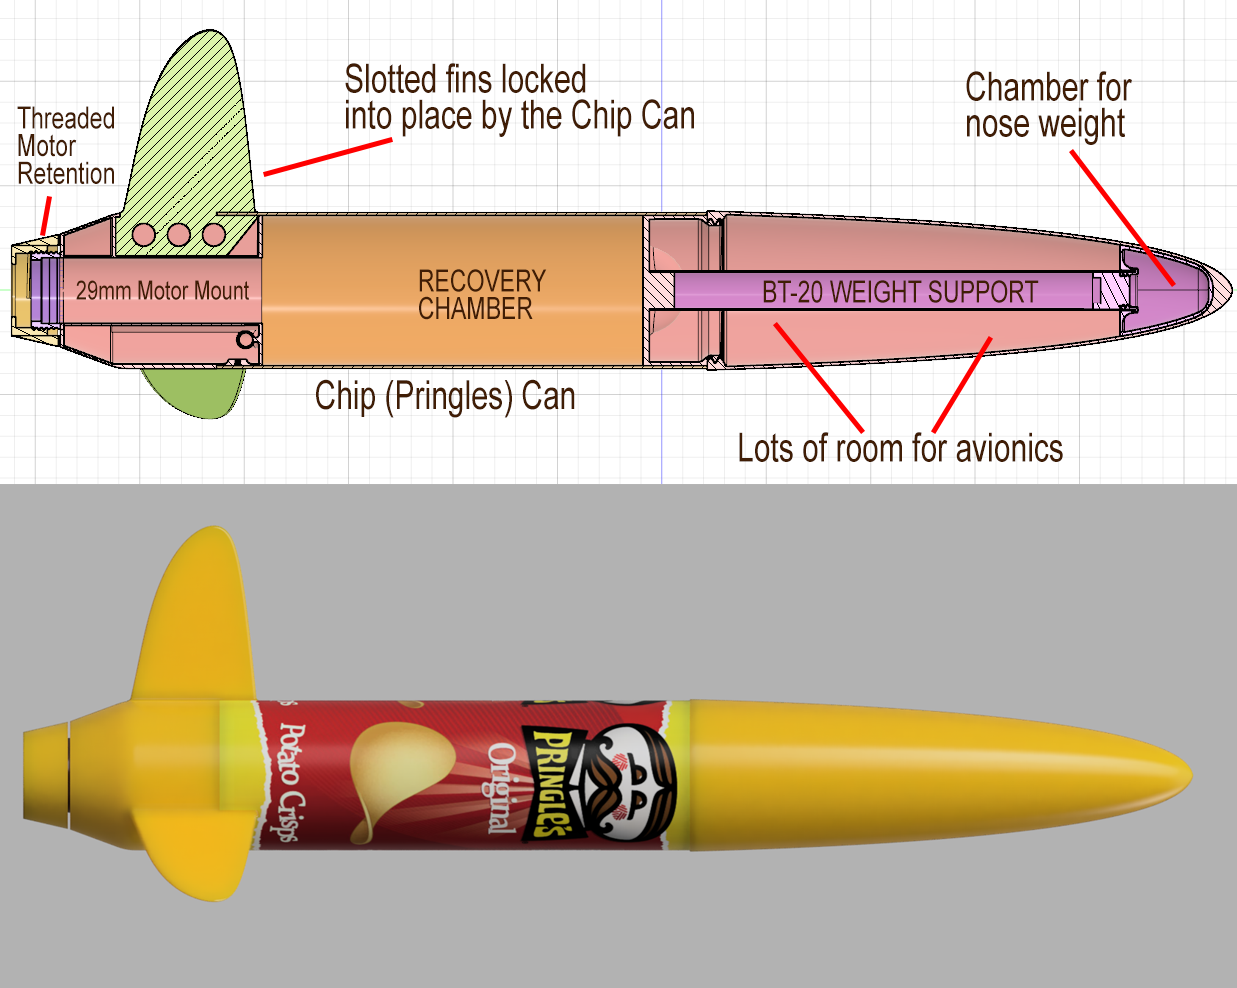
Parts (so far) included in this ‘kit’
- Sprint Style Nosecone and threaded shoulder.
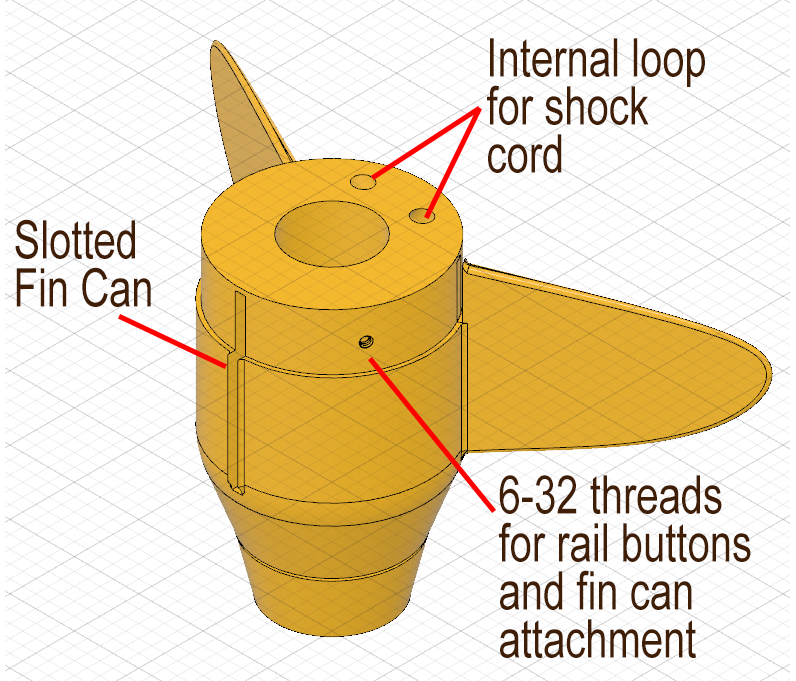
- Slotted Fin can
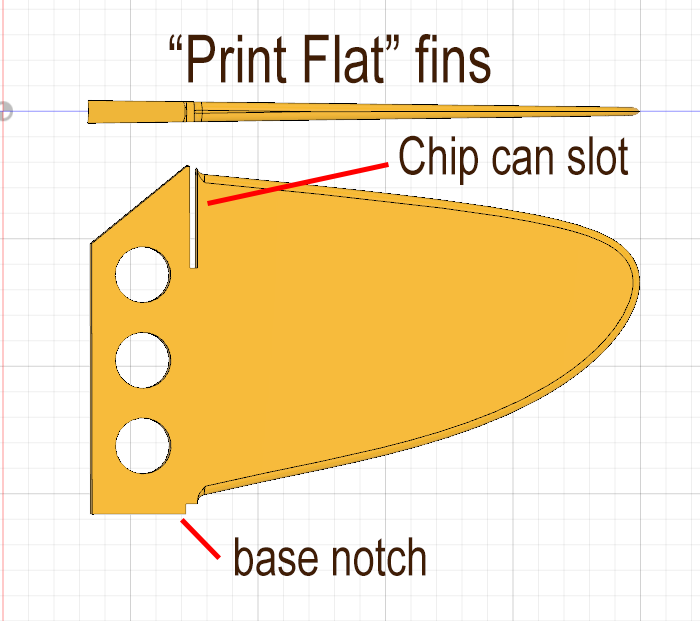
- Flat print Sprint style Fin
- 29mm motor mount with threaded retention cap
- 6-32 backing reinforcement for inside the can
- Camber for nose weight with a threaded BT-20 cap
- Rocksim(10) file that approximates this configuration
- STEP file for anyone who wants to modify this design (please post your changes)
- Template for marking holes in the Chip can for the 16-32 screws.
What you will need
- 9" (or more) BT-20 body tube
- Shock cord
- Parachute
- 6-32 Rail buttons
- 6-32 screws to attach the chip tube to the fin can.
- (optional) 29mm motor tube - it will add a layer of insulation between the motor and the fin can but, I'm not 100% certain it's needed.


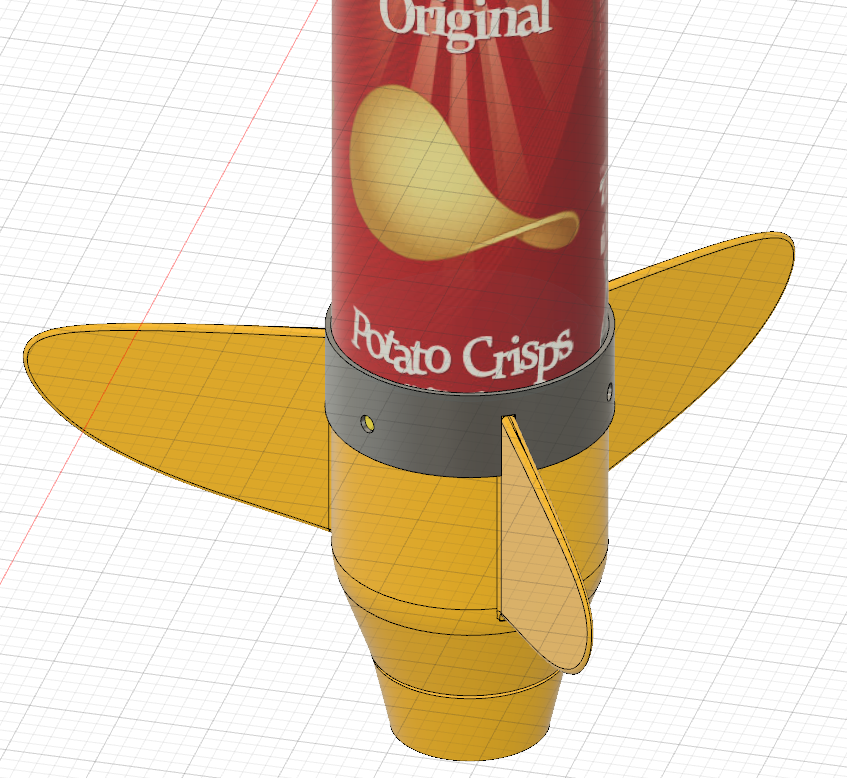
When printing the fins, set your layer height to the smallest your printer offers and make sure to use 100% infill. The fit for the fins is tight, so work the base notch in first then push the fin until it stops at the top. The chip can slot should line up with the upper shoulder of the fin can.
Using the template - first slide it onto the chip can, then fit the chip can to the fin can, then slide the template until it stops at the top of the fins. Mark the can for the holes. Separate the can from the fin can and then drill out the holes.
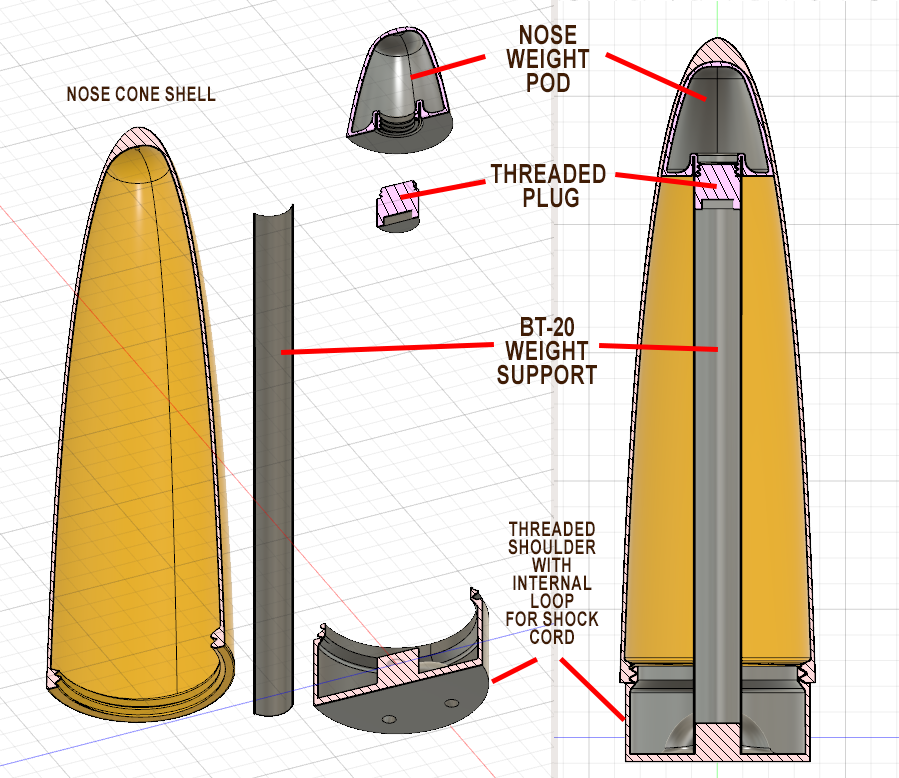
The nose cone has lots of room for almost any sort of avionics but more importantly you need to add weight to the nose in order to move the CG to about the base of the shoulder. That's the idea behind this pod configuration. The weight in the pod is positioned using the (9") BT-20 tube.

The nose cone shell then holds it all in place when threaded onto the shoulder.
NOTE: For all threaded parts (and that's just about all) use the smallest layer height your printer can print. THEN, after printing gently work the parts together until they thread easily. All parts should thread to a stopping point.
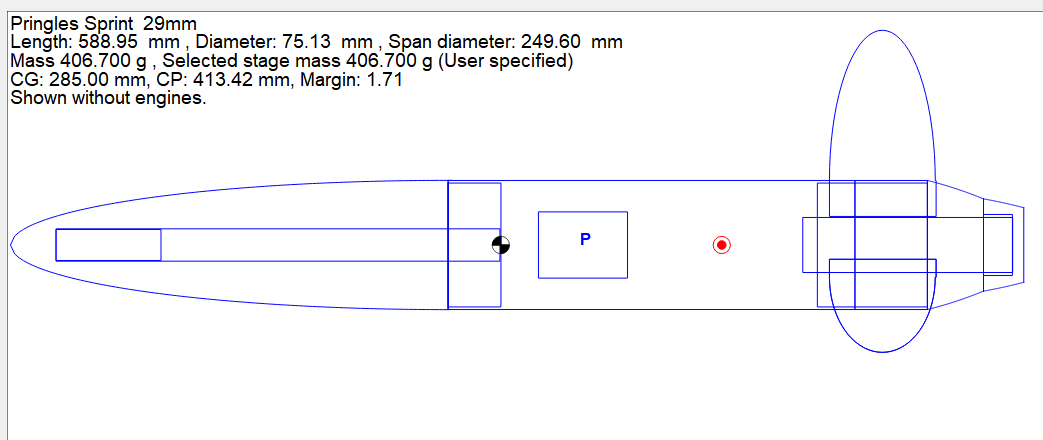
I roughed out the stability for mine - you may get different results with your prints so use the Mass override settings to adjust the weight until you get the CG close to the base of the nose cone shoulder. The further forward the better.
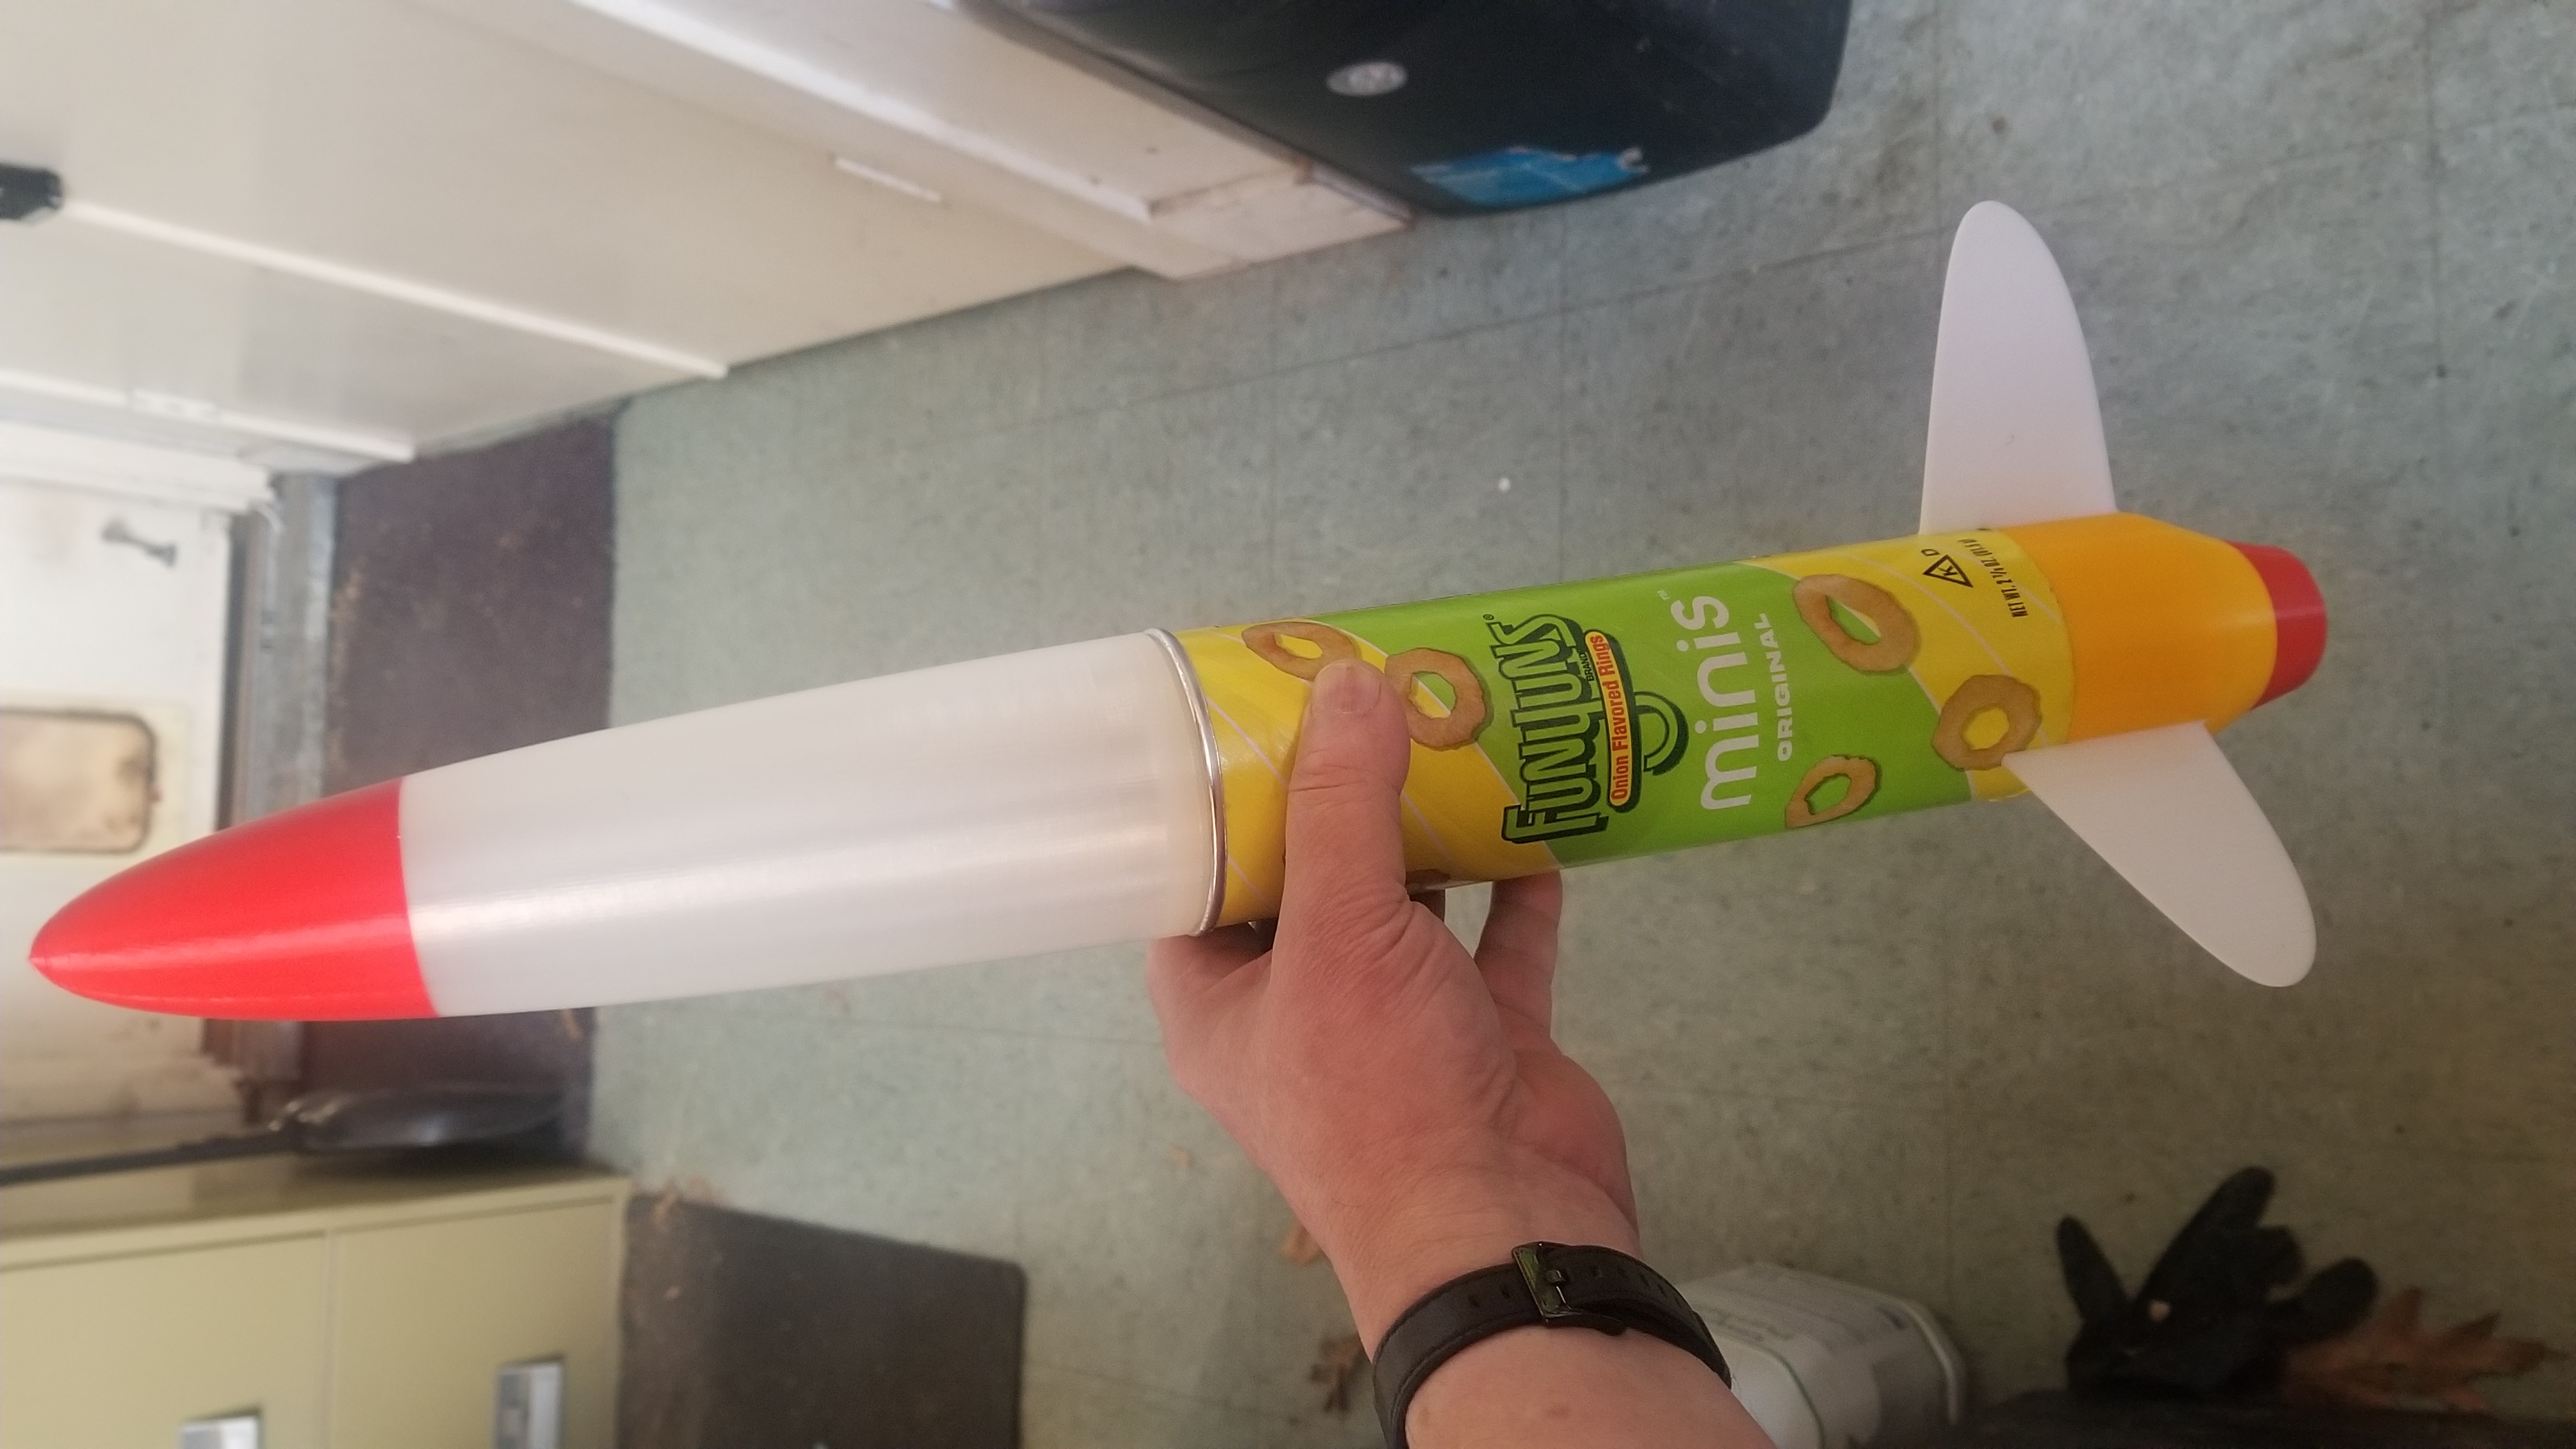
My test print using a “Funyuns” can - it's the same spec as the Pringles Can (in theory)
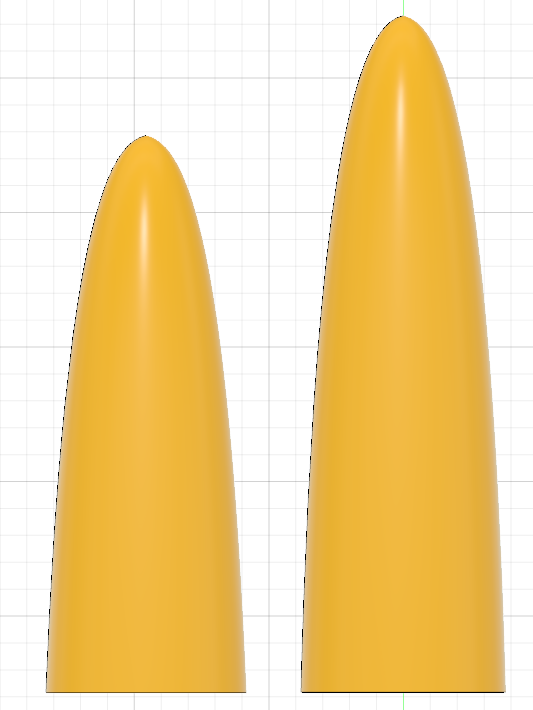
Alpha.02 Update to offer a shorter nose cone shell to support printers with a smaller printbed.

Alpha.03 Update to include Astrocam mounts


View from the camera

Etiketler
Model Kaynağı