
Varikon tower puzzle
FinnLee

Найти похожую с ИИ

Профиль печати(0)
Файл модели(0)
 0
0 0
0 0
0
Опубликовано:2026-04-21 00:20:40
0
0



 000
000That's a little toy from my childhood that I was wonder, could I make it myself.. and guess, what?... I did it.,
What u need:
7 colors of PLA filament (PETG, if u got dey not stringing would work too.. maybe), base filament (that black one on my foto) should not be mate, it;s not so smooth;
nail file/wood file (or just sand paper);
time;
What u could need but it's not necessary:
grease - used ONLY on that "hexaoidal straight thing" (4 example I have not use it);
Minimal printing requirments:
5% infill;
0,2 mm layer lines (u can use adaptive layer lines to make the parts prettier);
0,4 nozzle;
3 wall loop (I find it necessery if I want to part be strong enough with 5% infill);
Assembly:
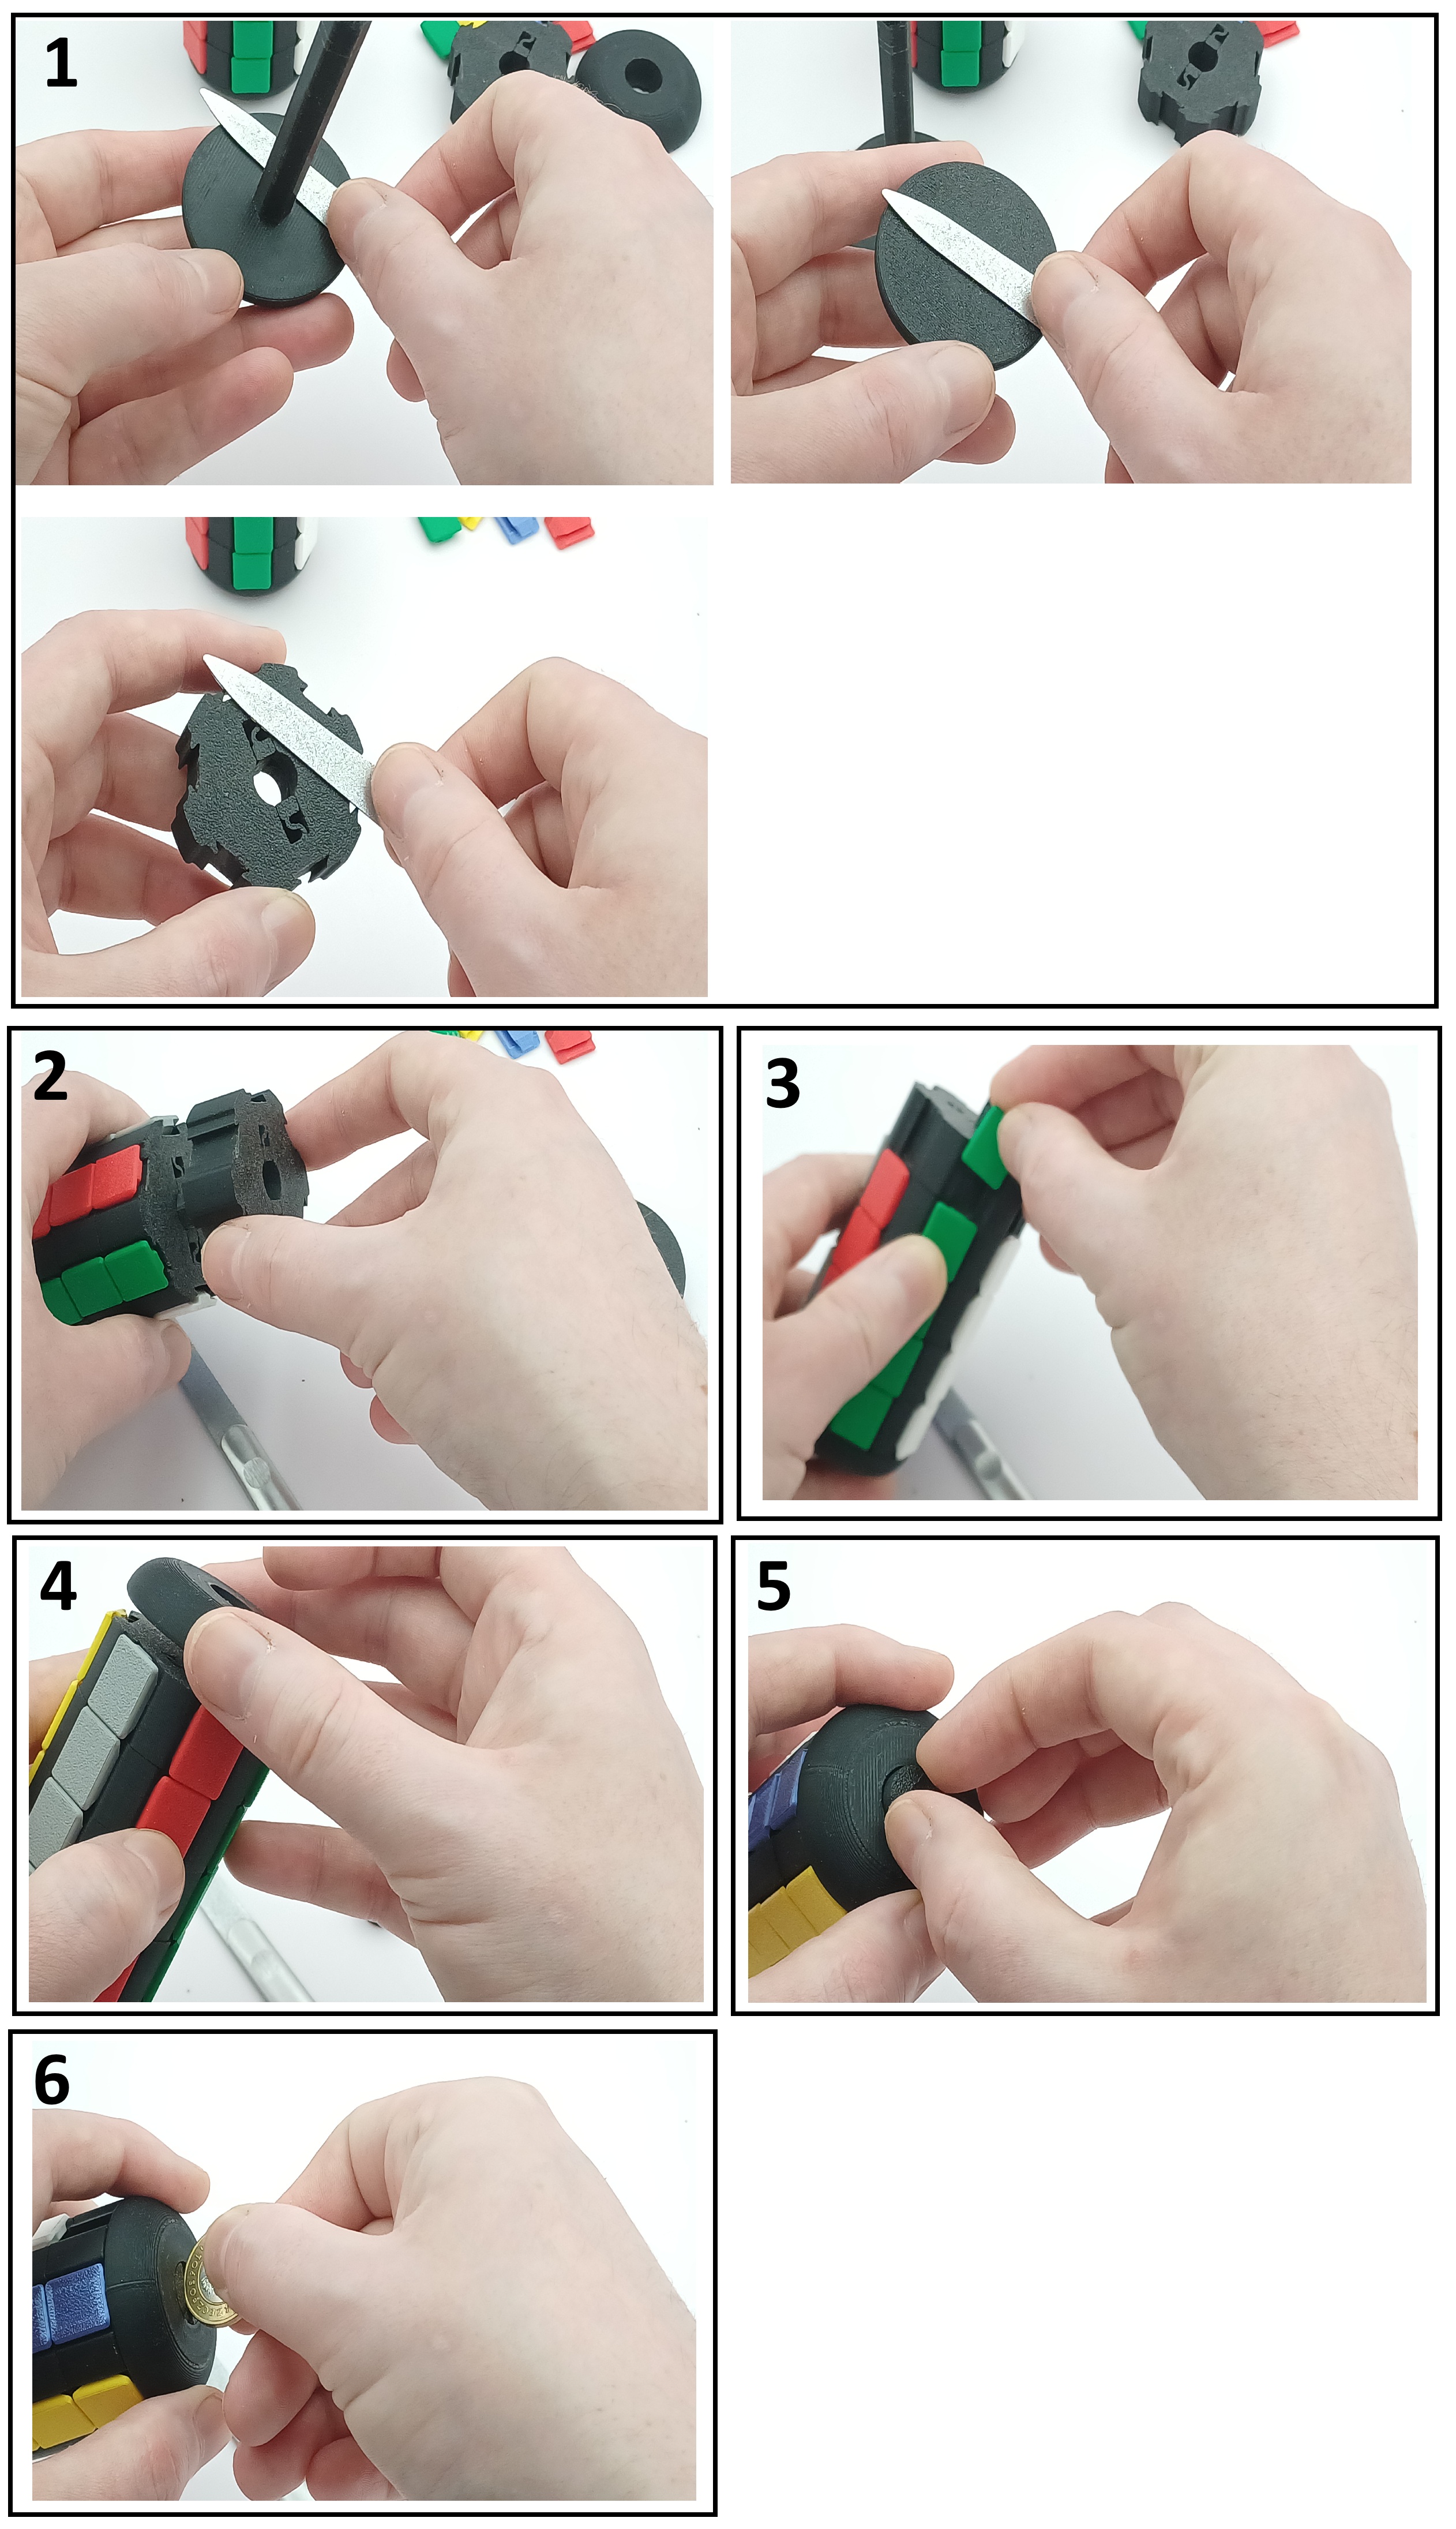
polish parts with file or sand paper a little bit - after pronting on top of parts always there are roughness, point is that this parts touch each others and they move so they should be more smooth.
put "Mechanism" parts on "Base" - there is no difference how u put it on, even springs don;t have to be in line;
when u have all "Mechanism" parts on "Base", u can start assemble "Bead", remember that u dont have to put colors in lines, point of puzzle is to arrange that puzzle ;) ;
now It's time to put on "Top", u must rotate until part will pop on place amd there would be no gap between parts;
place "Lock" part in hole, and rotate part until it pop in, "Top" with "Lock" should line;
using coin turn "Lock" counterclockwise (it should make about half turn);
I'd be grateful for your feedback on the project. I've attached the FreeCAD and STEP files; perhaps someone can think of a way to further improve the functionality of this toy. I've been working on it for a while now, and perhaps a different perspective could improve it. I'd be incredibly grateful for your feedback and comments.
