
XY Axis
form.eclectic

Найти похожую с ИИ
Профиль печати(0)
Файл модели(0)
 0
0 0
0 0
0
Опубликовано:2026-02-18 19:02:35
0
0
 000
000
Non-printed parts used in this section:
◦ MGN9h rails 2x 350 mm
◦ MGN12h rails 300 mm
◦ GT2 Pulleys 2x smooth and 4x Toothed
◦ Y Endstop limit switch
◦ M5 Bearing retaining star washers (For pulleys)
◦ M5 Hex head screw, length: 40 mm (2x for Belt tensioners)
◦ M5 Half rounded head, length: 12 mm (4x for Bottom of XY Joints)
◦ M5 CS screws, 12, 16, 30, 40 mm
◦ M3 CS screws, 10, 16, 20 mm
◦ M5 nuts
◦ M3 nuts
◦ M3 T-nuts / Ball T-nuts
M5 Bearing retaining star washers update: Instead of the classic M5 washers, use Bearing star washers everywhere on GT2 pulleys: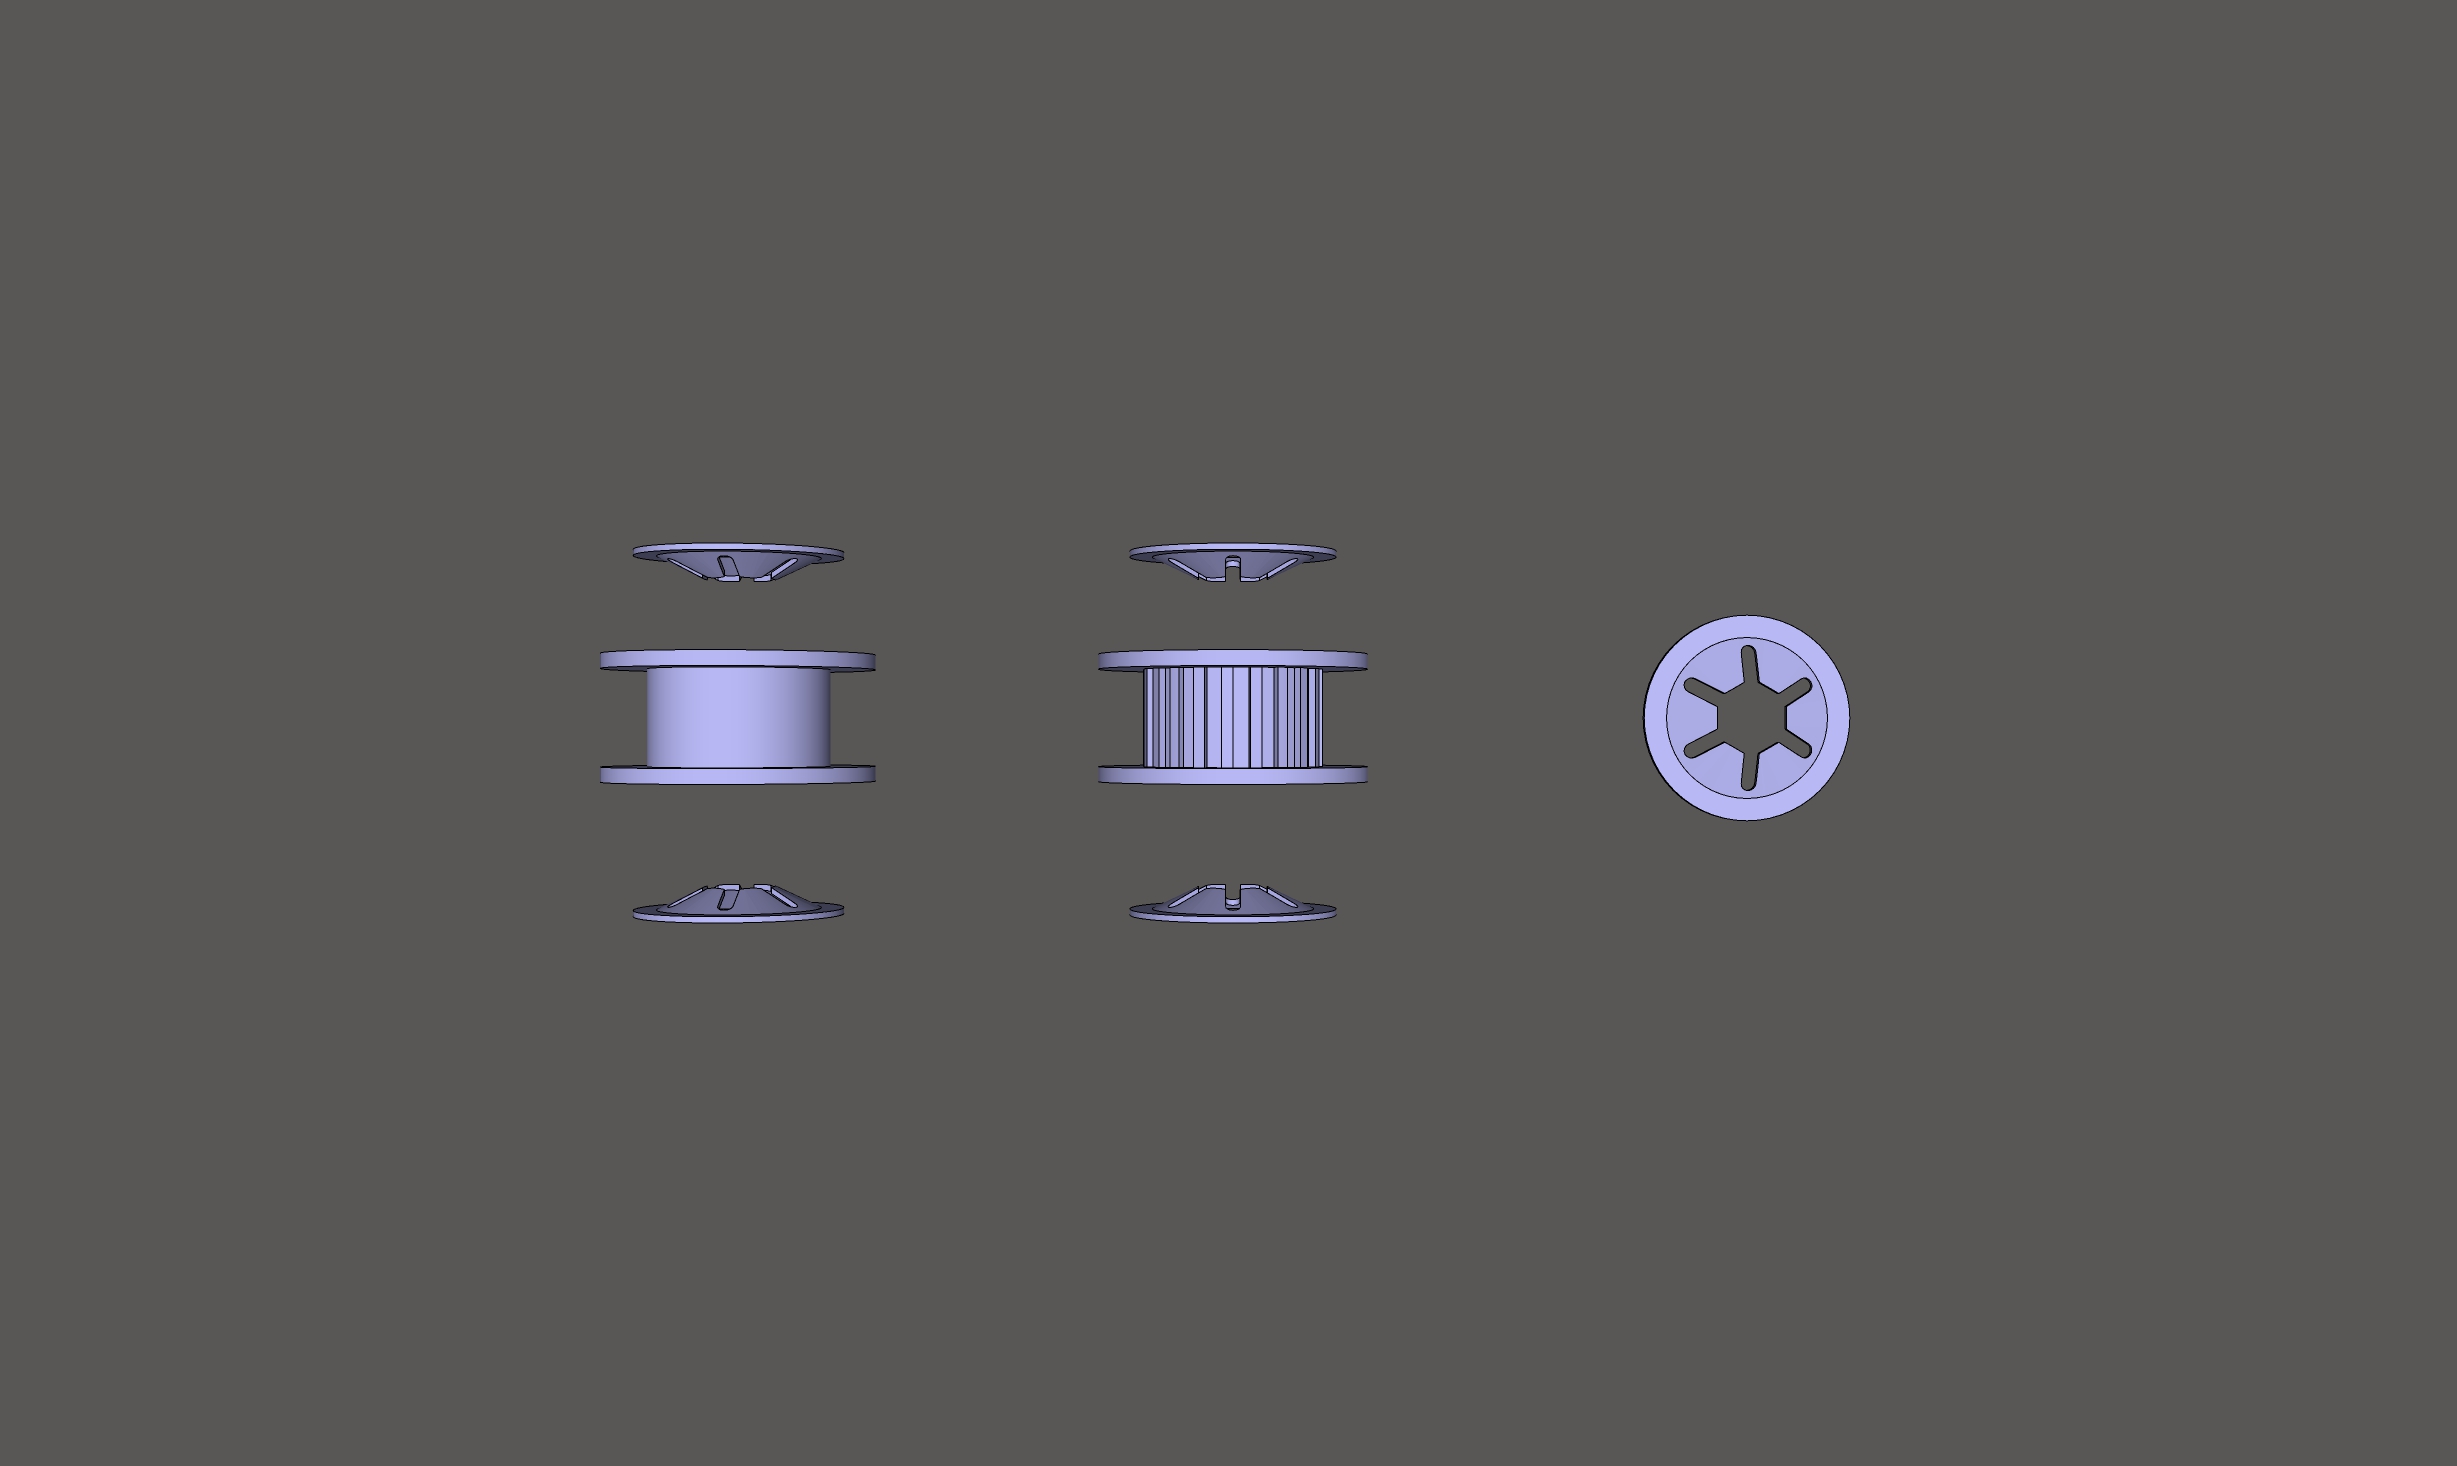

1. Print all STL files from this section… and also from Tools signpost section print 3x MGN9 and 3x MGN12 rail guide…
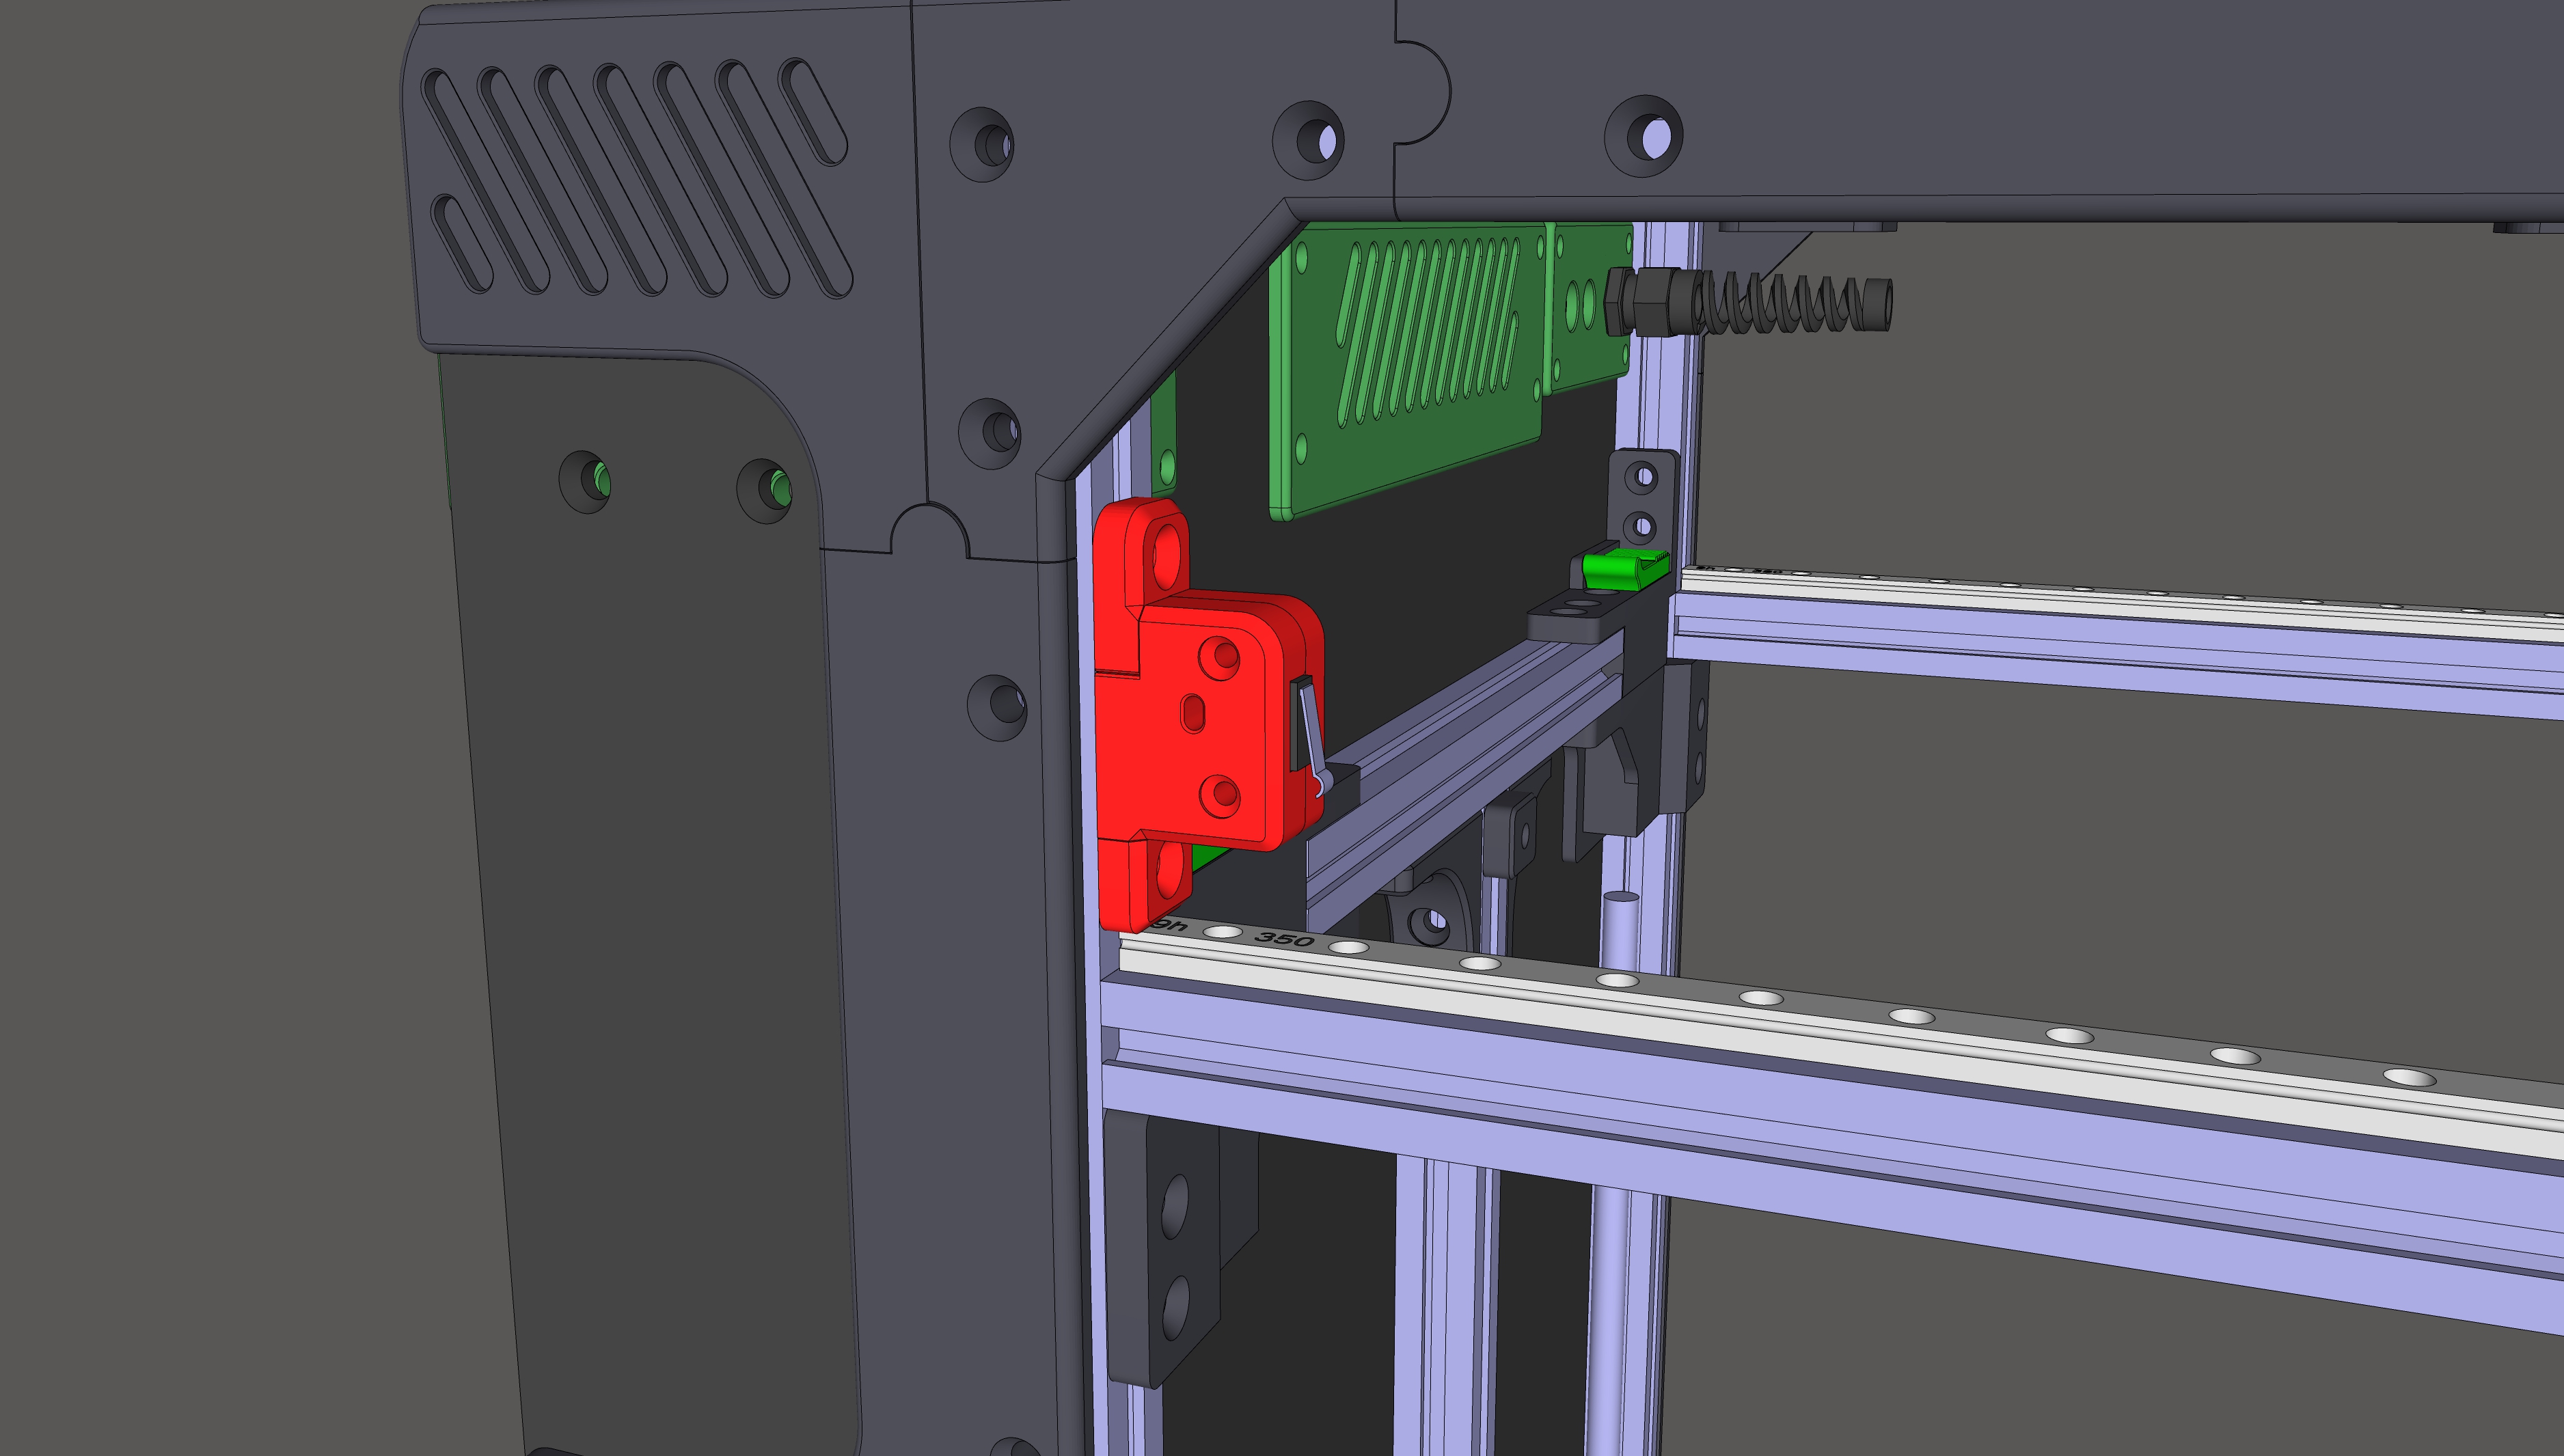
Install two MGN9 350mm rails onto the frame using M3 10mm screws and M3 T-nuts (leave about 1mm gap between the rear frame and the rails). Place Mgn9_Rail_Stop.stl on the front ends of the rails as shown in red in the image below:

2. Assemble the Y endstop (by 2x M3 20mm screws)…

… and mount them on alu frame (by M5 12mm screw)
3. Belt Tensioners:
Assemble two Belt Tensioners via image below (You will also need two M5 40mm HEX head screws, along with the classic CS head), place M5 Bearing retaining star washers on each side of the pulley…

… and mount them on alu frame by 4x M5 12mm screws (the models contains helper holes through which you can insert an allen key and when the allen key rests on the head of the screw in the alu frame, you are at the correct height)

4. Gantry:
Assemble the Gantry as shown, on top using: 8x M5 CS 40mm screws and 2x M5 CS 20mm screws. On the bottom: 4x M5 12mm half rounded head screws. Put smooth pulleys in the front, toothed ones in the back, place M5 bearing retaining star washers on each side of the pulley! For MGN12h rail use: M3 CS 10mm screws and M3 T-nuts...
I recommend sticking a strip of ash insulation on the bottom of the aluminum portal (the one above the heated bed)
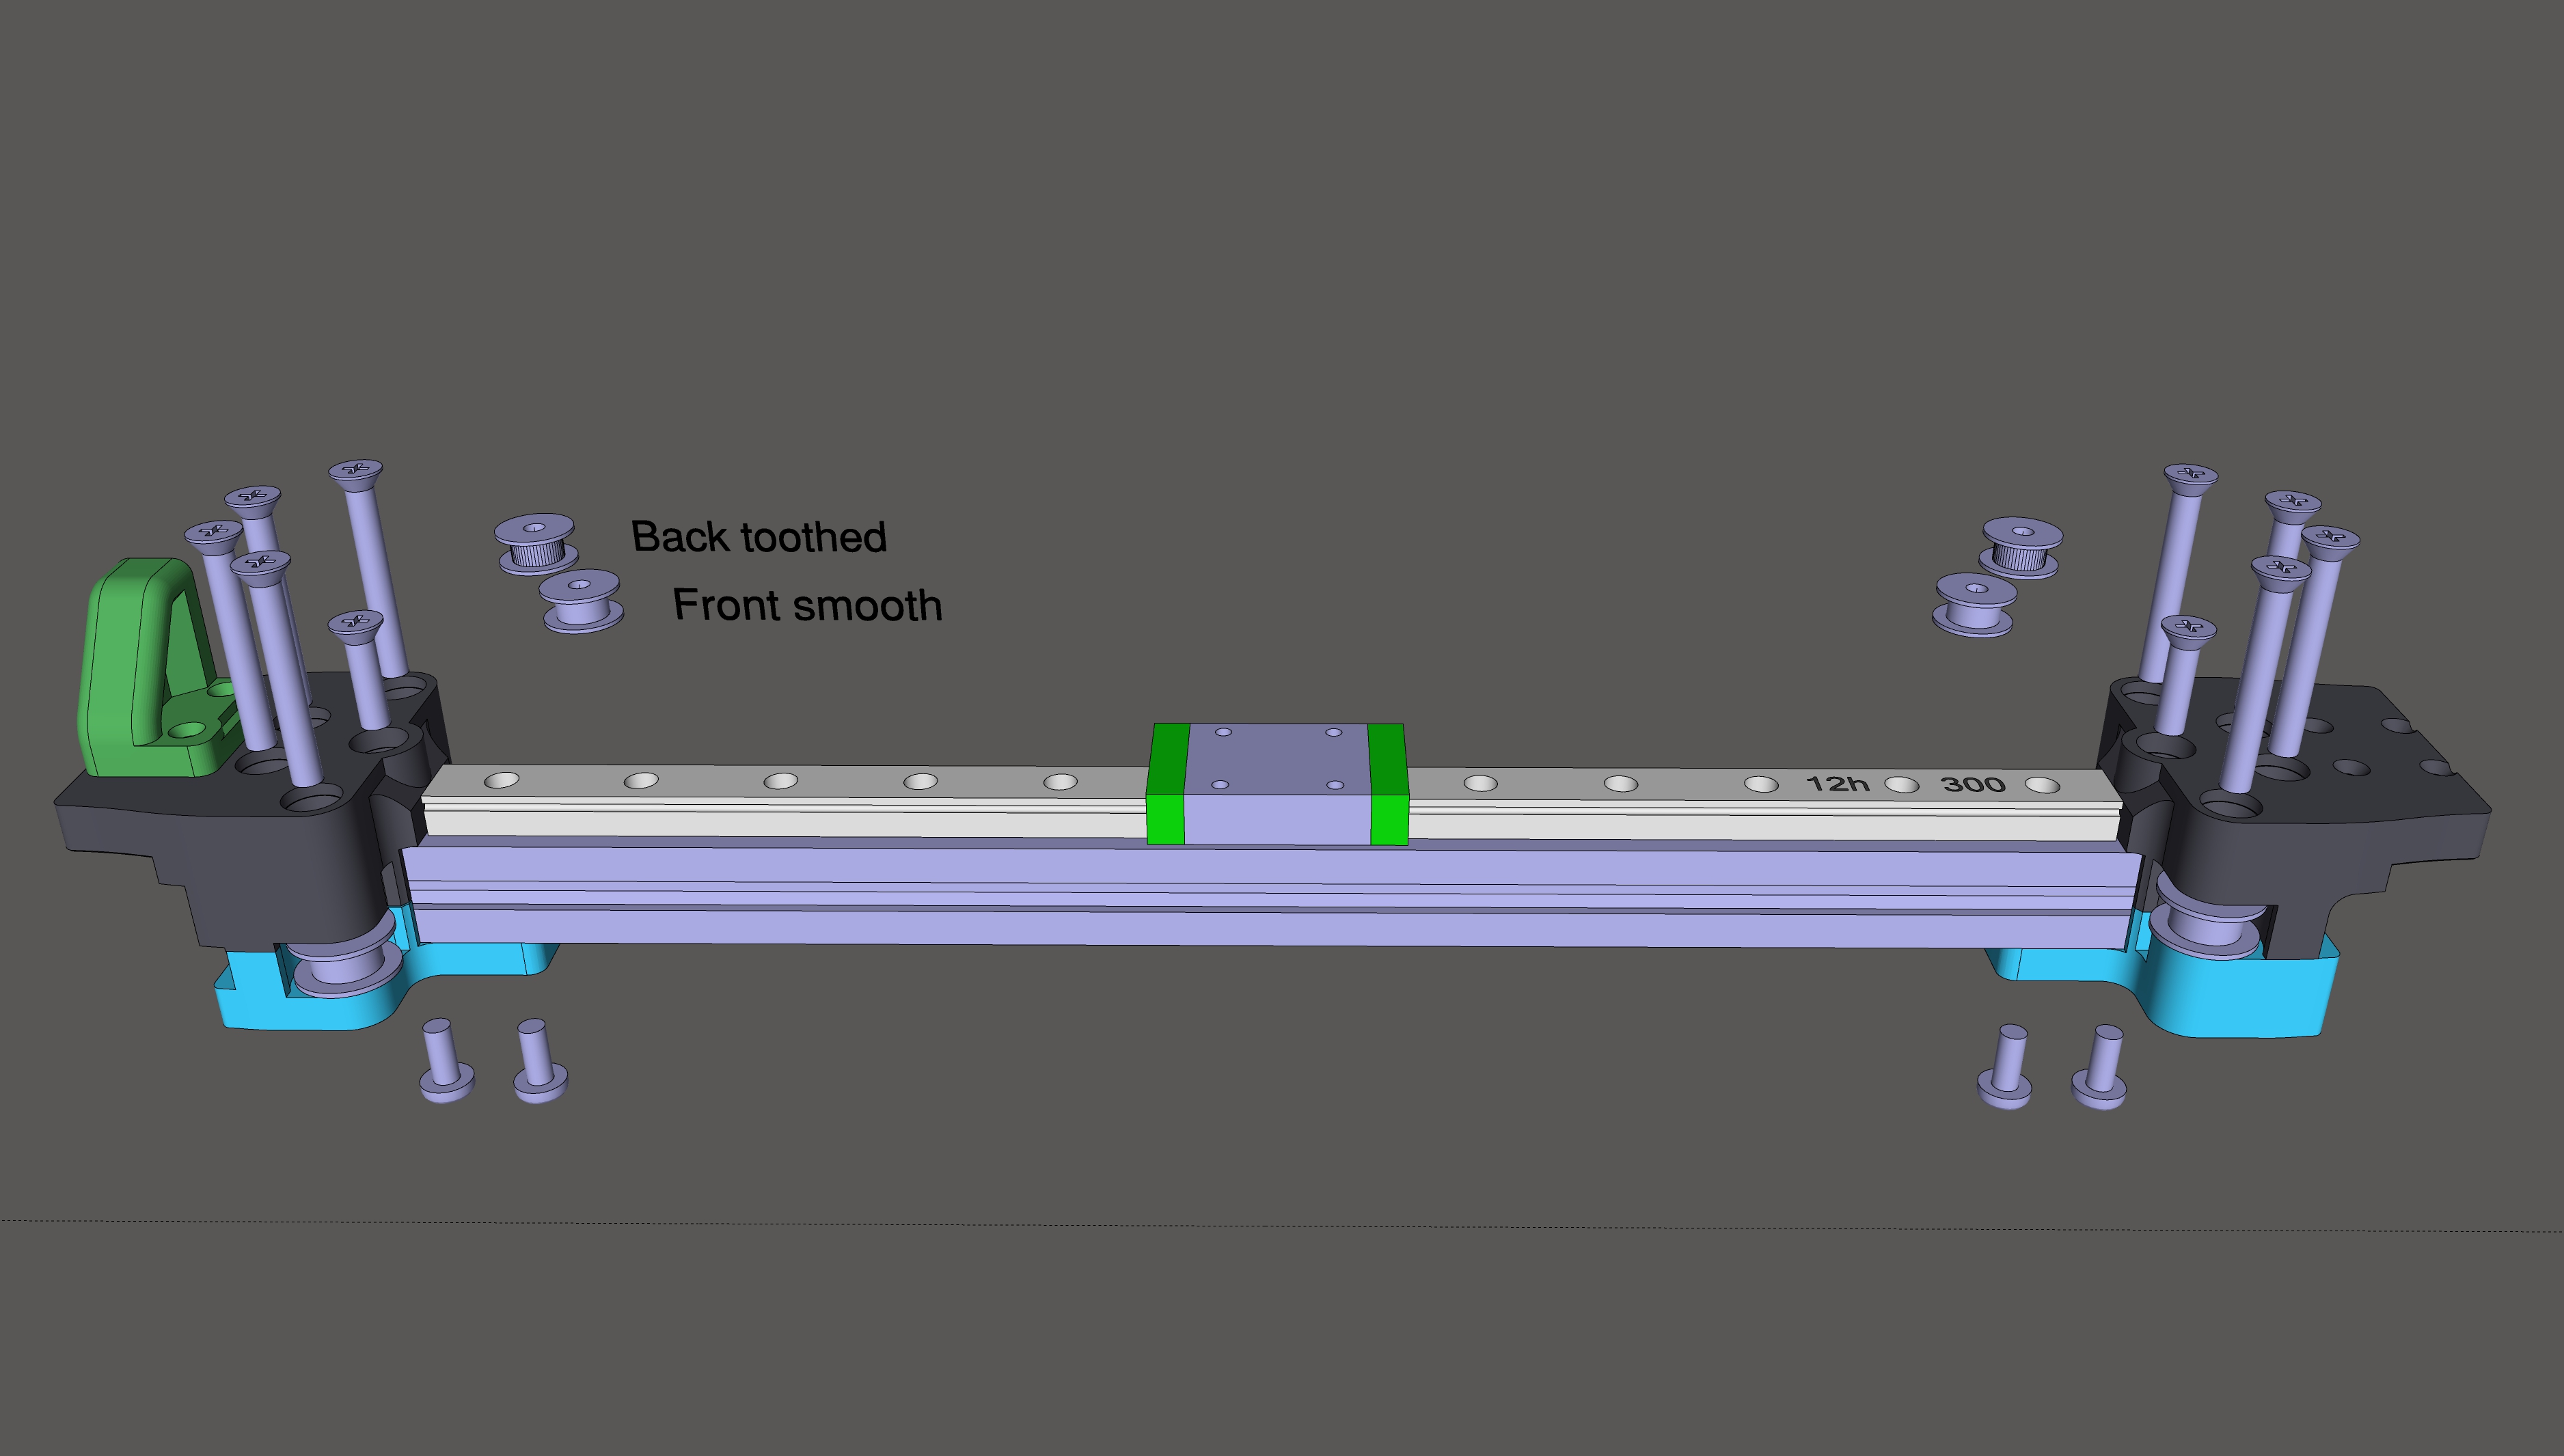
…Mount the entire assembled Gantry to the MGN carriages using M3 CS 10mm screws. On the right side, attach the Y Endstop Bumper (orange in the picture) with longer M3 screws

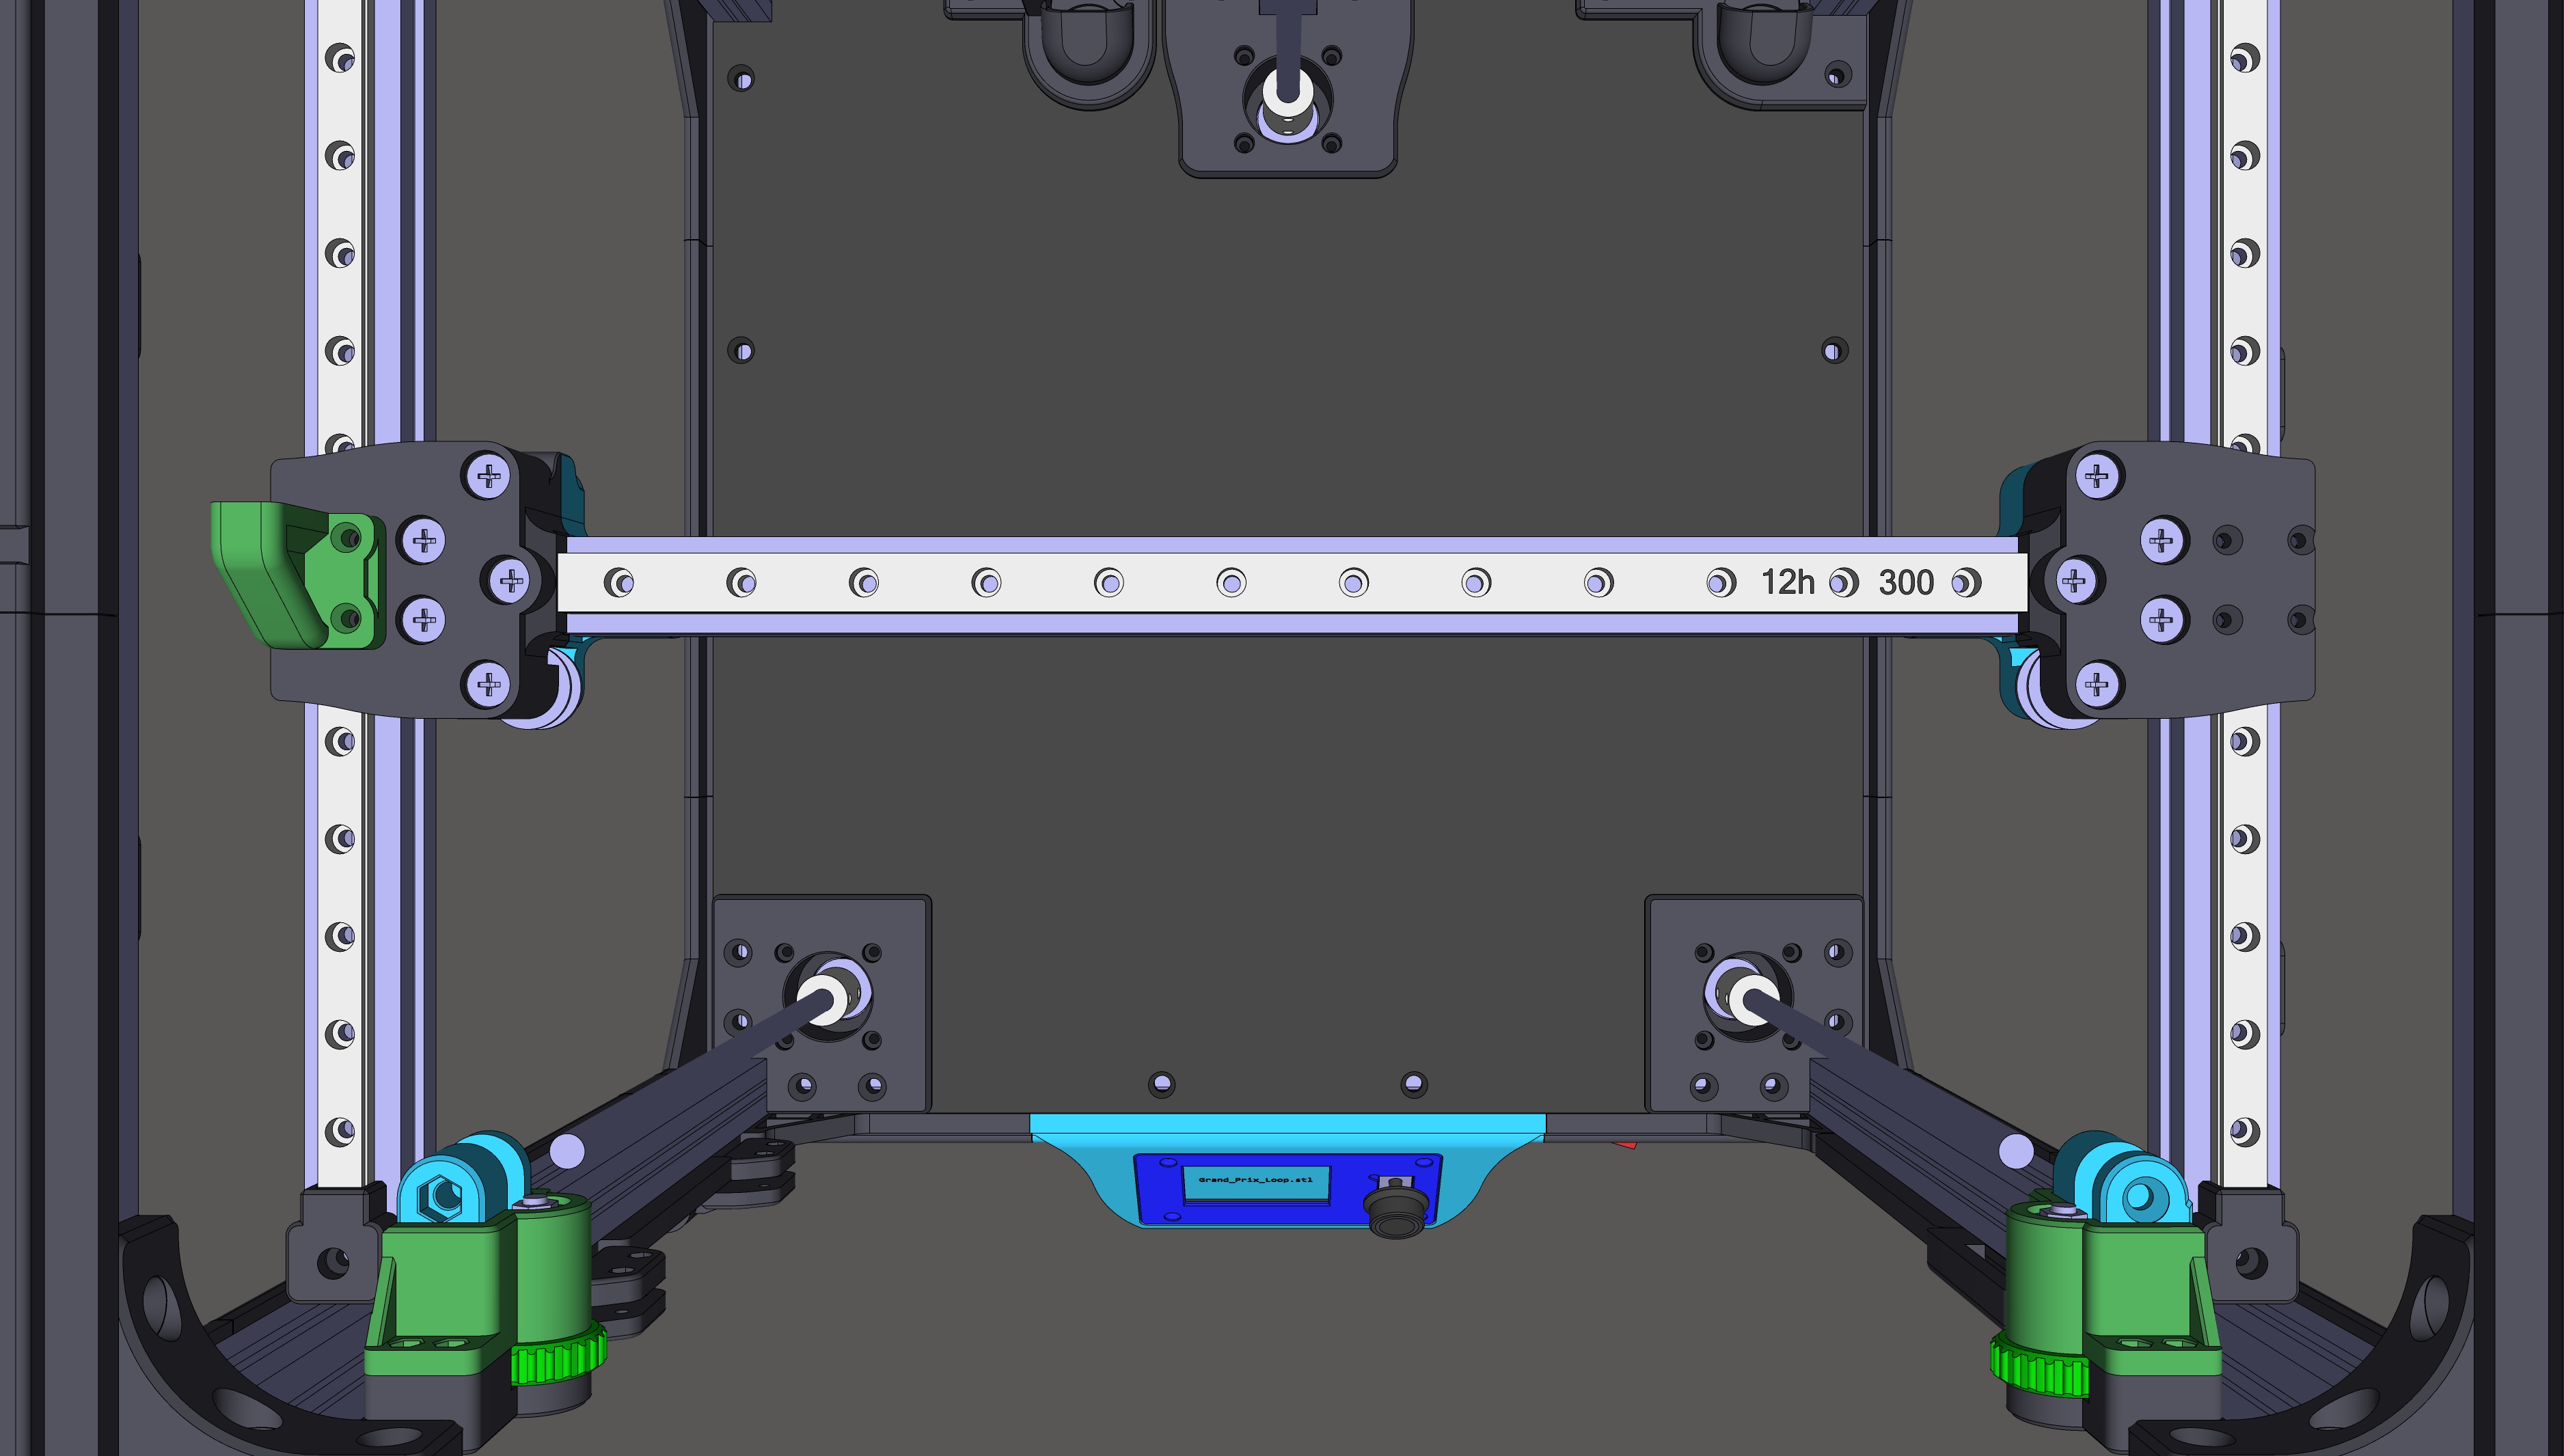
5. Belts and pulleys guidance:

Roadmap:
Drive Mount → Chassis Bottom → Chassis Top → Chassis Middle → XY Axis → Z Axis → Electronics → Extruder → Filament and Spool → Levelup Addons → PrusaSlicer → GitHub
Now that's all from the XY Axis section, next is the Z Axis
