
Extruder
link92maker

AI로 유사한 모델 찾기
프로필 출력(0)
모델 파일(0)
 0
0 0
0 0
0
게시일:2025-11-01 22:04:54
0
0
 000
000Extruder

The Extruder Basic is the standard extruder included with the Sandworm 3D printer project, provided free of charge. It offers reliable performance for everyday printing needs.
For those looking for enhanced features like NeoPixel lighting and status LEDs, check out the Extruder Pro upgrade available as a paid contribution.
Non-printed parts used in this section:
◦ Heatsink: Trianglelab TCHC TD6S Heatsink (For TUN Nozle)
◦ Heatblock: Volcano CHC (ceramic heating Core) - Trianglelab 115 Watt
◦ BL Touch/ 3D Touch, Trianglelab
◦ Fan 30x30x10 24V (2x for Hotend heatsink and Nema 17 cooling, 3DSway )
◦ TurboFan 4020 24V (Print layer cooling, ball bearing, 3D-Print Store )
◦ BMG Extruder + recommended: Trianglelab DDB Extruder Upgrade 2.0 Shell Right-Hand
◦ EBB42 CanBus board ( Bigtreetech )
◦ U2C V1.2 ( for CanBus wiring, Bigtreetech )
◦ Nema17 Stepperonline 17HS08-1004S ( Stepperonline ) 20.5mm (or thickness 23mm)
◦ TUN Trianglelab nozzle
◦ PG9 cable grommets (with anti-bending plastic spring)
◦ Endstop switch

1. Install heat-set nuts into Main_bottom.stl part:
Six heat-set nuts from top:

Two from back (for enstop cover):
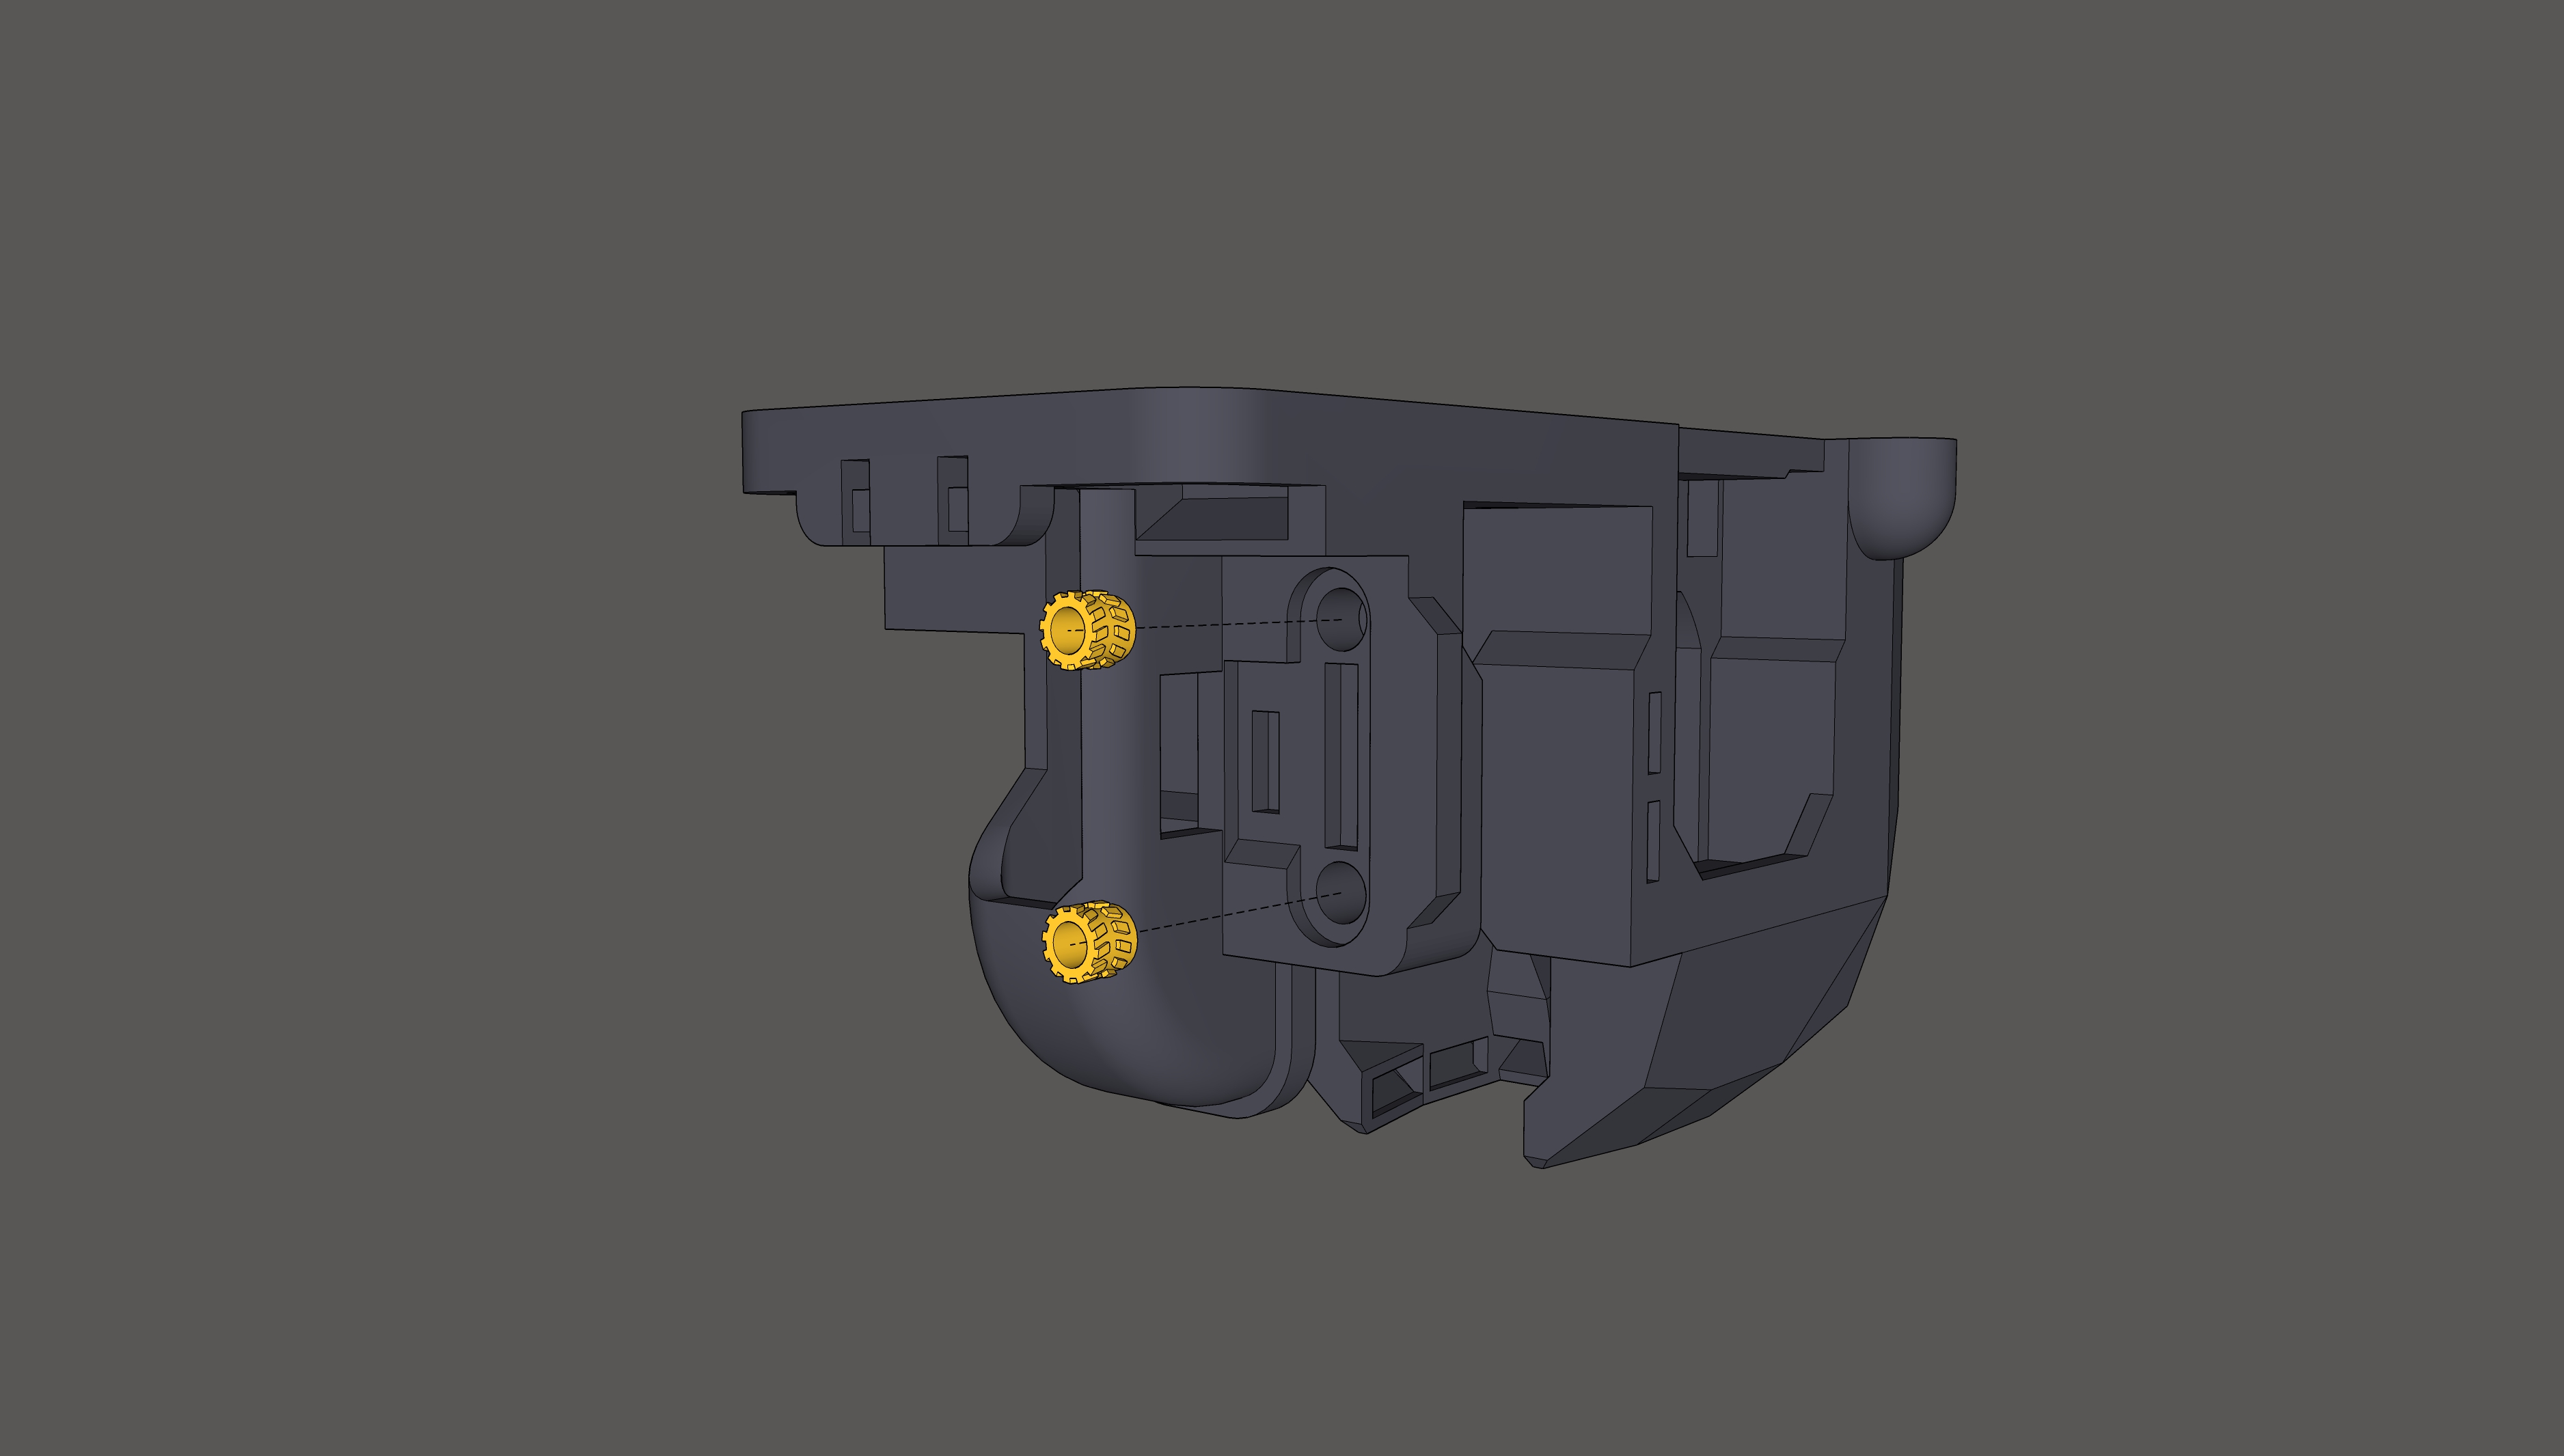
Two from side (for fan cover):

And two from bottom (for 3D-Touch):

2. Installing Hotend and 3D-Touch:
To mount the Hotend (Trianglelab TD6S Heatsink with CHC Volcano) use 4x M2.5 round head screws 16mm long (No M3 screws here!), for Trianglelab 3D-Touch use 2x M3 CS screws 10mm long, as shown in the picture:

3. Fan and Endstop
Install the Fan 30x30x10 mm for Heatsink and Endstop using M3 CS 16mm screws as shown in the picture:

Cable routing:
Route the Fan and 3D-Touch cables through the hole in the Main_Bottom model:

4. Belts and Carriage
Start with the left belts before mounting the Extruder on the MGN12H carriage!

Secure the left side belts at their end with zip ties:
(note: nylon zip ties have good heat resistance and do not loosen when the chamber is heated, unlike the screws and the printed parts uder pressure)
Carriage:
Slide the MGN12h carriage into the Main_bottom model from the side and screw it with 4x M3 L10mm CS screws:

Alignment of belt tensioners:
Before attaching the other ends of the belts with zip ties, first loosen both (Right and Left) Belt tensioners to their maximum capacity as shown in the picture:

Secure the right side belts at their end with zip ties:
After securing the ends of the zip ties, you can tension the belts using belt tensioners

5. Prepare Main_Top model:
Insert 5 heat-set nuts into the model

Mount the Main_Top model to Main_Bottom by six M3 10mm screws:

6. Assembling the Stepper Motor and EBB42:
◦ Manual for: Nema17 stepper motor: Stepperonline 17HS08-1004S, real length 20.5mm (42*42*20.5mm)
◦ Remove the four original screws from the stepper motor (with a PH2 screwdriver)
◦ The length of the new M3 countersunk screws for EBB42 and stepper is 24 mm - Shorten the M3 30mm screws with a Dremel and cutting disc (Note: for CS screws, the length is measured including the screw head, if you shorten the half-round screws that are in the EBB package, you will shorten their thread length to 23mm, not to 24mm)
◦ Use 4x M3 nuts as additional washers (to the plastic ones that come with the EBB42 from Bigtreetech) to level the depressions on the corners of the motor.

For a longer motor type Usongshine 17HS4023 (42*42*23mm) there is no need to add additional M3 nuts as washers. The thread length of an M3 screw with a half-round head is then 24mm.
7. BMG Extruder install:
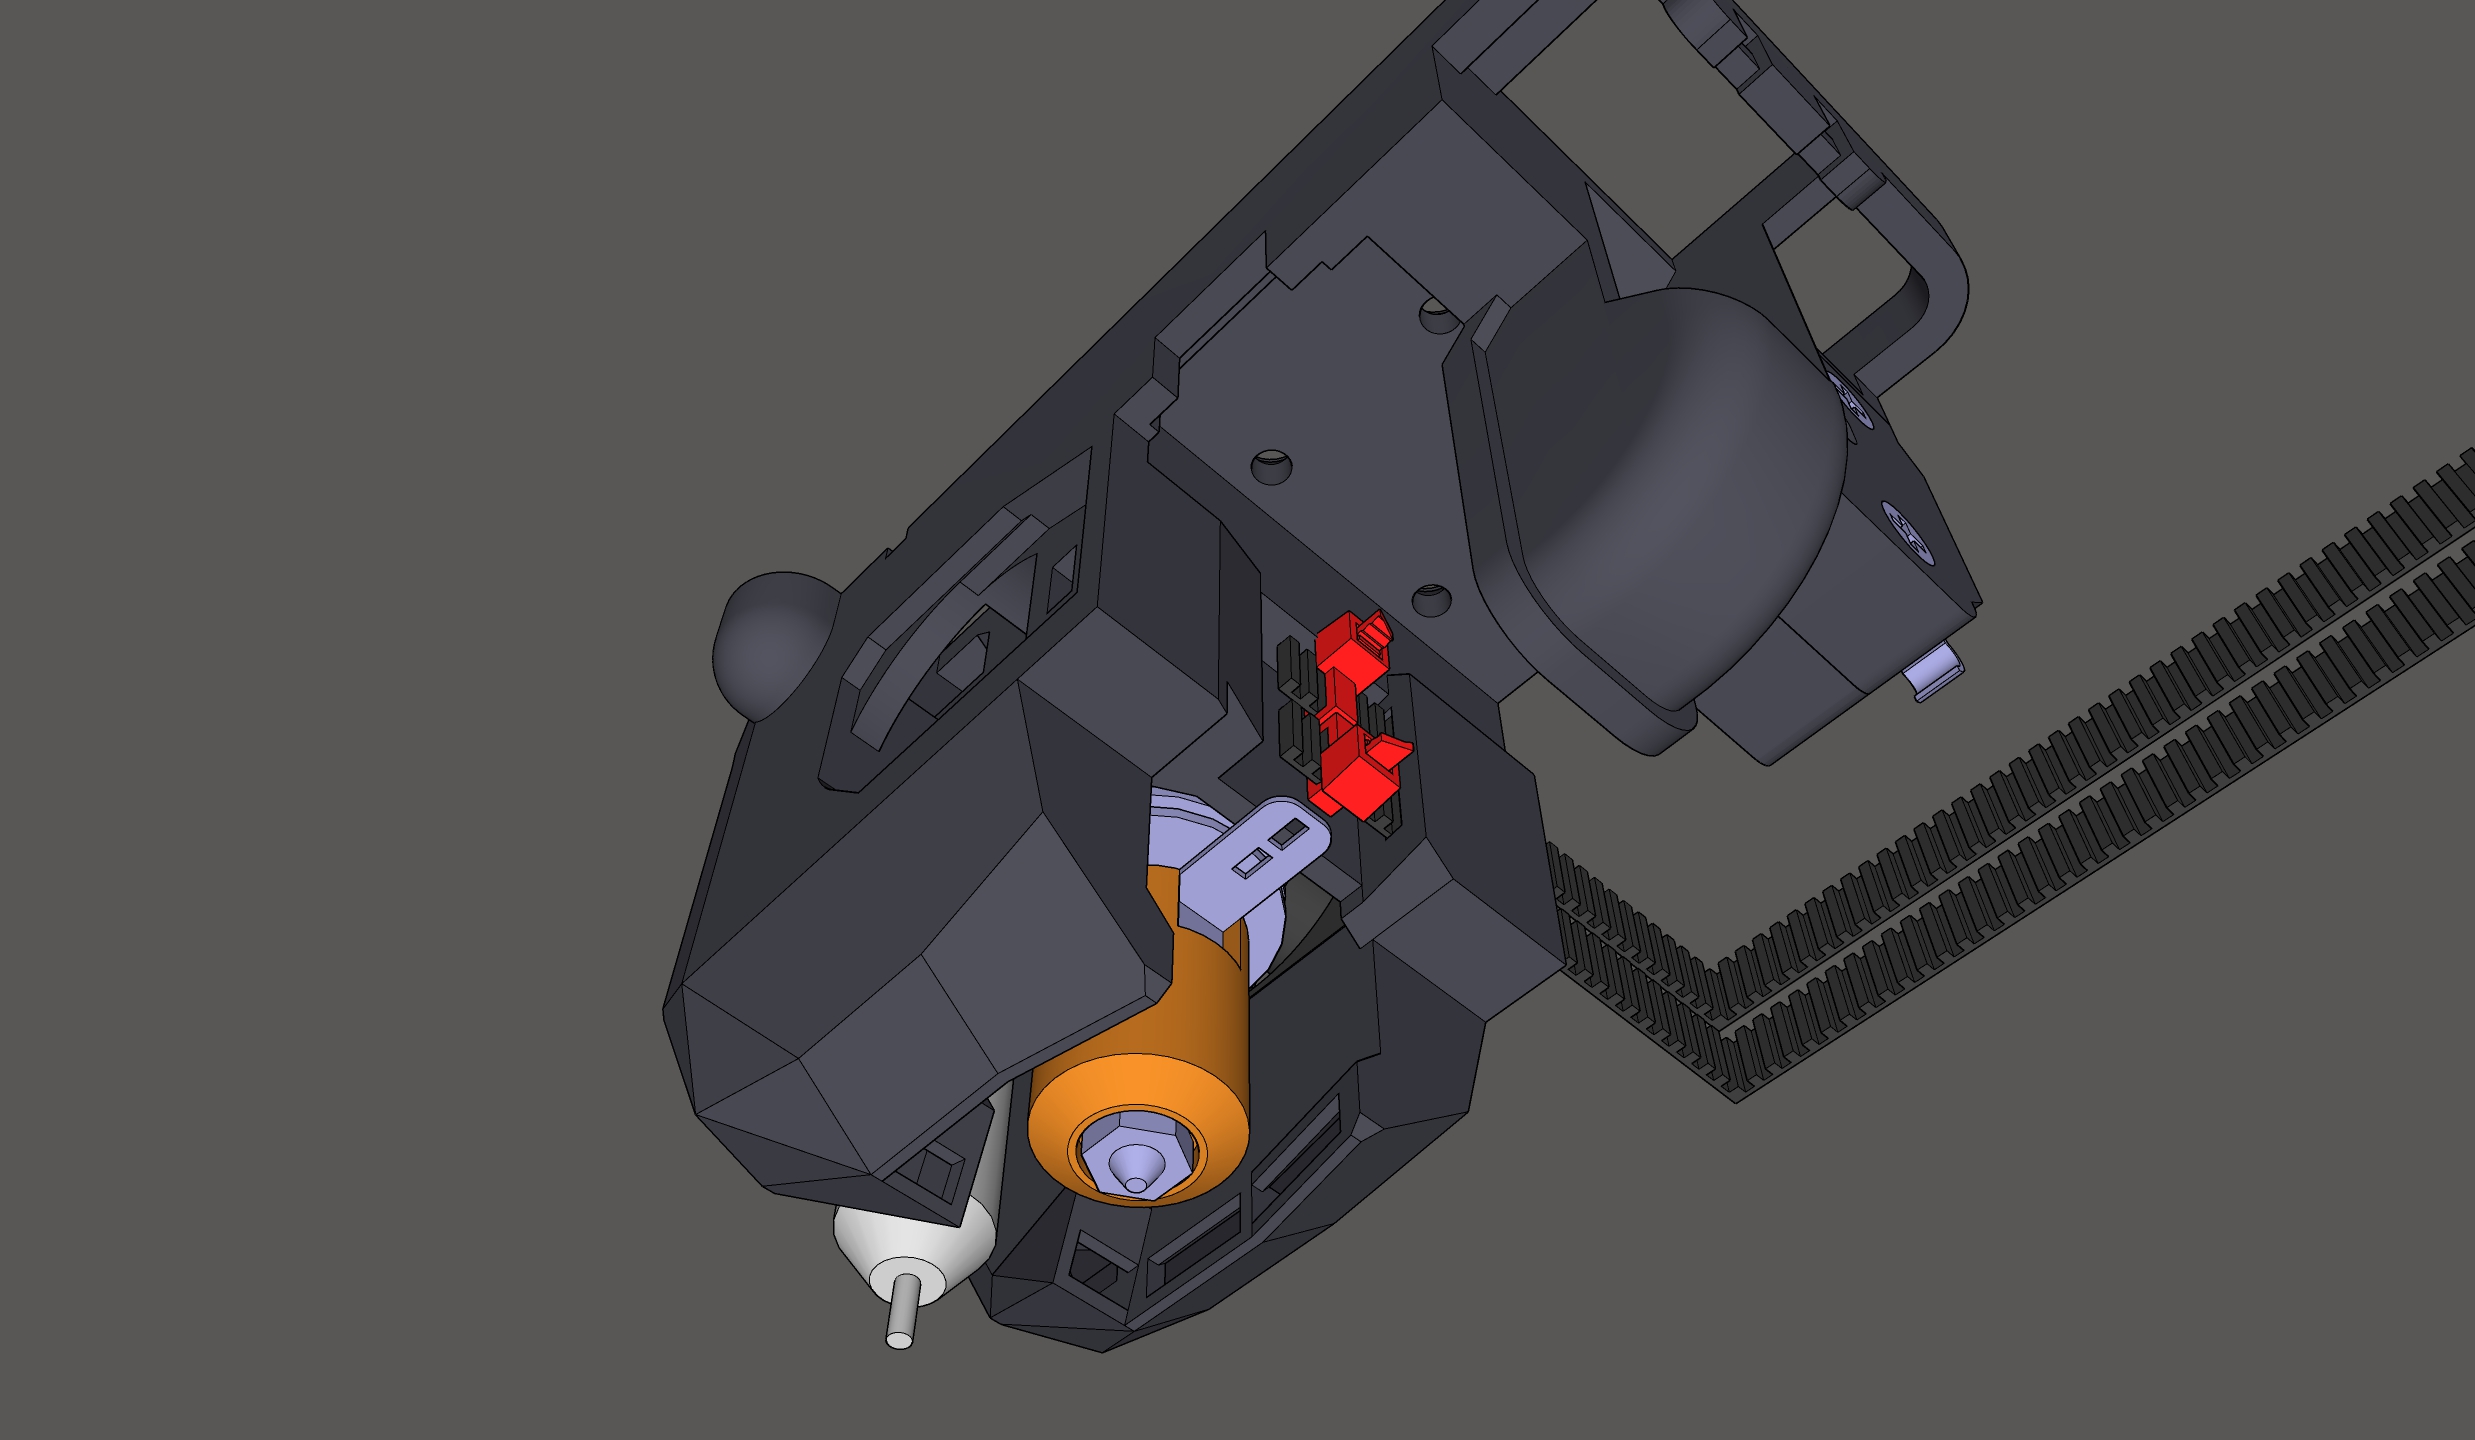
Left image: Insert the PTFE_Grommet-insert_into_BMG.stl model (red in image) into the BMG Extruder. Shorten the PTFE tube to a length of 44.8 mm (in the Tools section you can print the template Extruder_PTFE_Length_44.8mm_Cutter.stl for shortening), and insert the shortened PTFE tube into the Basic Extruder.
Right image: Finally, slide the entire BMG Extruder onto the PTFE

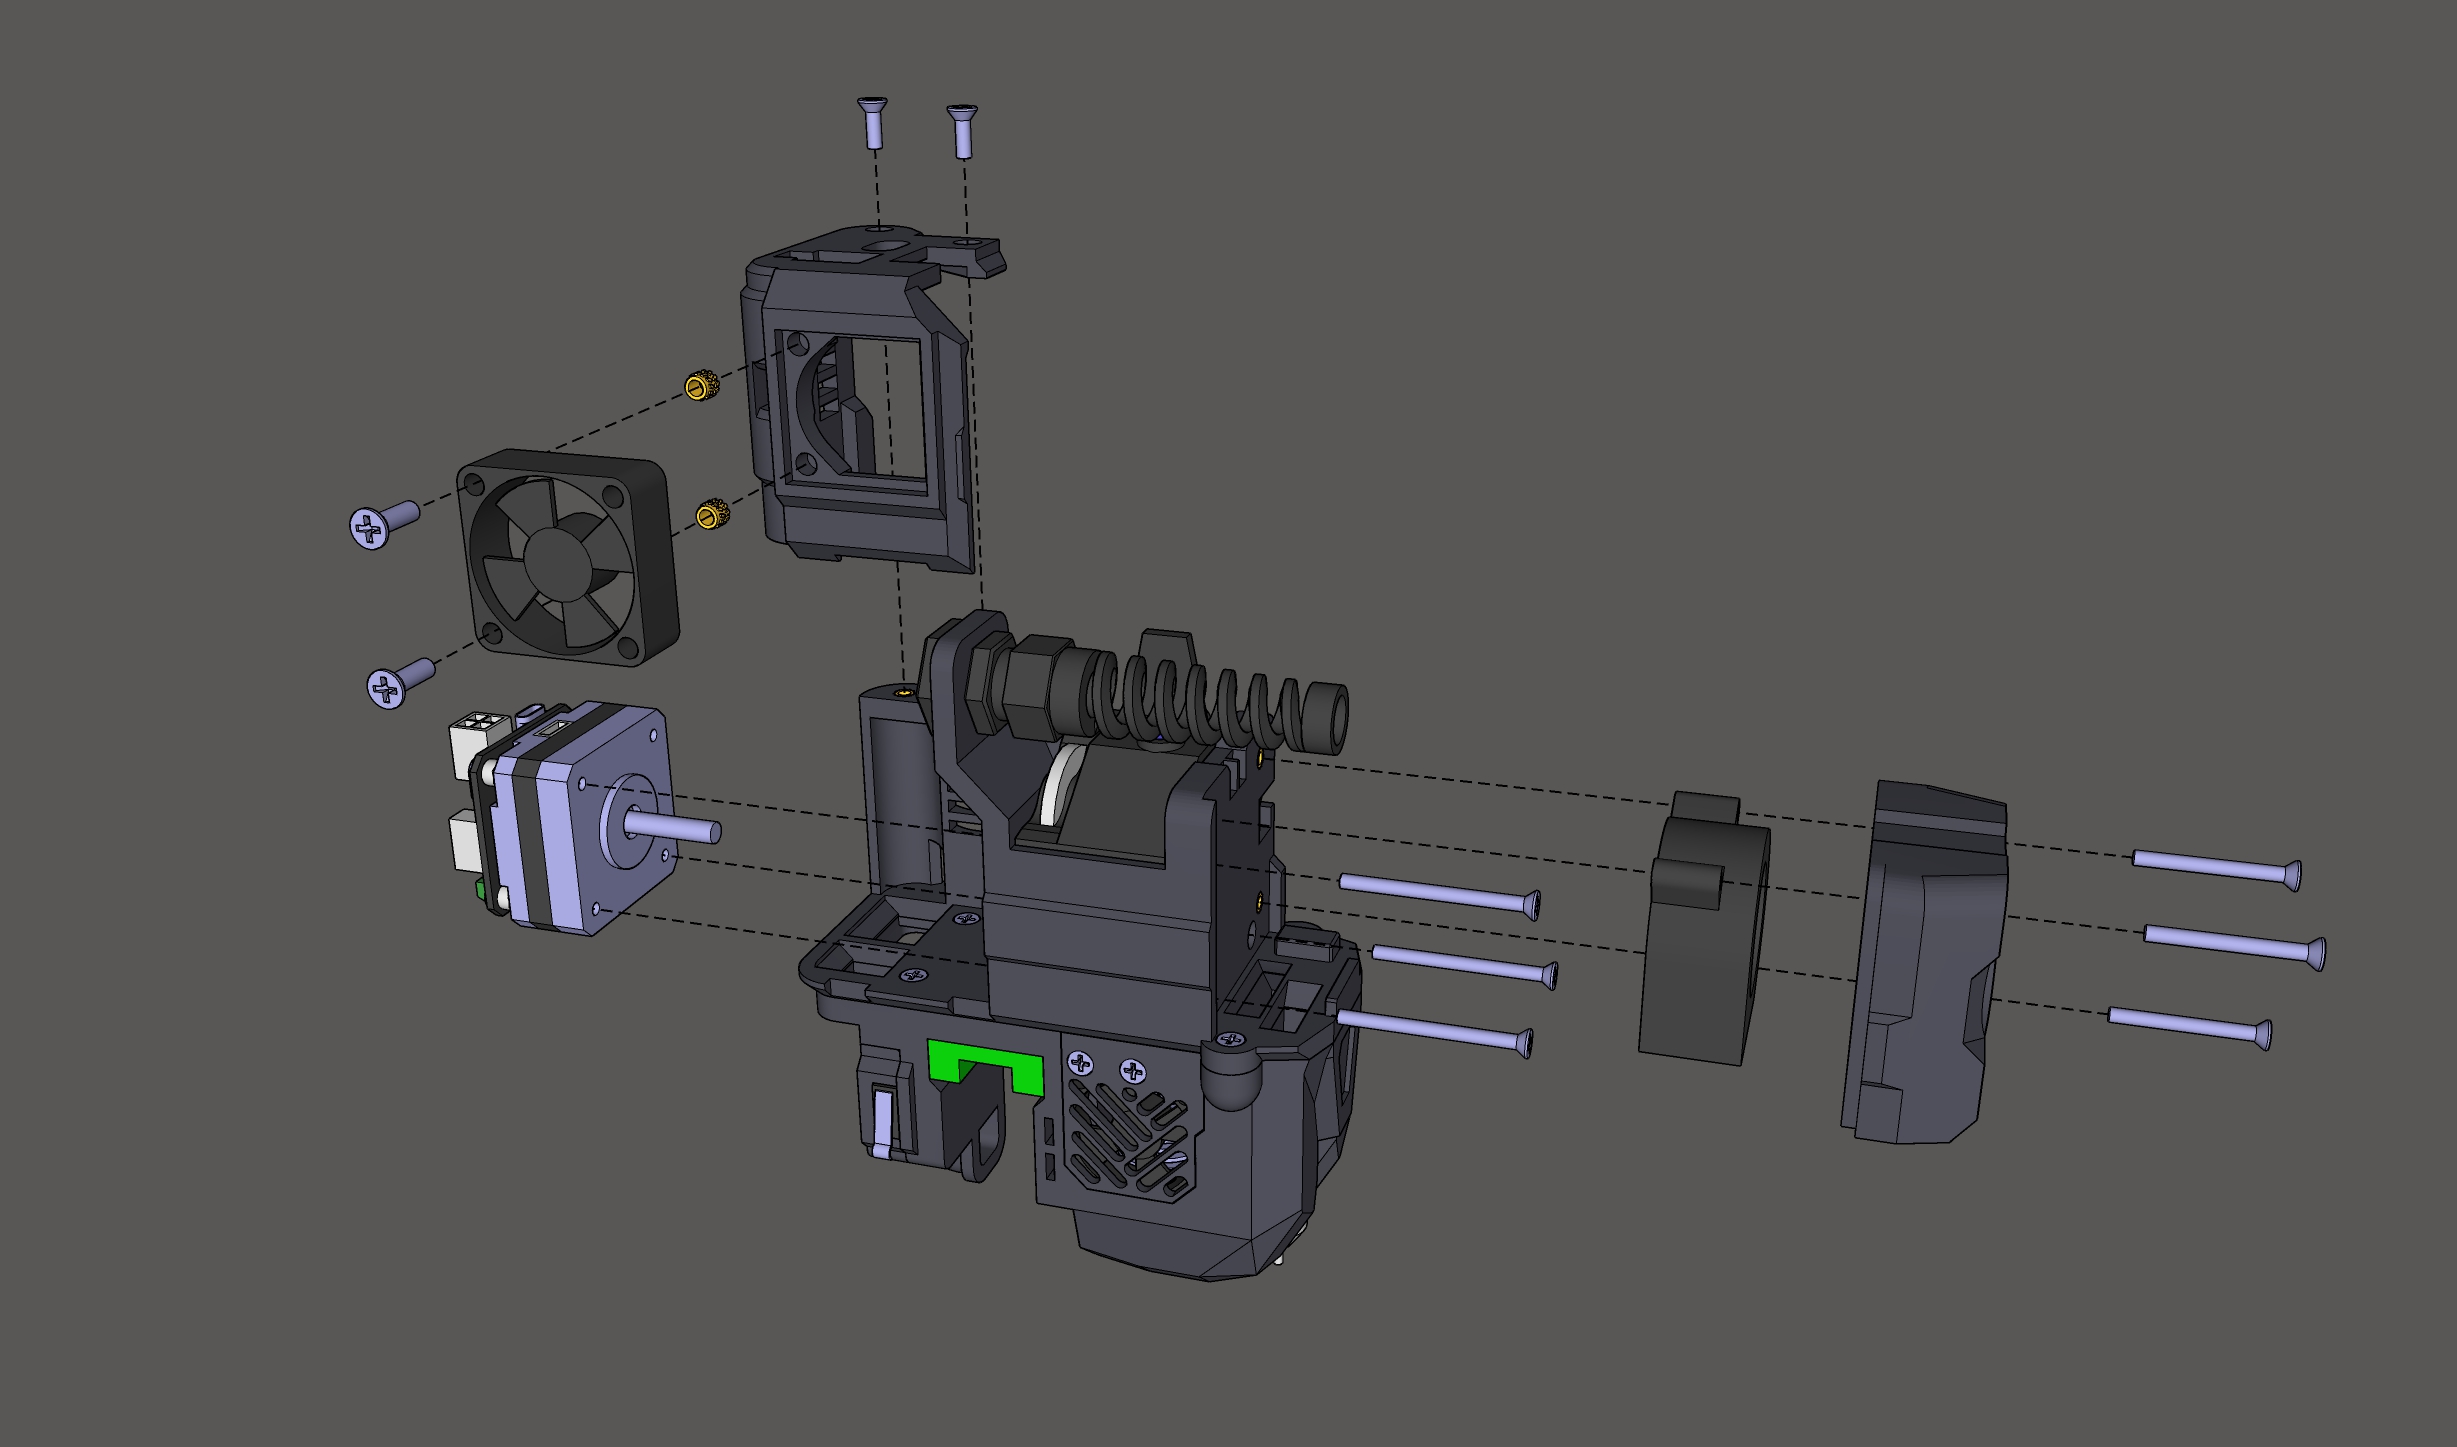
8. Final:
Assemble the top of the Extruder as shown in the picture below:


Roadmap:
Drive Mount → Chassis Bottom → Chassis Top → Chassis Middle → XY Axis → Z Axis → Electronics → Extruder → Filament and Spool → Levelup Addons → PrusaSlicer → GitHub
The next section is Electronics (if you don't have it yet) or Filament and Spool

