Practice microscope | Fully 3D-printed
cell_nerd

AI로 유사한 모델 찾기


프로필 출력(0)
모델 파일(0)
 0
0 0
0 0
0
게시일:2026-05-27 08:14:48
0
0
 000
000This is a very detailed microscope, except for the zoom function. Its features are as follows:
The lens barrel can be adjusted up and down

There are a total of 29 parts, made from three different materials. The white ones are made of PETG, the silver ones are made of PLA Basic
How to assemble it:
After printing all the parts with the color or material of your choice, you need to assemble all 29 parts. The method is as follows.
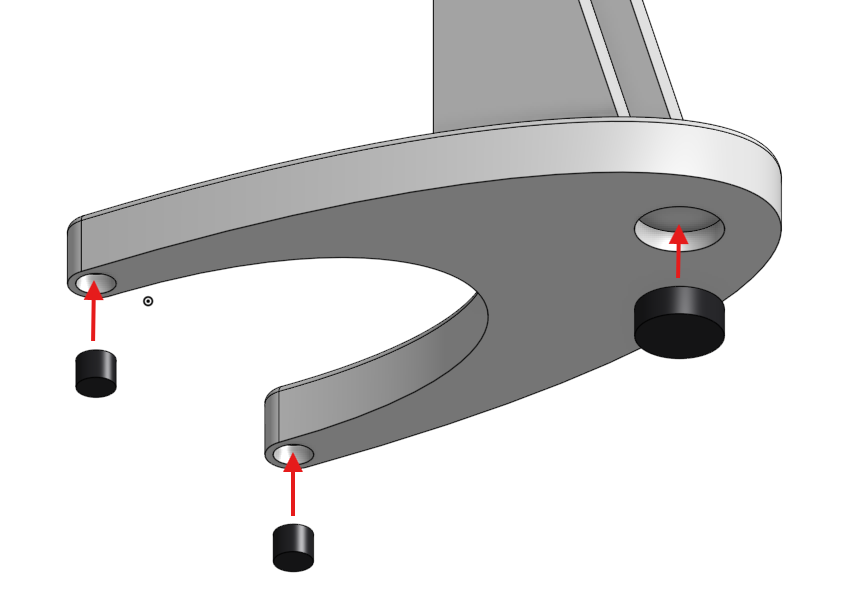
| 1. Glue the three small feet into the grooves at the bottom of the base, respectively. Make sure they are completely pushed in. |
|
|
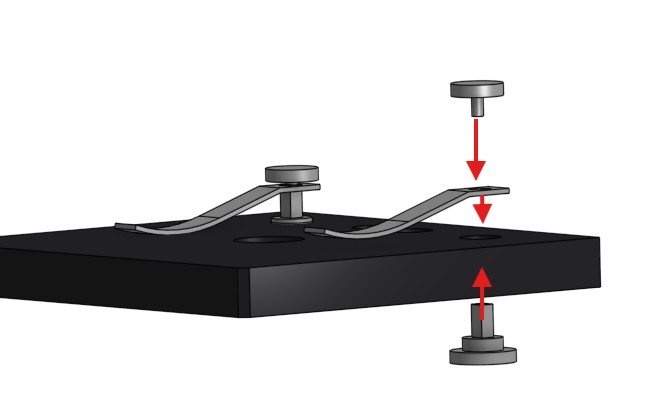
2. Glue the three components of each loading platform clip together. The loading platform clamp should be clamped between two objects. Between the pins. The pins with square shapes should be glued on At the bottom of the loading platform, the circular pins should be tightly fitted. Embed it into the square hole. Glue the pins together. |
|
|
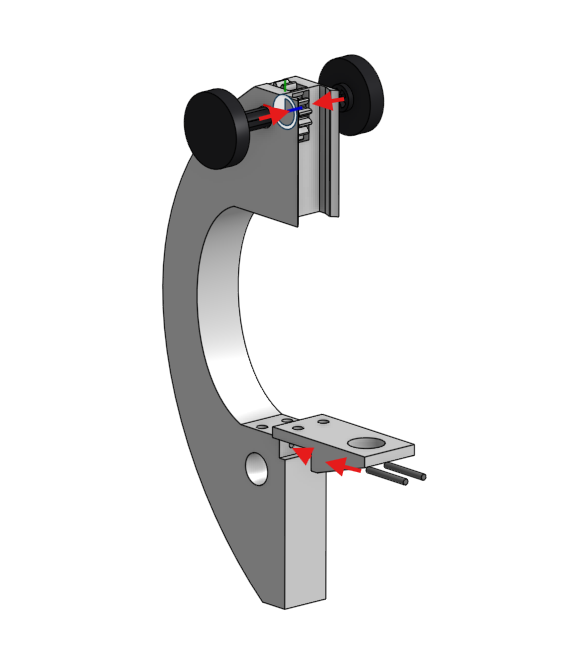
3. Put the gear into the narrow gap at the top of the arm. Put the plus sign Align the shape with the holes. Pass the knob pin through and glue another knob to the protruding pin. Then, place the stage bracket on the arm and firmly tighten the two pins.
|
|
|
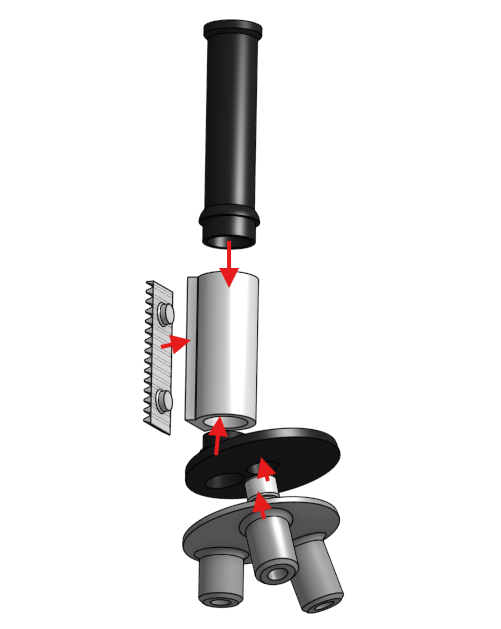
4. Push the gear into the two grooves on the lens barrel. Attach the black eyepiece Push it into the lens barrel. Attach the lens base to the bottom of the lens barrel. Make sure the protrusion at the top is facing in the opposite direction to the gear. Then, attach the rotating component to it. On the lens base and the objective lens turret. Important note! You can only stick the movable parts onto it. The specified location. |
|
|
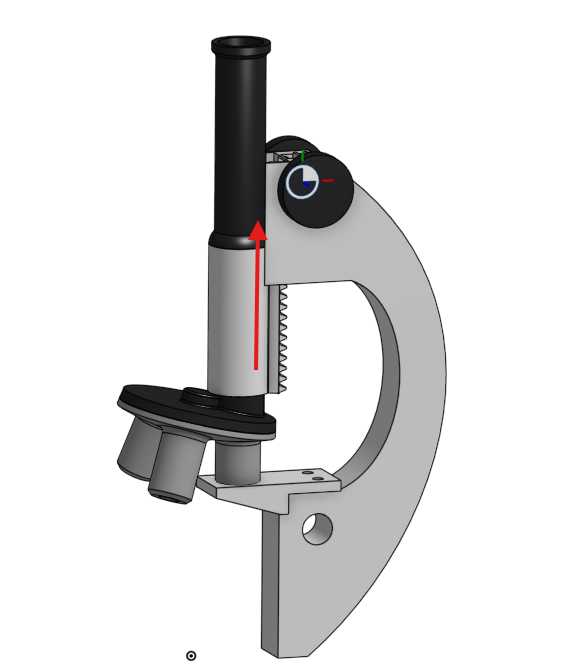
5. Slide the lens barrel gear from the bottom up into the gear on the arm. You may need to apply a bit of force, but... Just a little bit. |
|
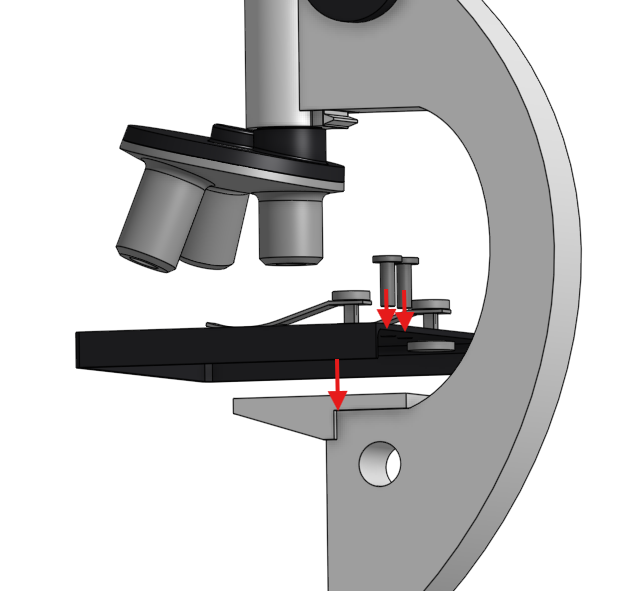
| 6. Knock/push the two thicker stage pins through the assembled stage and insert them into the stage bracket. Glue the stage to the tip of the stage bracket to increase stability. |
|
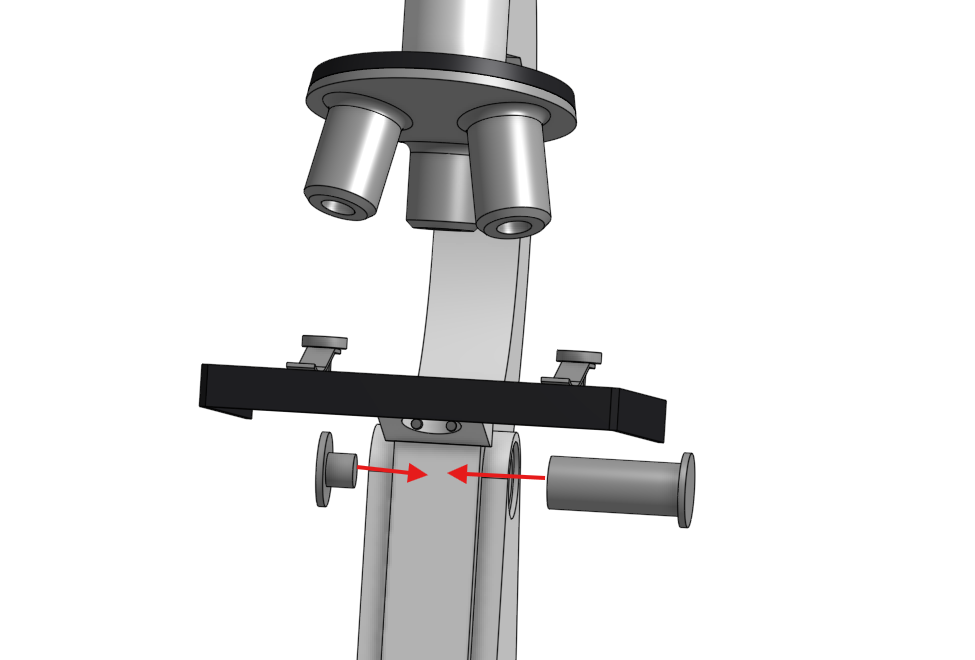
| 7. Align the large holes of the base and the arm, then slide the large pins through them. You may need to apply a strip of hot melt glue on the pins to increase friction during assembly. Attach another cover. |
|
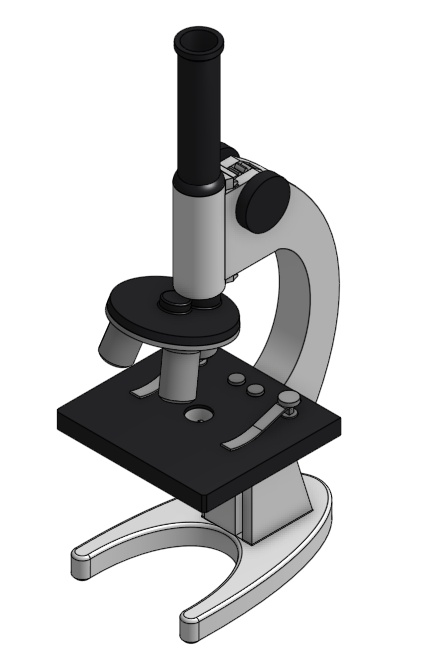
| This is what the finished product looks like. |
|
This model is my most complex work, so it took me a lot of time. Here are the pictures of my prototype document:
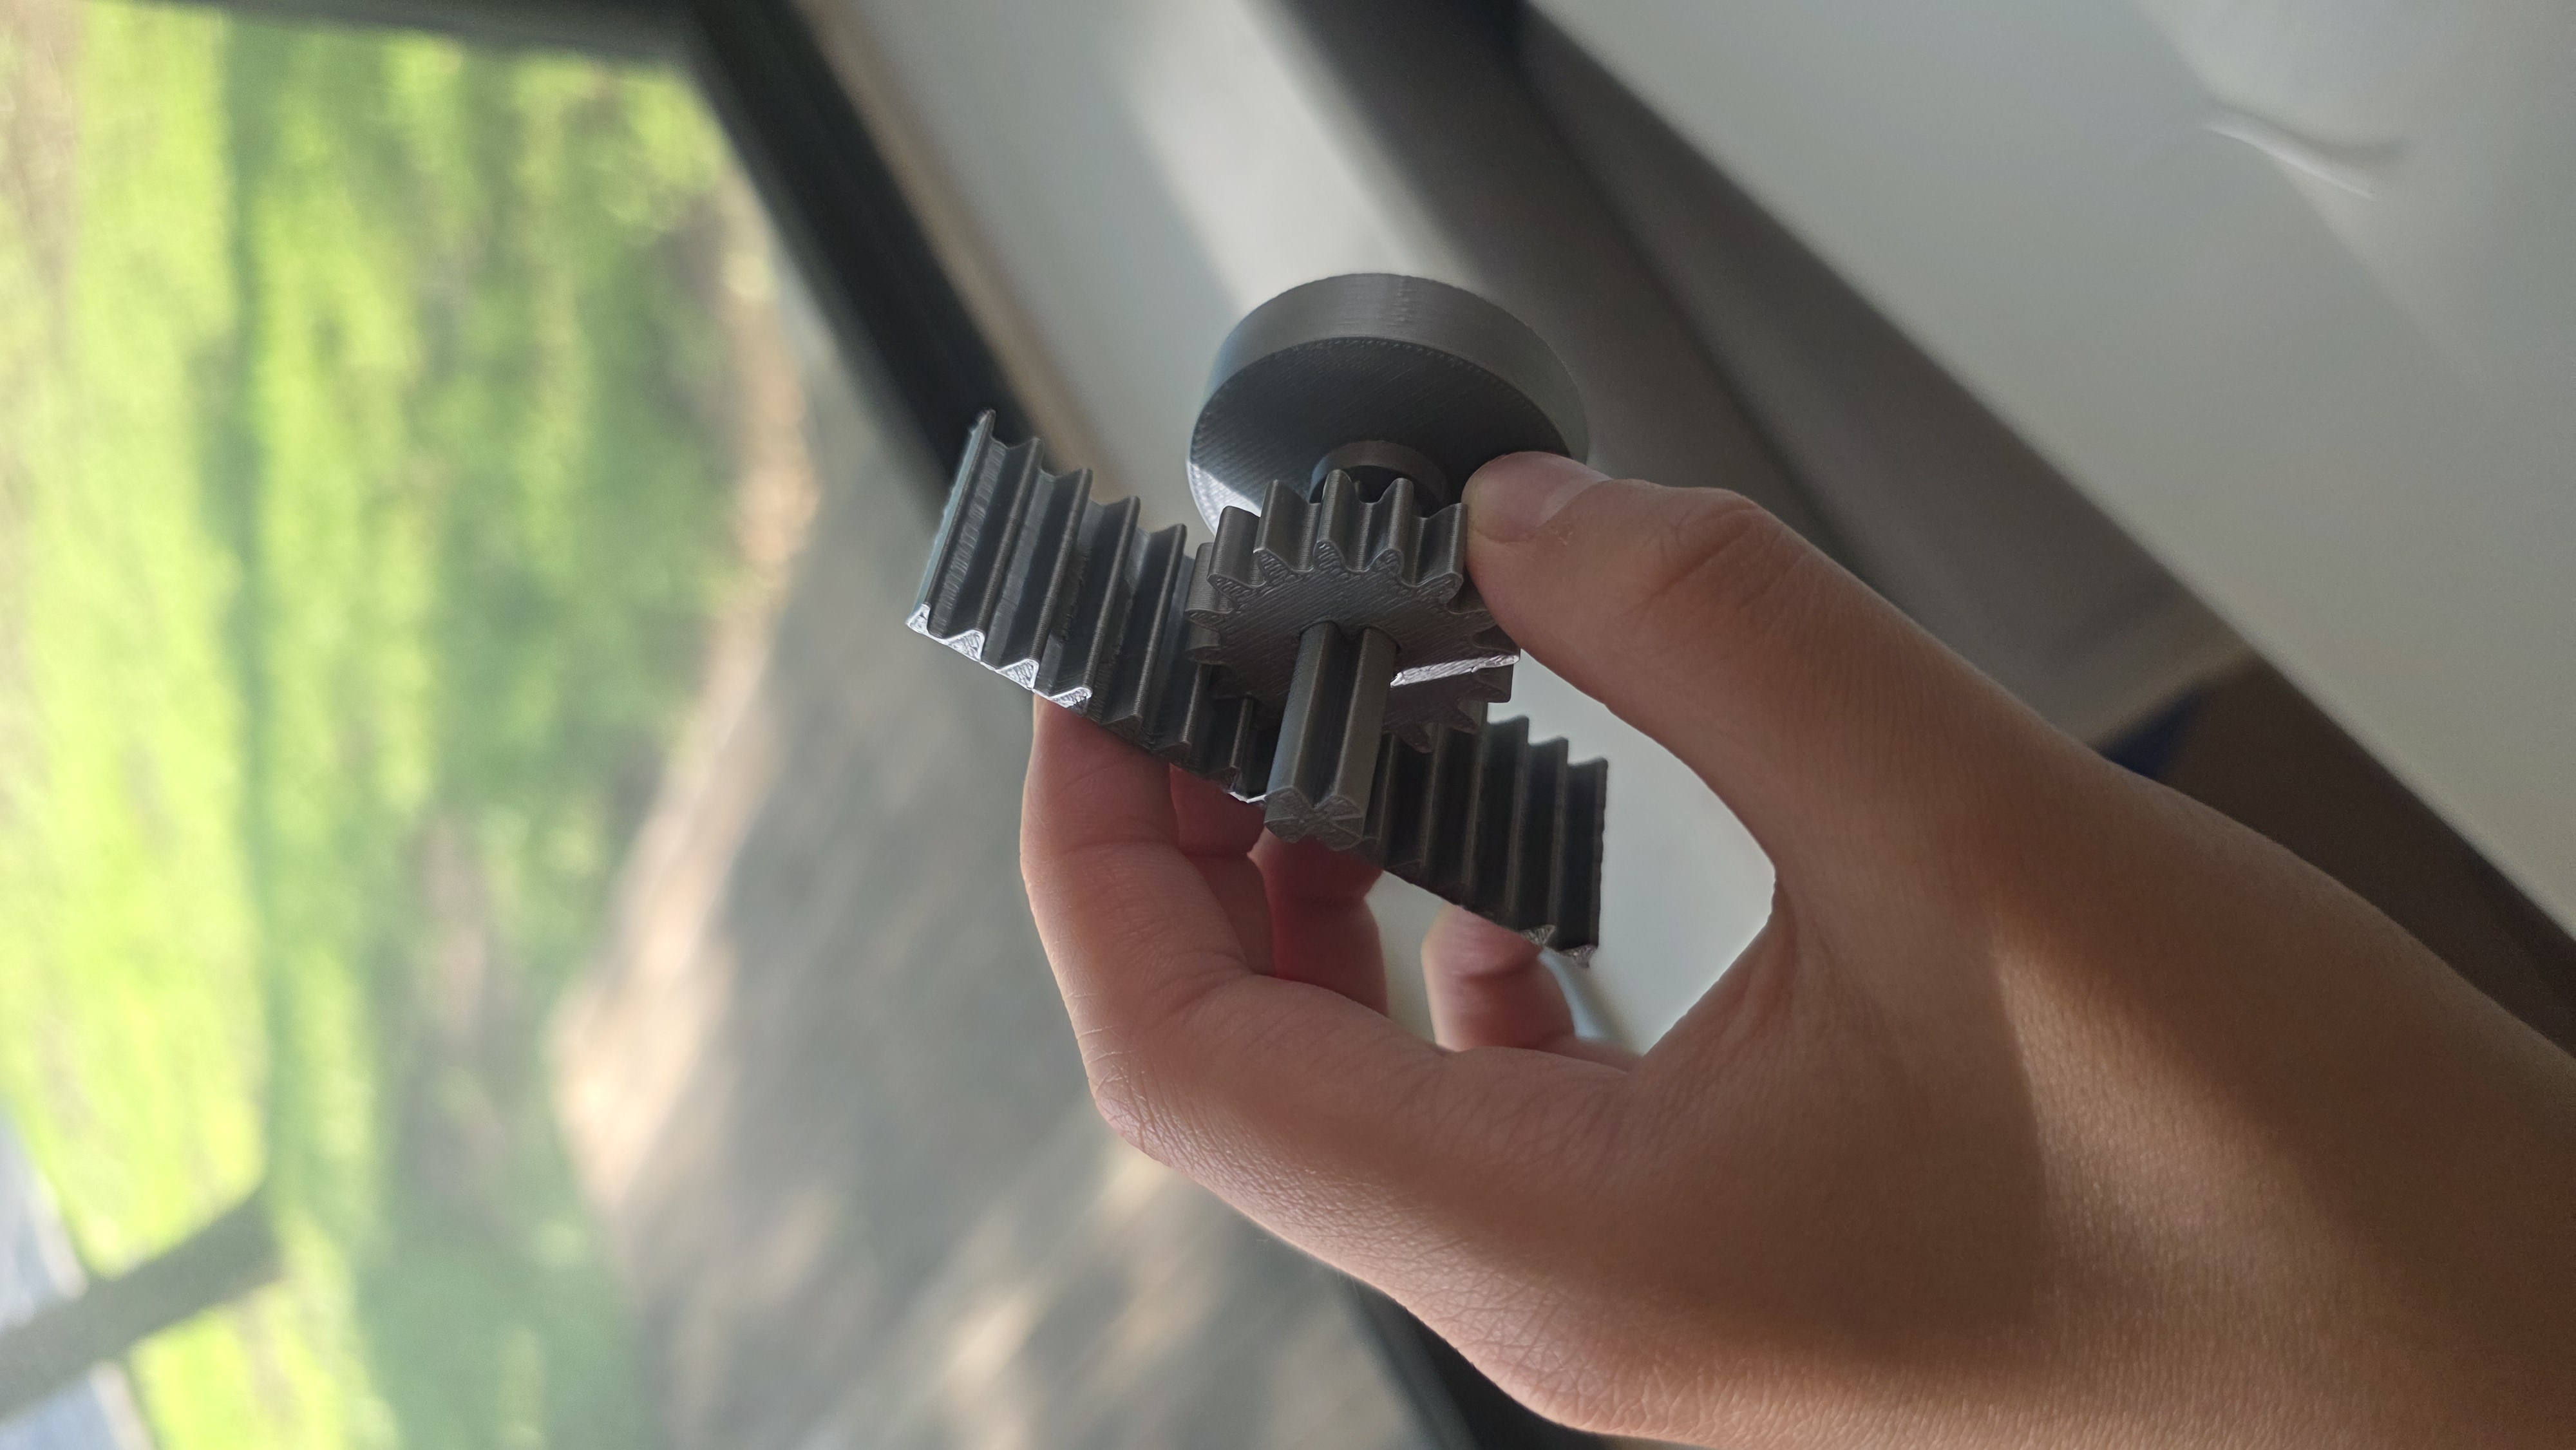
|
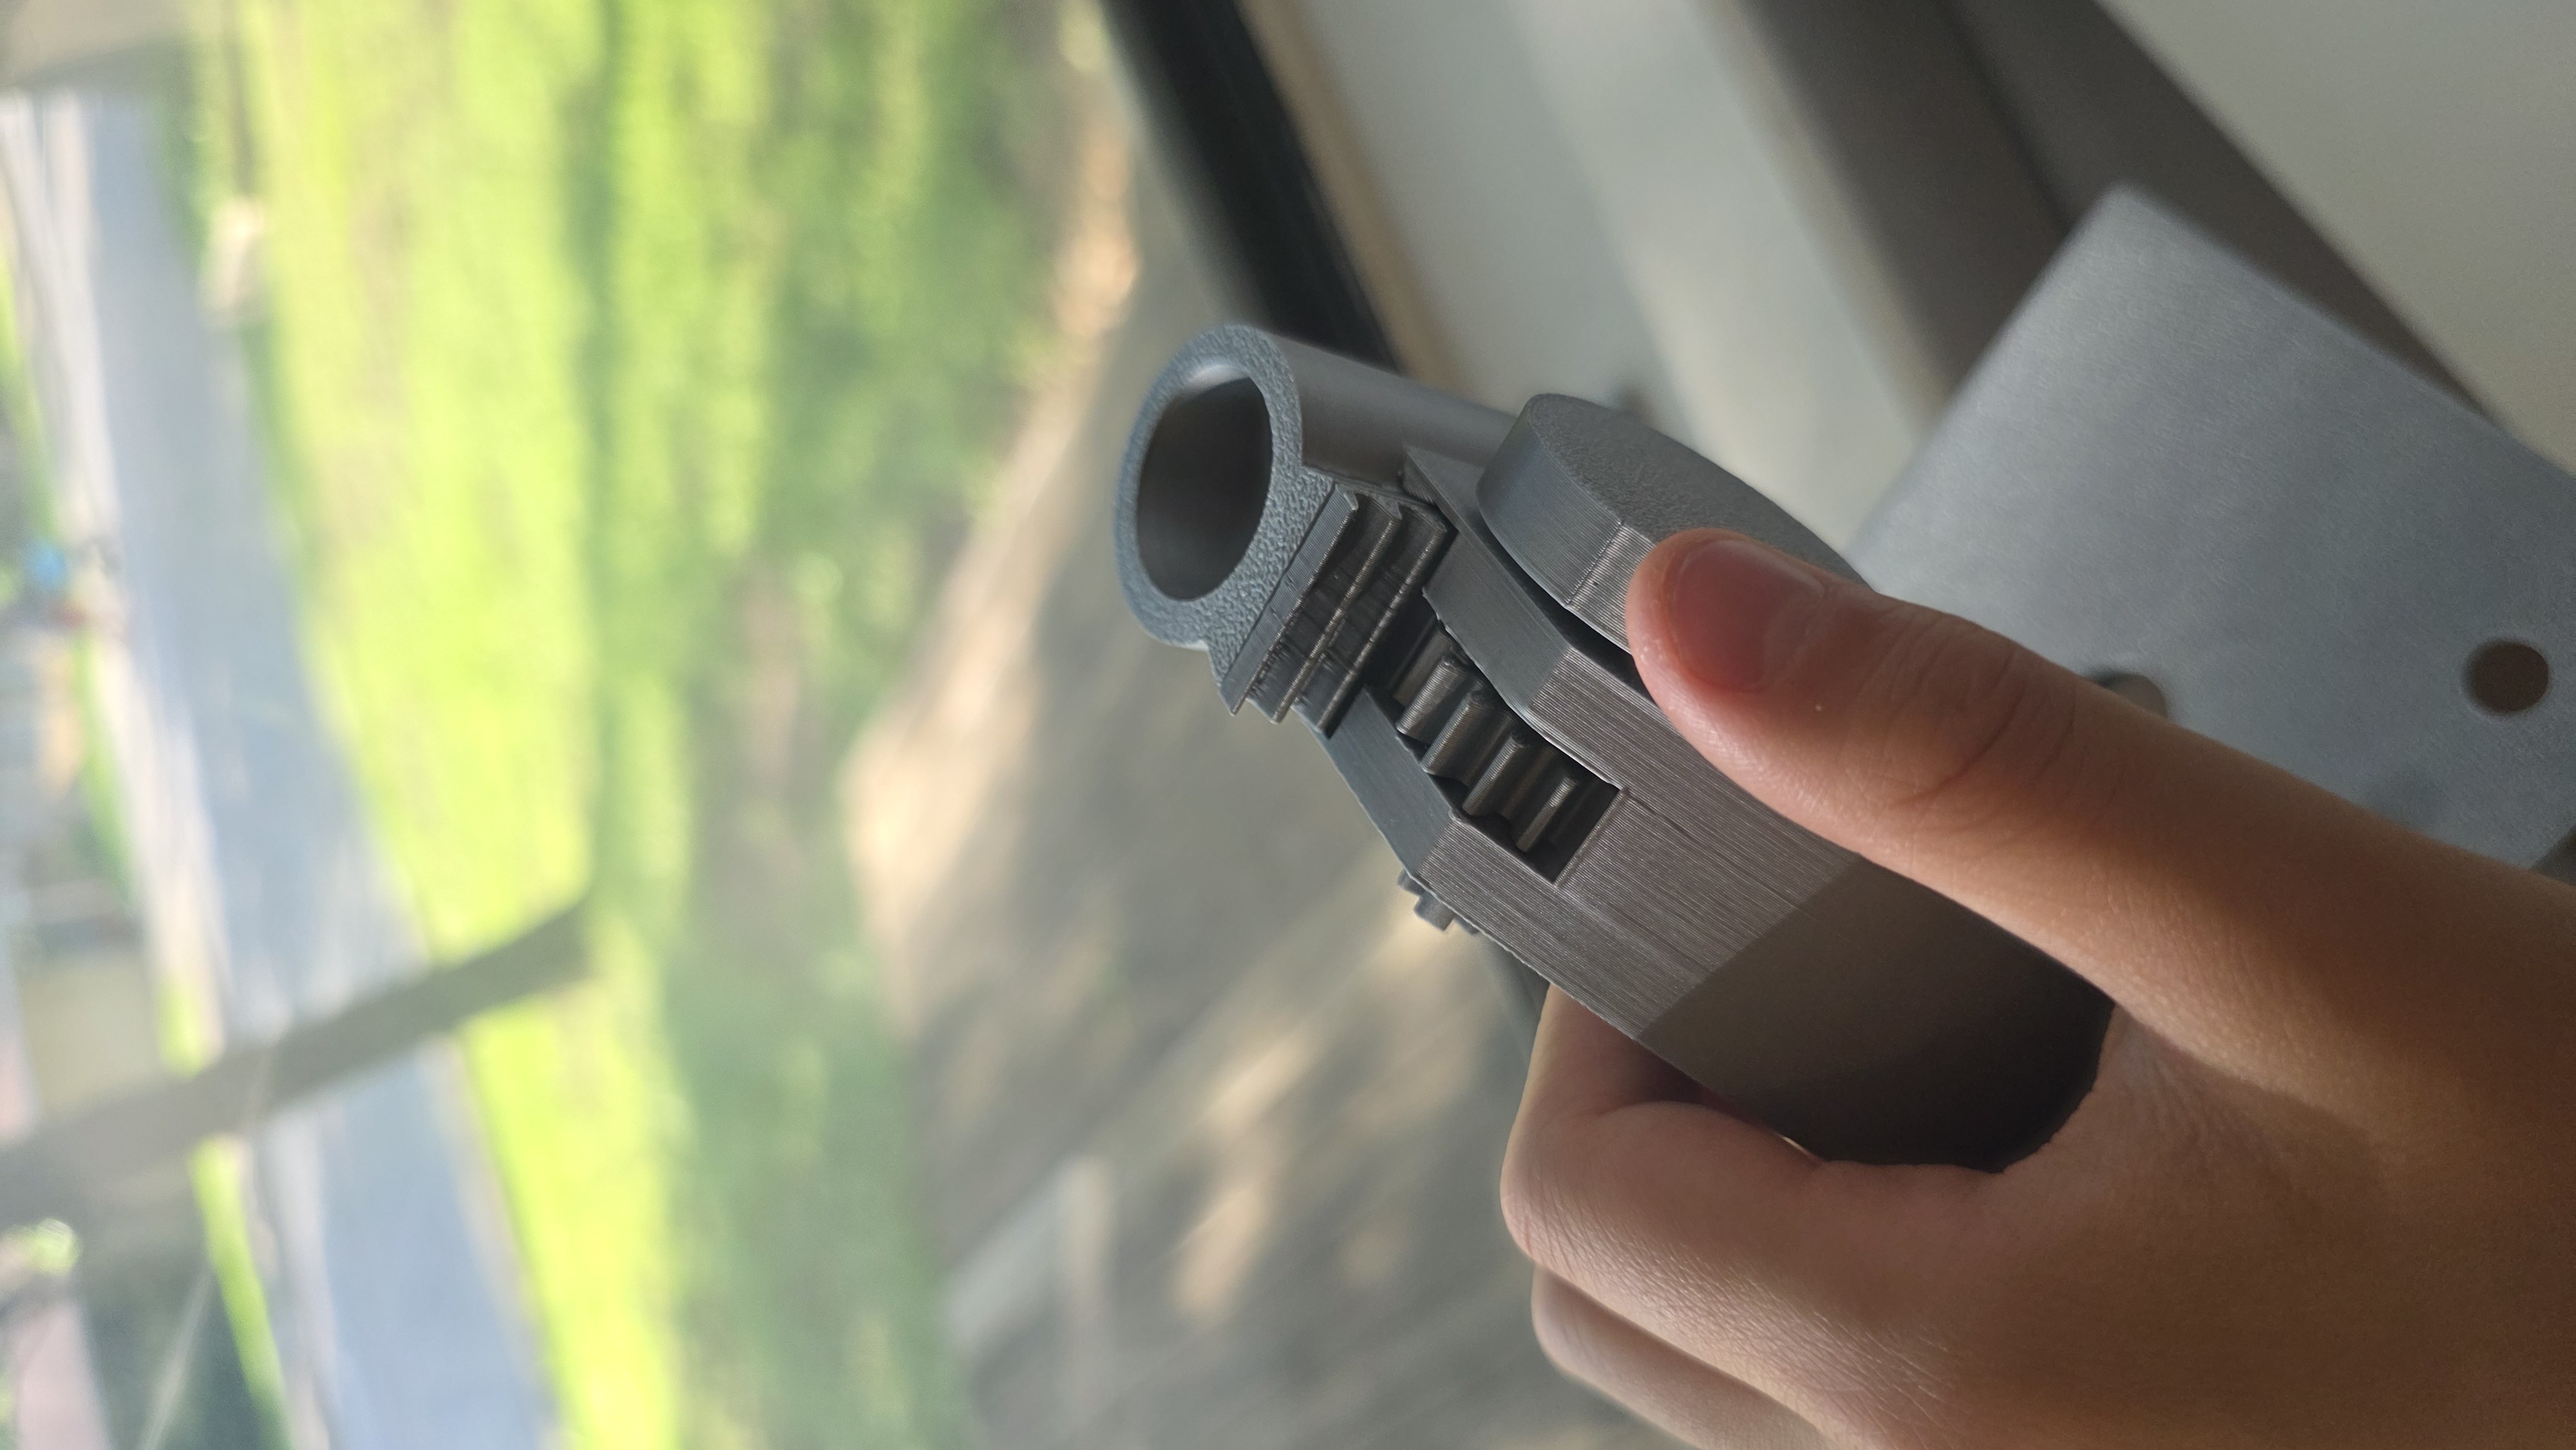
|
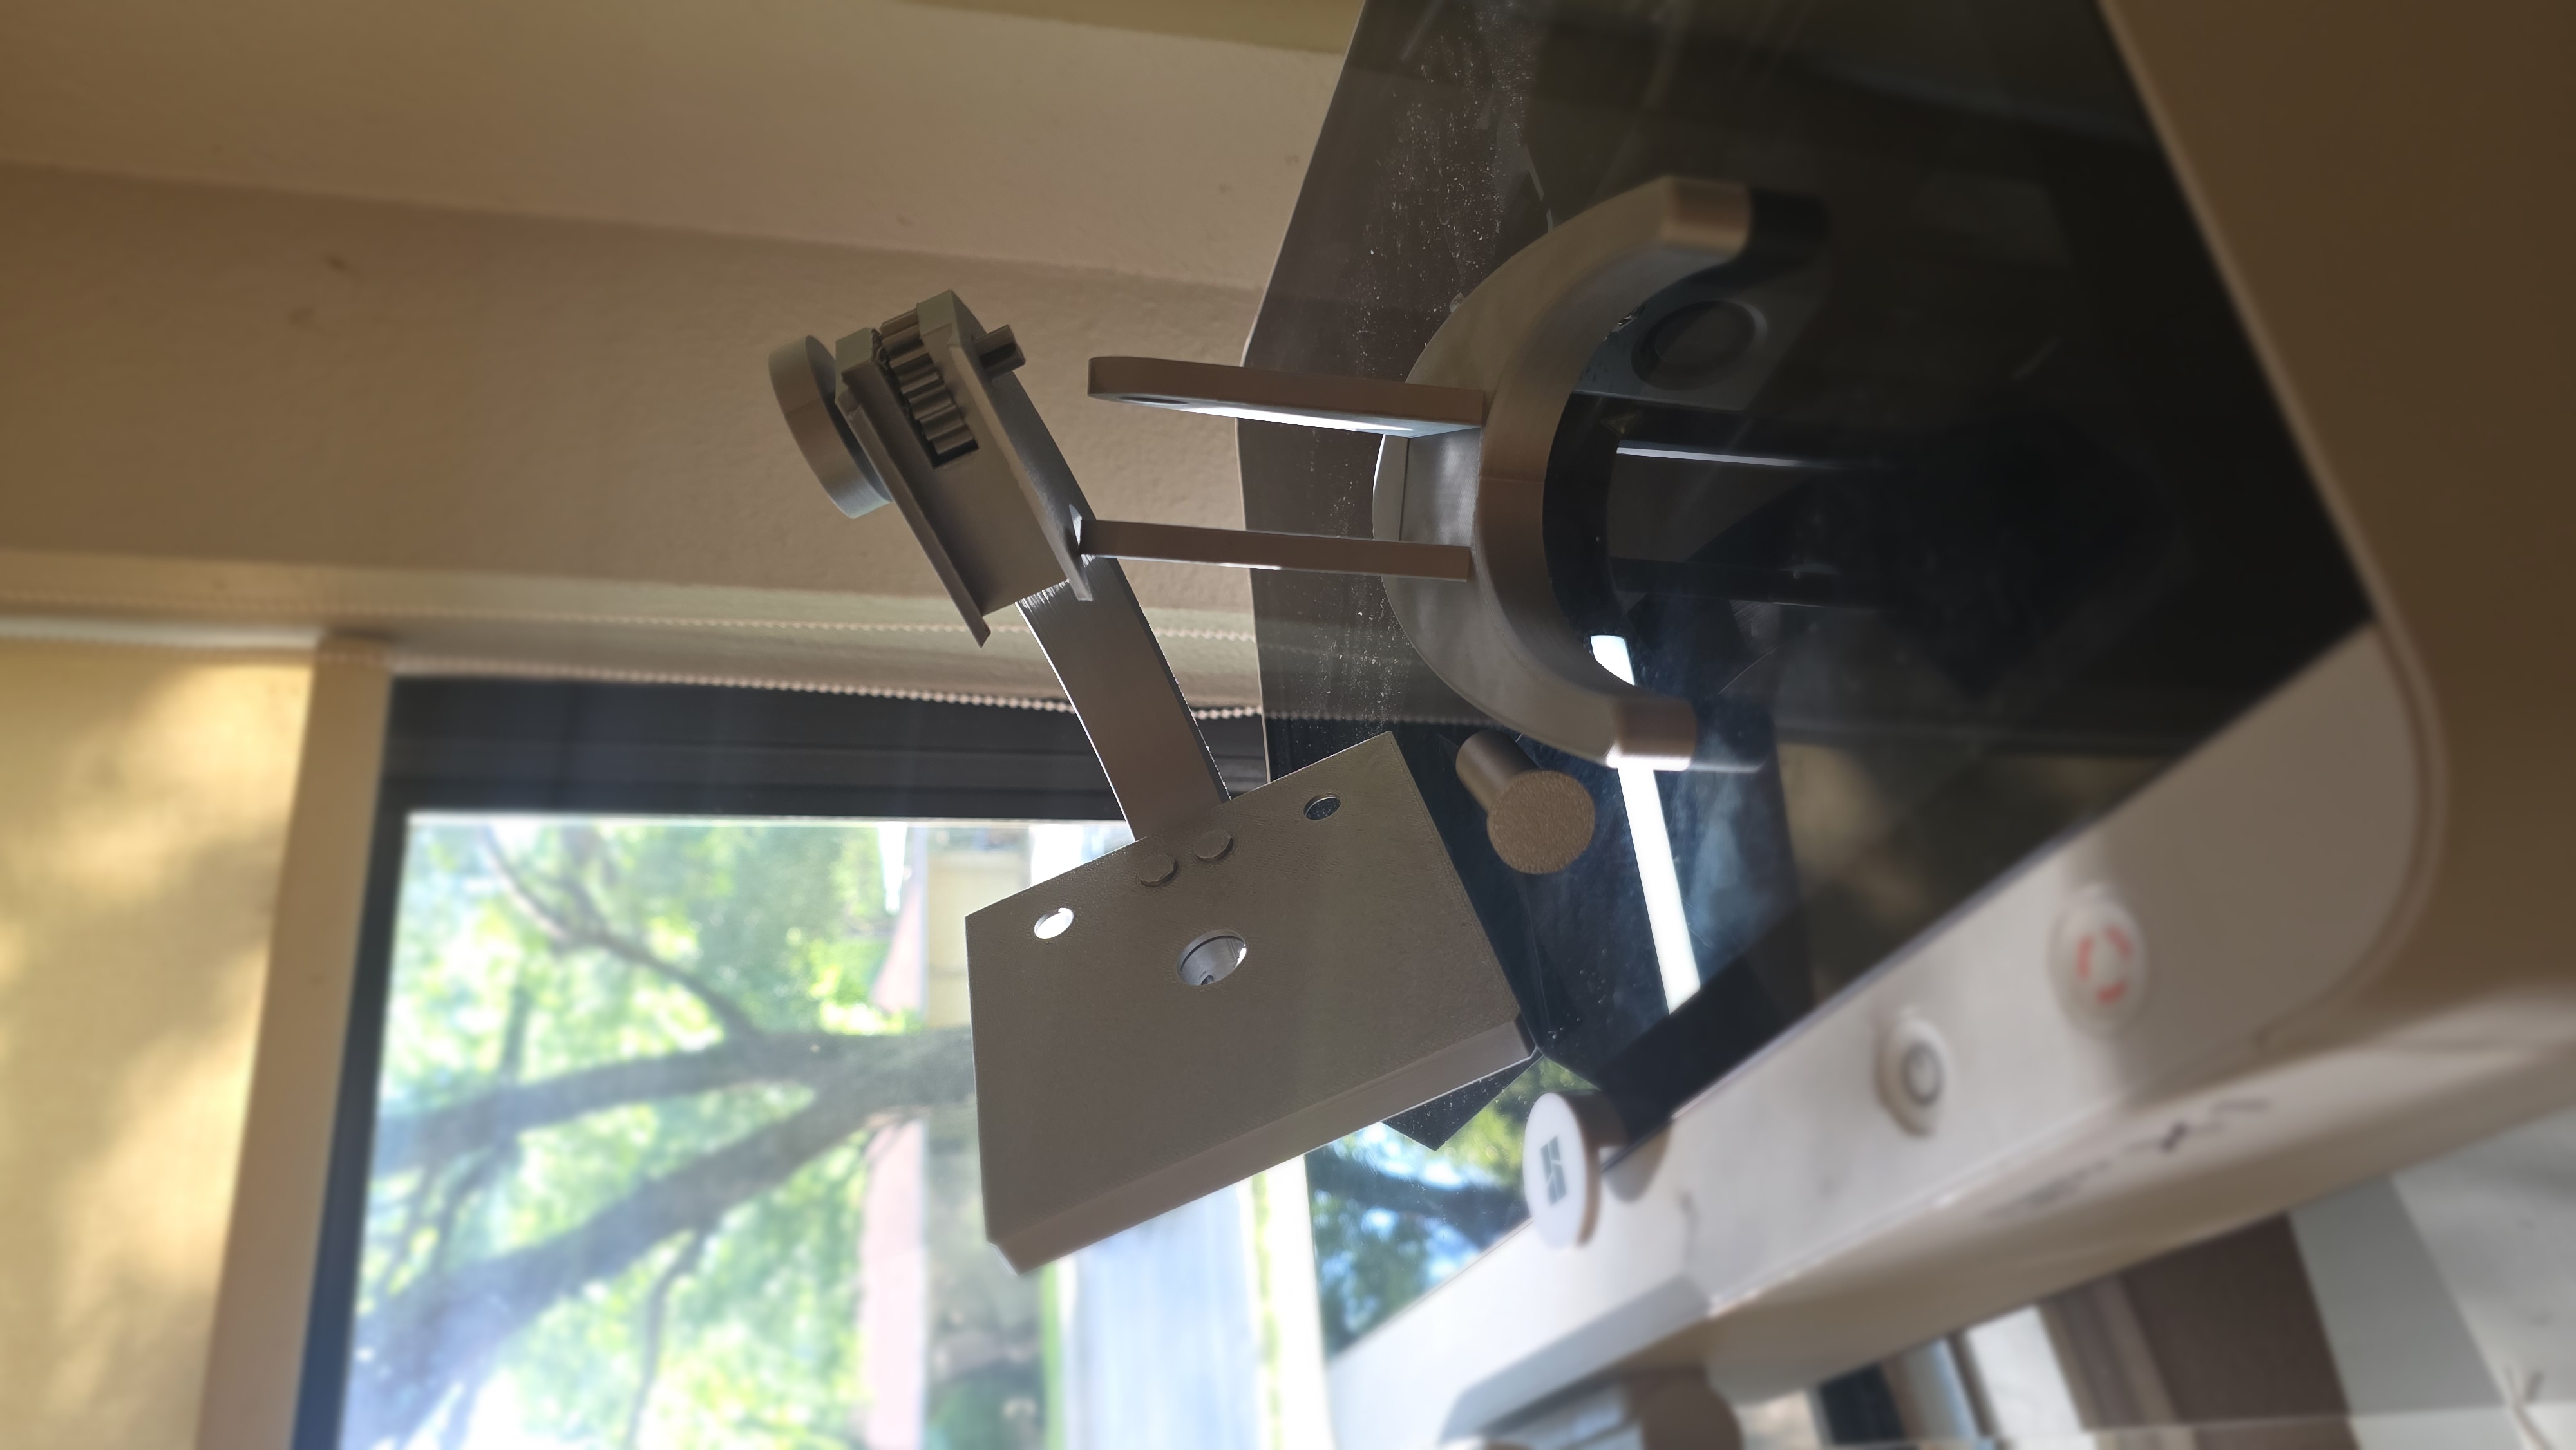
|
All the parts were designed by me in Onshape
All the pictures were taken by me.