
Round Led Bar (Skadis Version)
Violet Mitchell

AI로 유사한 모델 찾기


프로필 출력(0)
모델 파일(0)
 0
0 0
0 0
0
게시일:2026-02-03 13:06:24
0
0



 000
000This design is made to stick a ledstrip on the rails, then you can print all the parts to make an orientable led bar, perfect for electronics and hobbying.
It uses the very good T-Clip system to connect to the Skadis board.
If your printer can handle 20cm Z height then this design will be printable.
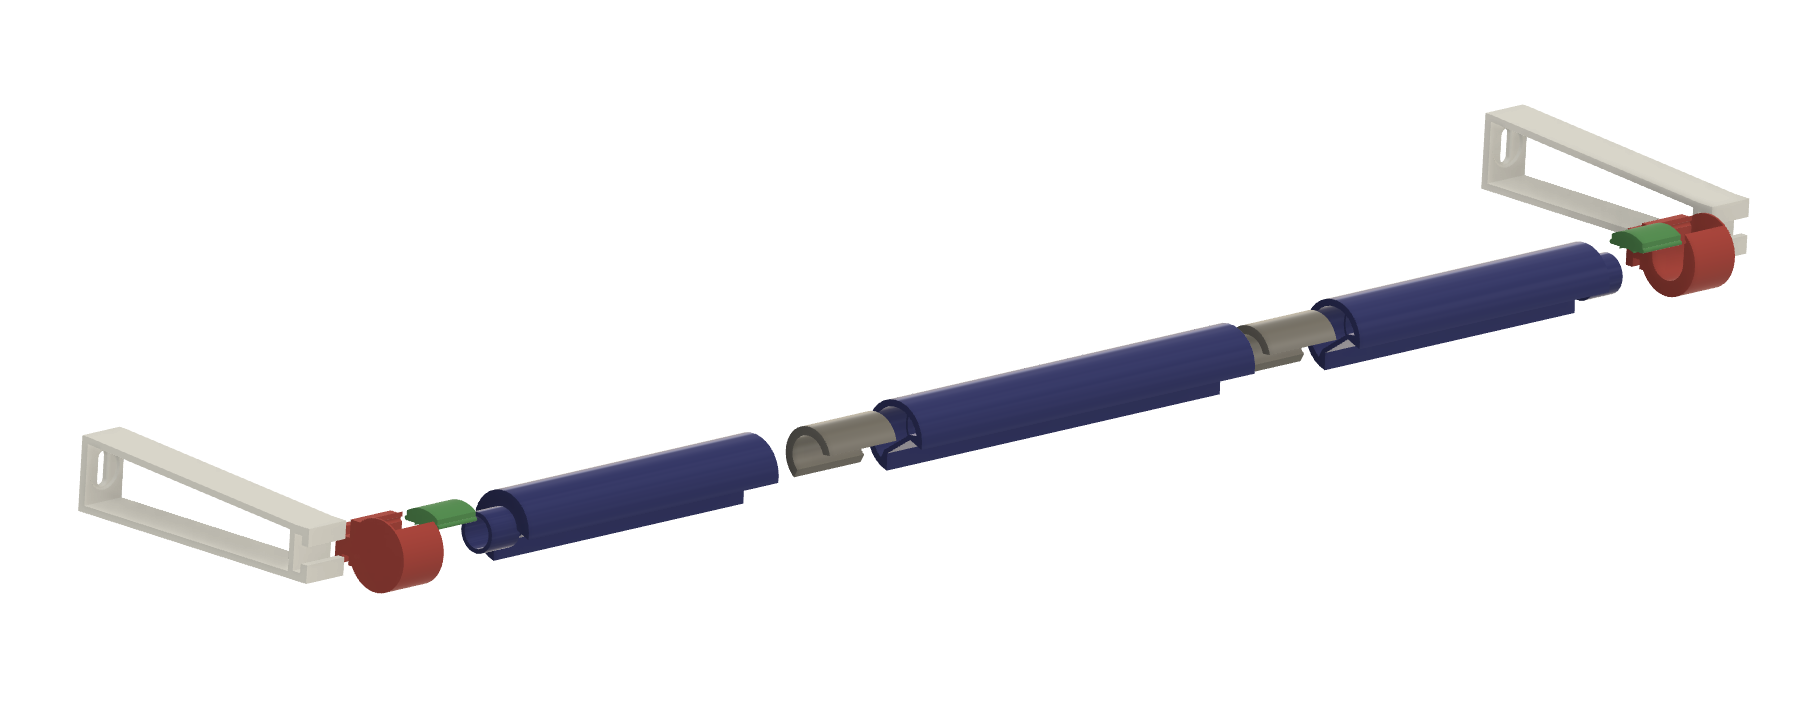
White: Arms
Red: Left and Right supports
Green: External cover
Blue: 15cm and 20cm Rails
Grey: Joints
There are two different ways to use the Round Led Bar
1x 20cm Rail
2x 15cm Rail
2x External Support
2x Joints
2x Arms
2x T-Clip (or from the original design https://www.printables.com/model/540362-skadis-t-clip-mini-parametric
2x External Cover
The part list is very similar to the one for the single skadis, except for the middle piece when connecting multiple bars together, which is the Middle Support, with the middle cover.
You can add as many rails as you want and orient them independently. Do not twist them too much as the wire connecting the led strips could be damaged.
It took about 7 hours on my Prusa CoreOne with a 0.20mm Speed print profile to print a full Single Skadis unit.
I tried to reduce supports as much as i could, but you should use the supports "only from the build plate".
Only the 15cm Rail, 20cm Rail and arm should need some supports.
I did my best and tried different PLAs for this design. The goal is to be able to rotate the bar easily, but not much as we dont want is to fall back in position.
The joints should be pretty hard to put in the rails, that is wanted for rigidity and you should not be able to take them off easily.
The T-clips will also be a bit hard to put in place, as it is needed to have a rigid group, as well as the T shaped connection between the arms and the supports. It can be adjusted but should offer some resistance.
