
AMS Adapting Spool
retro_studio

AI로 유사한 모델 찾기


프로필 출력(0)
모델 파일(0)
 0
0 0
0 0
0
게시일:2026-03-13 18:11:47
0
0
 000
000
test
This Adapting Spool is designed to be used in the BambuLab AMS unit and can be adapted to fit other brand spools that normally do not fit in the AMS. The current list of successful adaptations will remain on this page and will be updated occasionally!
The Adapting Spool prints in four parts; two halves of the Adapting Spool itself and two Adapters. For the “threaded” half of the Adapting Spool, you will need to decide if you want to use a M6 nut or M6 threaded insert. The “screw” half will work with either of these.
The dimensions of the "adapter key" will be posted here for anyone who wants to model their own set of adapters.
Successful Adaptations:
I plan on modeling more adapters as my filament library grows. Please reach out if you have any questions.
Adapter Dimensions:
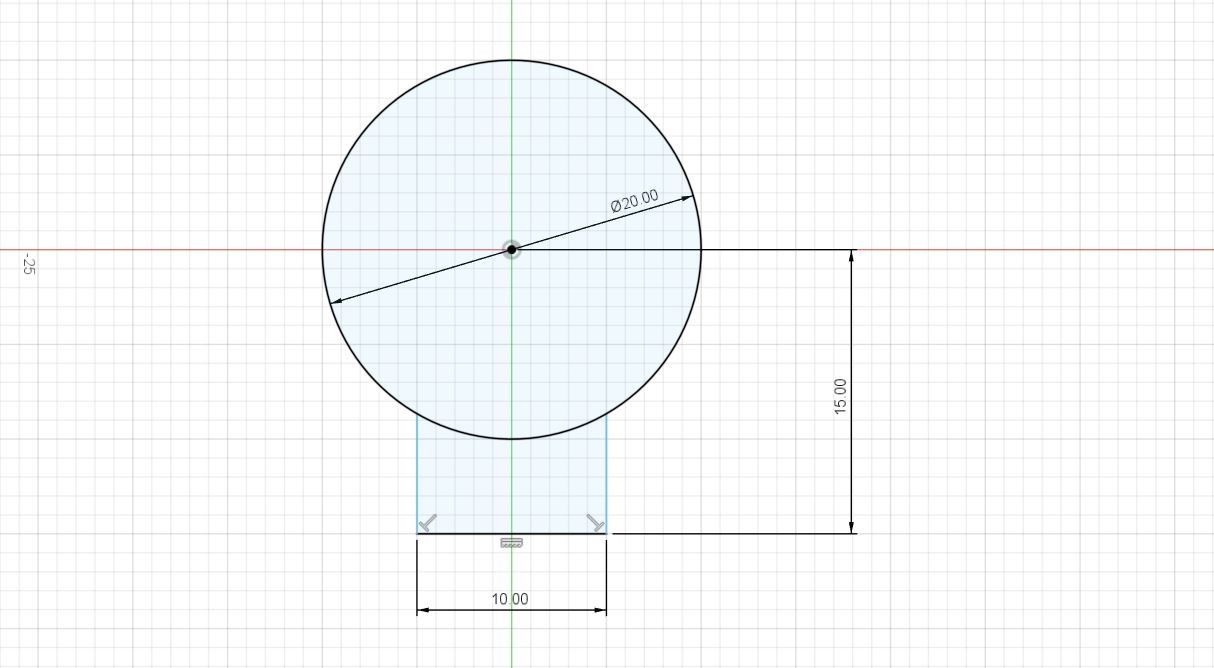
Start with a sketch, and add these three components: a 20mm circle, a 10mm wide line that is 15mm away from the center of the circle. And finally, connect the 10mm line with the circle with two lines. Easy!
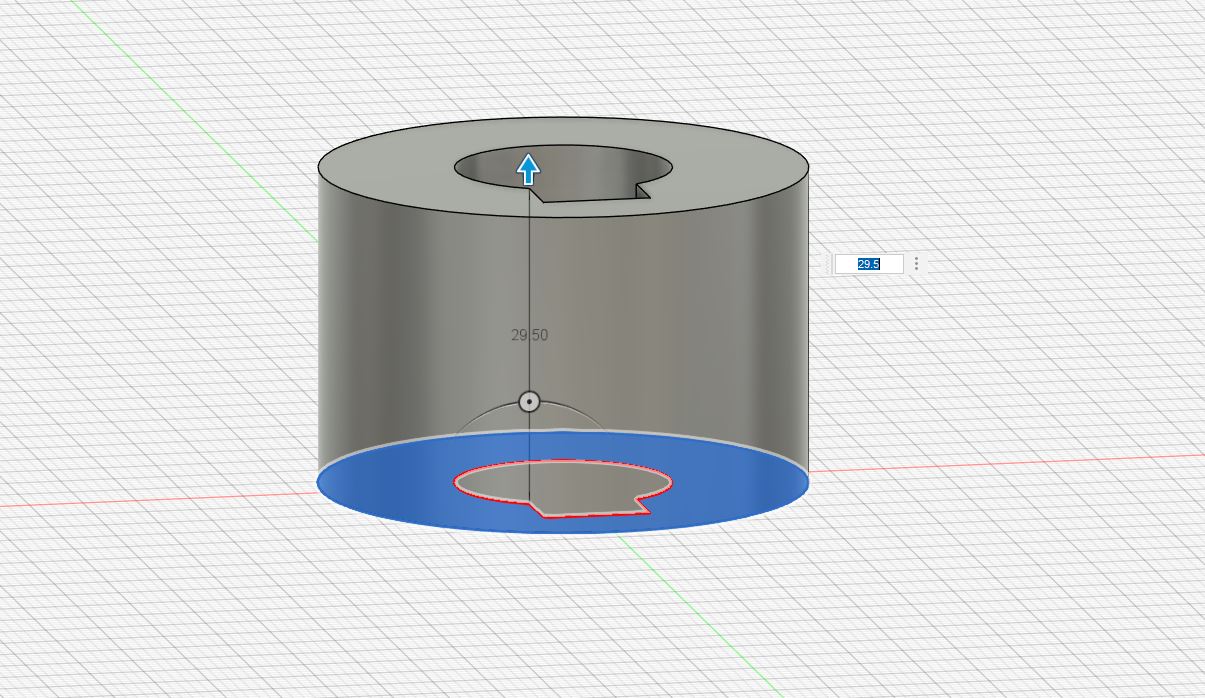
Extrude the adapter (another circle was added to the sketch to make this possible). The height of this extrusion (which translates to the width of the adapter) should not be any taller than 29.5mm.

Add a round fillet on the two “inner” corners of the key for 2mm (blue arrow).

Add a round fillet on the two “outer” corners of the key for 1mm (blue arrow).
At this point you have the basic key dimensions that should fit snugly over the spool halves.
Happy printing!
