
Raspberry Pi 4 Model B PC Case (with Fan mount)
StalwartScrew

AIで類似品を検索


印刷プロファイル(0)
モデルファイル(0)
 0
0 0
0 0
0
公開日時:2026-04-19 15:16:06
0
0



 000
000
Poor print quality because of my Ender 3 Pro!
5v fan is optional but can improve airflow!
Step 1:
Pressfit the magnets into the holes on the backplate, main body and Raspi Holder. (super glue can make the diffrence between ragebaiting everytime you want to open the case or a smooth experience)
(make sure they have the right polarity)

<- Top right & Bottom left are magnet holes

magnet holes arent really visible but you are looking at the back of the Raspi Holder (the white part)
Step 2:
Cut the Acrylic Glass into the right size which is about 110mm (length) and 70mm (height)
Step 3:
Drill some 3mm holes into the acrylic glass sheet. Can be done by laying the sheet ontop of the 3D printed part and marking the holes.
Step 4:
Snap on the Raspi Holder while the raspberry pi is in place and clip the right hook under the Display Ribbon connector (serves as leverage for connecting cables at the top)
Step 5: (critical)
Connect the 5v/3.3v fan to those pins (shown in the picture)
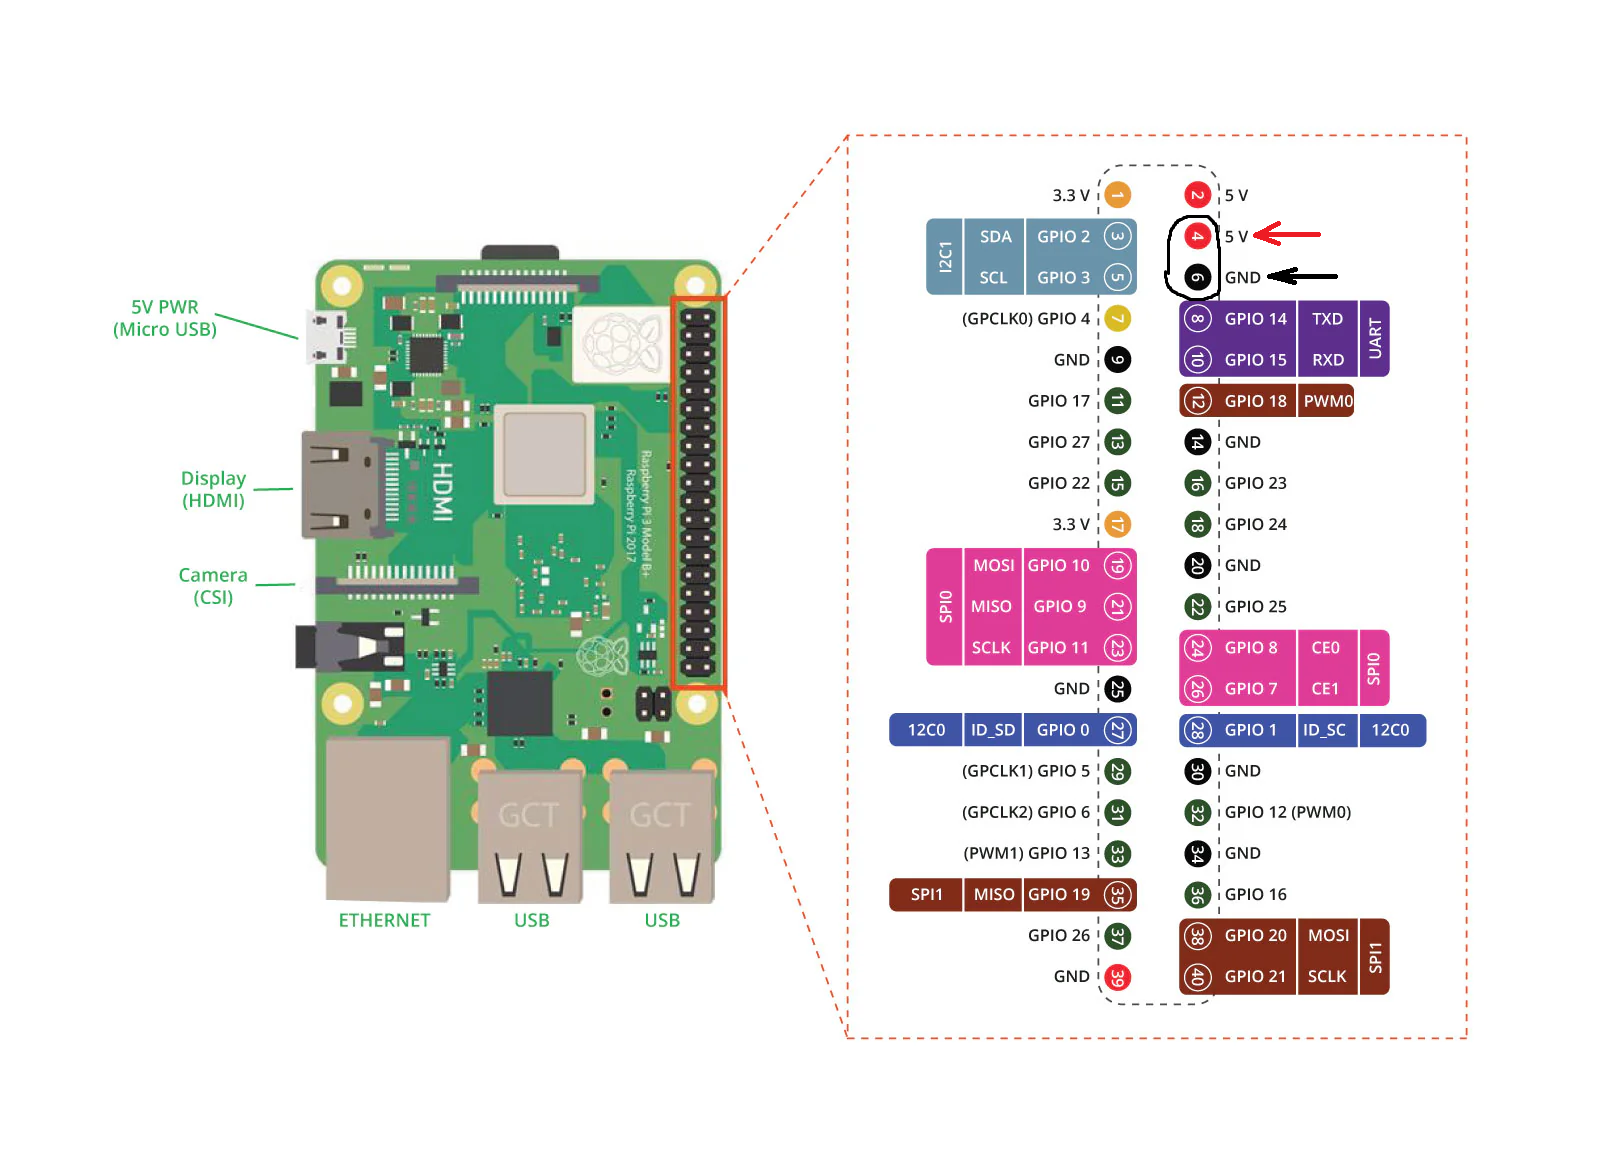
(Already color coded)
if you use the 3.3v fan then you can connect the red wire to the pin in the top left.
Step 6:
Attach the Back Plate and screw on the Acrylic Glass Panel and now...
