
Elegoo Centauri Carbon dedicated γ
wild_shop

AIで類似品を検索


印刷プロファイル(0)
モデルファイル(0)
 0
0 0
0 0
0
公開日時:2025-09-29 09:42:31
0
0
 000
000This is a scratch-resistant tool head cover/fairing designed specifically for the Centauri carbon fiber 3D printer. It has been carefully optimized to combine lightweight and high-strength design. Although its name may seem a bit mundane, it originates from the brilliant star in the Centaurus constellation - and this fairing is a follow-up to the original factory fairing andSE3D DesignThe third scratch-resistant protective cover that was launched afterwards.
So, why should you choose to print this protective cover?
In short:It's more lightweight than other solutions, yet its strength is still excellent. Even if I use it frequently, I don't have to worry about damaging the shield:
Main advantages:
To intuitively feel the reliability of magnetic fixing, I can easily pull the gantry crane just by the shield itself:
Materials list:
Printing and assembly guide:
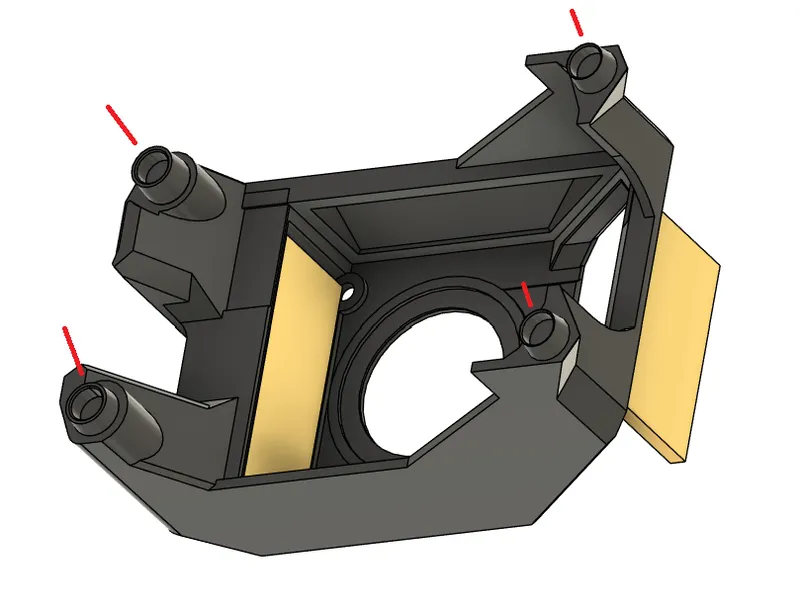
It is recommended to use ABS material for printing, prioritizing a four-wall structure and setting 5-6 layers for the top and bottom shells. I used 50% adaptive cubic infill, but any infill rate between 25% and 50% can achieve ideal results. Please be sure to disable the support function - all necessary supports are built into the model and do not require additional additions. It is recommended to use a layer height of 0.2 mm during printing.Note: The built-in support may not be sliced correctly under the traditional wall thickness generation mode. If you haven't set the "Spider Web" wall thickness generator as the default option, please be sure to enable this function:

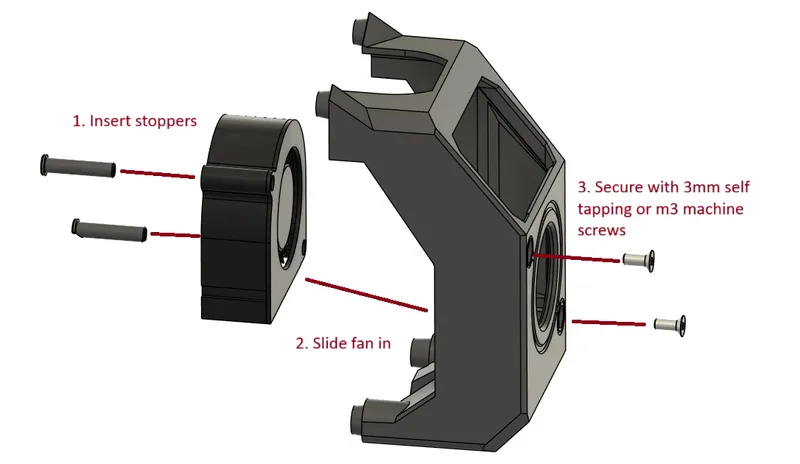
3. Follow the steps in the diagram to complete the installation of the fan: Insert the stopper into the holes on the fan from the back, and the side with a notch should be inserted into the lower hole so that there will be no interference when the fan is inserted. Then align the fan with the front shield and push it into the groove along the guide rail. Finally, use self-tapping screws or...
In addition, I have also specially launched a version that removes the decorative round groove design on the front, and optimized the built-in support. The new handle design makes the disassembly process more convenient and worry-free.
