
Unzip the handle controller
PaleWall

Trouver des similitudes avec l'IA


Profil d’impression(0)
Fichier modèle(0)
 0
0 0
0 0
0
Publié:2026-02-21 18:39:10
0
0
 000
000This stress-relieving toy is easy to assemble and can provide you with a great way to relax and unwind.
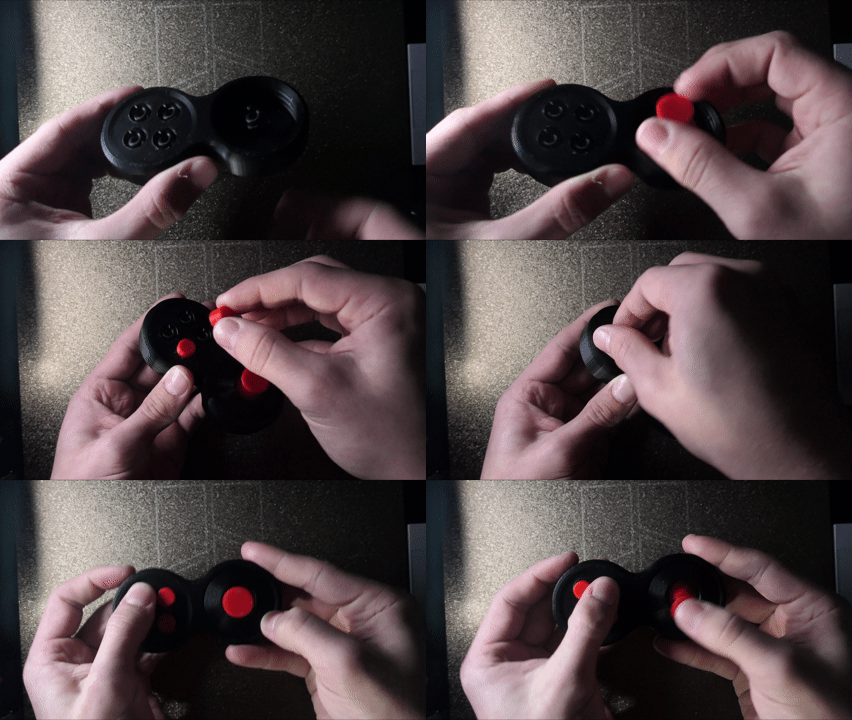
For the first variant, you need to first screw the rocker onto the spring, then close the cover, and screw the button onto the other spring:
However, there is a second variant, which is more stable and durable:
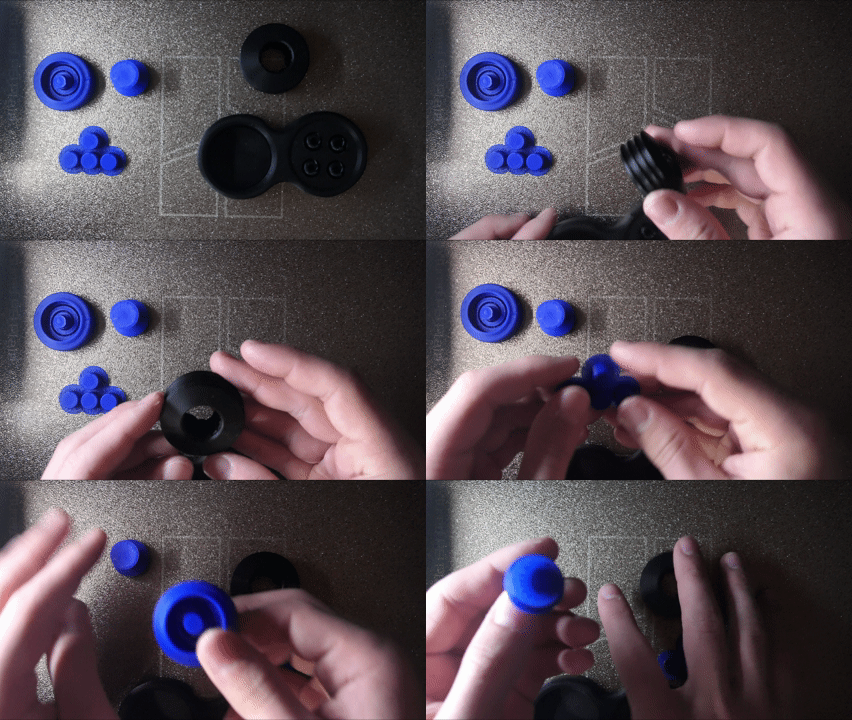
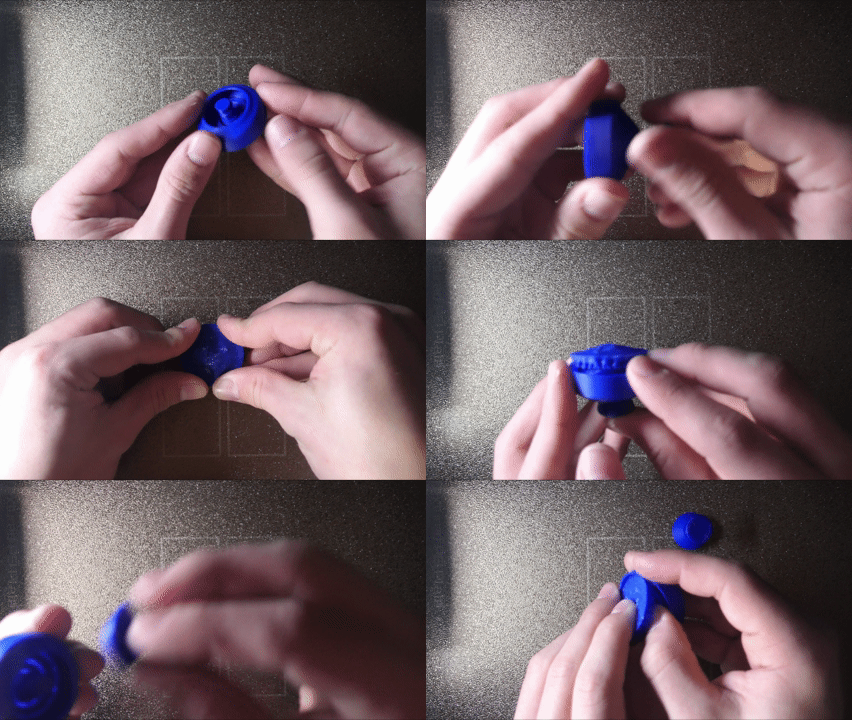
2. The joystick, coil spring, and cover are combined together:

3. Screw all the parts together:
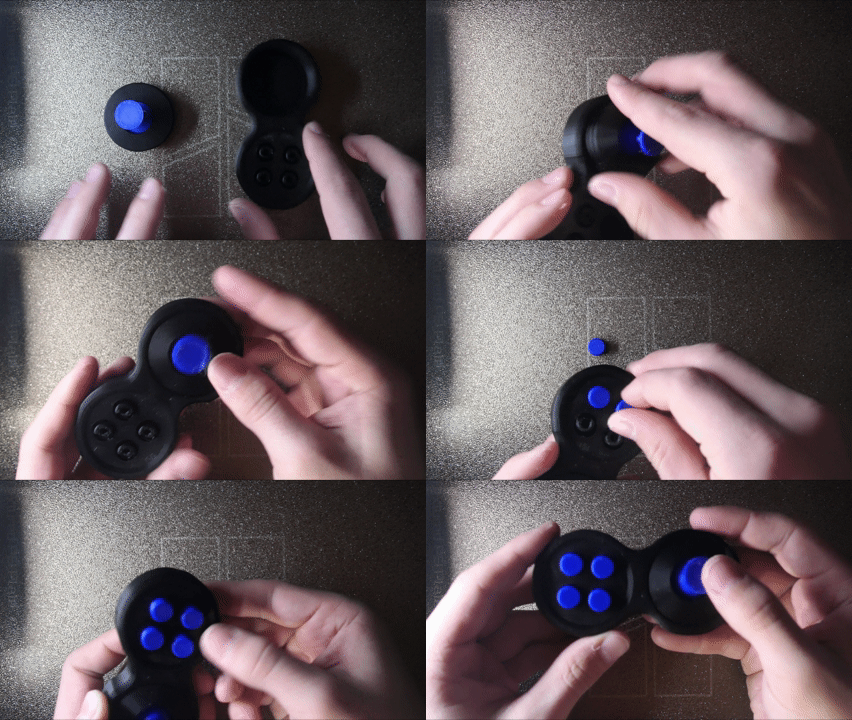
4. It's done!!!

As the third print configuration file, I have saved all the files in one file and distributed them across multiple print boards. This way, when importing this print configuration file into Bambu Studio, for example, it will be easier to get a better overview.
There is also a fourth print configuration file. There, the "body" and "lid" will print more beautifully. They will be "ironed". This means that after the 3D printer finishes printing the top layer, the nozzle will pass over it again, making the lines less noticeable. After that, people will almost think it's a cast piece.
To select or change a print profile, just select one under "Print Profile" in the upper-right corner.
Wish you a pleasant time printing and trying it out!
