
Max's ergonomic mouse
Wilbur Farrell

Trouver des similitudes avec l'IA


Profil d’impression(0)
Fichier modèle(0)
 0
0 0
0 0
0
Publié:2024-01-04 11:07:51
0
0
 000
000
This project uses the internal electronic components of the "VXE R1 SE" gaming mouse as the core.
This project uses the internal electronic components of the "VXE R1 SE" mouse as the kernel
Additional hardware fittings:
Additional hardware fittings:
(3) M3*6 hexagonal screws
(3) M3*6 hexagonal screws
(3) m3*4*4.2 knurled nuts
(3) m3*4*4.2 knurled nuts
(1) Omron B3F-4055 (12*12*7.3) tactile switch
(1) Omron B3F-4055 (12*12*7.3) tactile switch
(2) Omron B3F-6052 (6*6*7.3) tactile switch
(2) Omron B3F-6052 (6*6*7.3) tactile switch
(Any number of) mouse pads
(Any number of) mouse pads
Installation tips:
Installation tips:
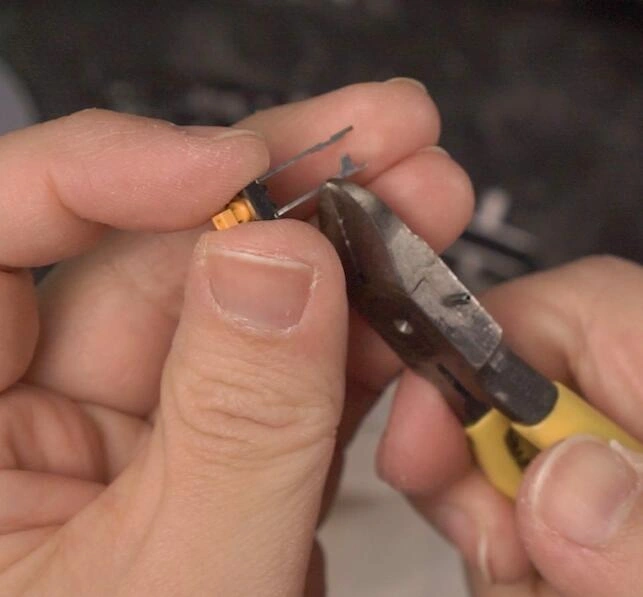
Trim off the "flag-shaped" protrusion on the 6*6 touch switch.
Trim off the "flag-shaped" protrusion on the 6*6 touch switch
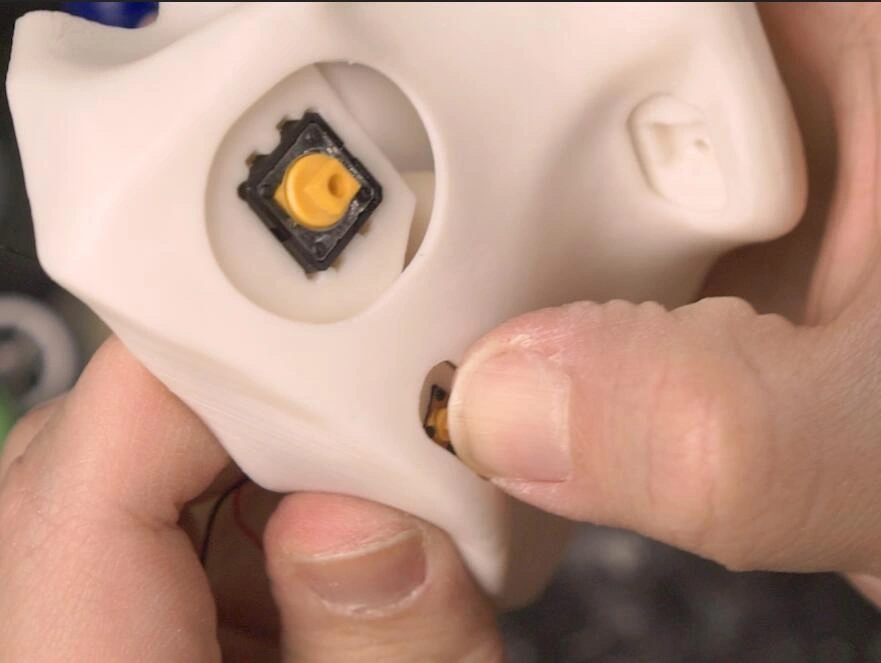
Install the switch as shown in the figure
Install the switch as shown in the figure

Install knurled nuts at the three holes at the bottom of the back.
Install knurled nuts in the three holes at the bottom of the back
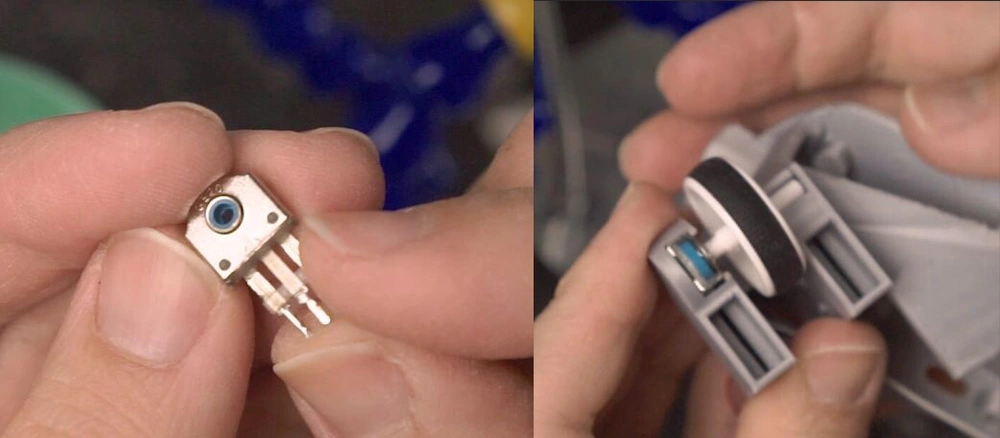
Cut off the excess metal parts of the encoder
When installing the encoder, make sure it is oriented in the opposite direction to the original one on the board
Cut off the excess metal parts of the encoder
When installing the encoder, make sure it is oriented in the opposite direction to the original one on the board
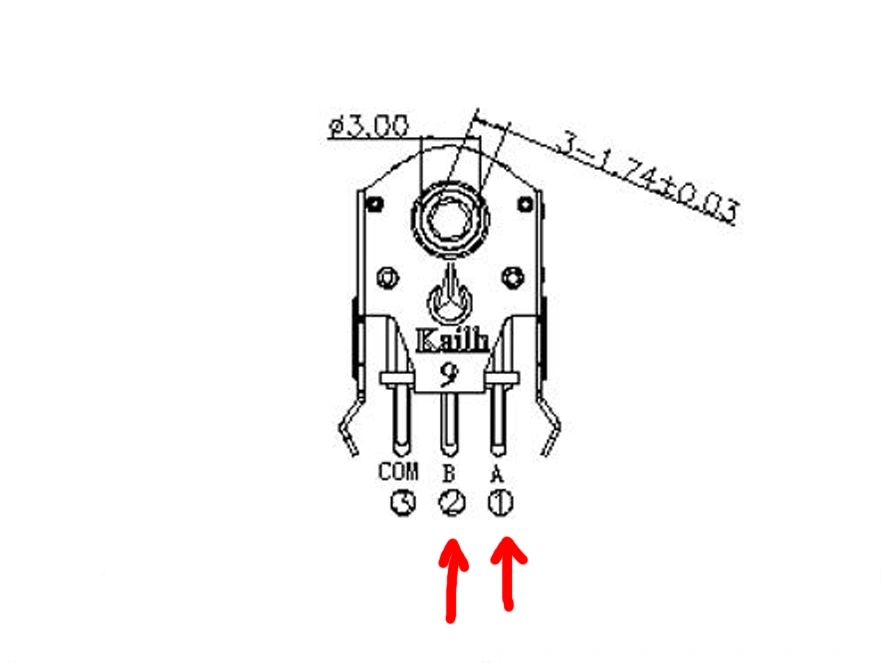
Because the encoder is rotated, the wiring of the "A" and "B" pins needs to be swapped
Because the encoder is rotated, the wiring of the "A" and "B" pins needs to be swapped
Install the micro switch at the position indicated by the basketball hoop.
Install the micro switch at the position indicated by the basketball hoop
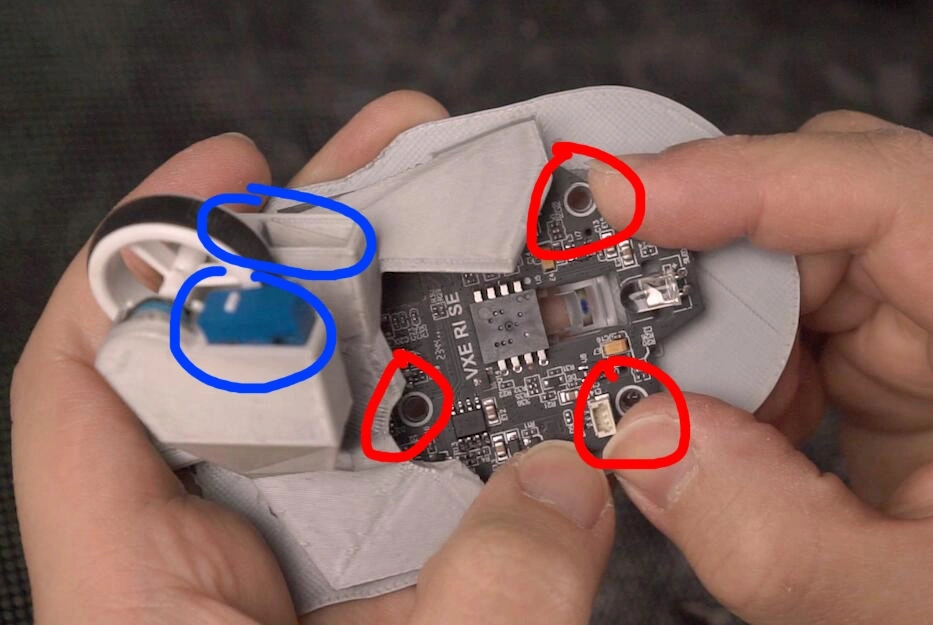
Align the three holes in the red circles on the baseboard, backboard, and circuit board and screw them in.
Align the three holes in the red circles on the baseboard, backboard, and circuit board and screw them together
Other:
Two sizes of side buttons are provided. You can install them according to your preferences.
There are buttons of two sizes on the side. You can install them according to your preferences.
