
Carousel Display Stand
george2018

Trouver des similitudes avec l'IA


Profil d’impression(0)
Fichier modèle(0)
 0
0 0
0 0
0
Publié:2026-02-17 04:17:17
0
0
 000
000I designed this for upcoming Craft Fairs I'm hoping to sell at. It is in parts for easier transport.
The frame spars are at a 60% angle, which most printers can sort of handle, but I'd still recommend supports as it just makes things easier for the spars to meet the middle shaft at the right height (ask me how I know). You could decrease this angle I suppose by scaling down X and Y (not Z) in your slicer for all parts, but I haven't tried this.
The Top can be printed upside down without supports, but I got better results printing it right way up with supports.
If you have Scarf Joints as an option then I highly recommend using a modifier to apply them to the cone and receiver at the base.
Top: 3/3/3 walls/top/bottom with 10% 3D infill, Normal (auto)/Snug supports with 0.2mm Top Interface Spacing and 1mm Support/Object XY DIstance.
Base: 3/3/4 walls/top/bottom with 15-20% 3D Infill (for weight), plus a Cylinder modifier covering the inner cone with Entire Wall Contour and Hole Scarf Joint Seam:
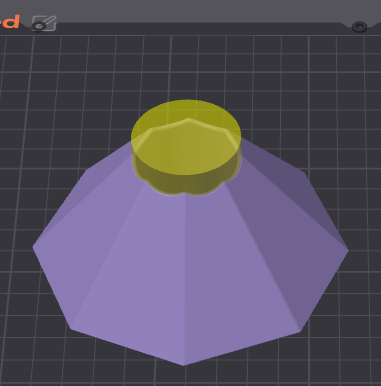
Main Frame: Upside down (as oriented in STL) 4/3/3 walls/top/bottom with 10% 3D infill, Normal (auto)/Snug supports at 46% Threshhold Angle with 0.2mm Top Interface Spacing and 1mm Support/Object First Layer Gap (helps with hollow connector), plus a Cylinder modifier covering the cone hole with Entire Wall Contour and Hole Scarf Joint Seam:
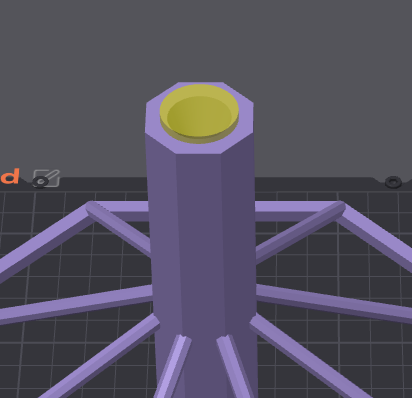
Top Frame: Upside down (as oriented in STL) 4/3/3 walls/top/bottom with 10% 3D infill, Normal (auto)/Snug supports at 46% Threshhold Angle with 0.2mm Top Interface Spacing and 1mm Support/Object First Layer Gap (helps with hollow connector)
Clips: Print as many as you need - the STL has 24 so add/remove as required. Just print enough walls to be solid (3 or 4).
To assemble just pop everything in to each other. I use Blu-Tak to keep them in place, allowing easy separation for transport and storage.
If you like this model, then please:

EdinBearDragon
