
Chassis Middle
ava6503

Encuentre similares con IA
Perfil de impresión(0)
Archivo de modelo(0)
 0
0 0
0 0
0
Publicado:2025-11-01 22:06:30
0
0
 000
000Chassis Middle

Non-printed parts used in this section:
◦ Spring from an old ballpoint pen (for door handle mechanism)
◦ M5 screws length: 16 mm
◦ M5 T-nuts
◦ Some length types of M3 screws and M3 nuts (for Door_Handle)
◦ Two Sidewall plywood boards Right and Left:
For attach plywood boards: 10x M5 screws length: 30 mm and M5 nuts
You can find these boards in the section: Scheme of Boards

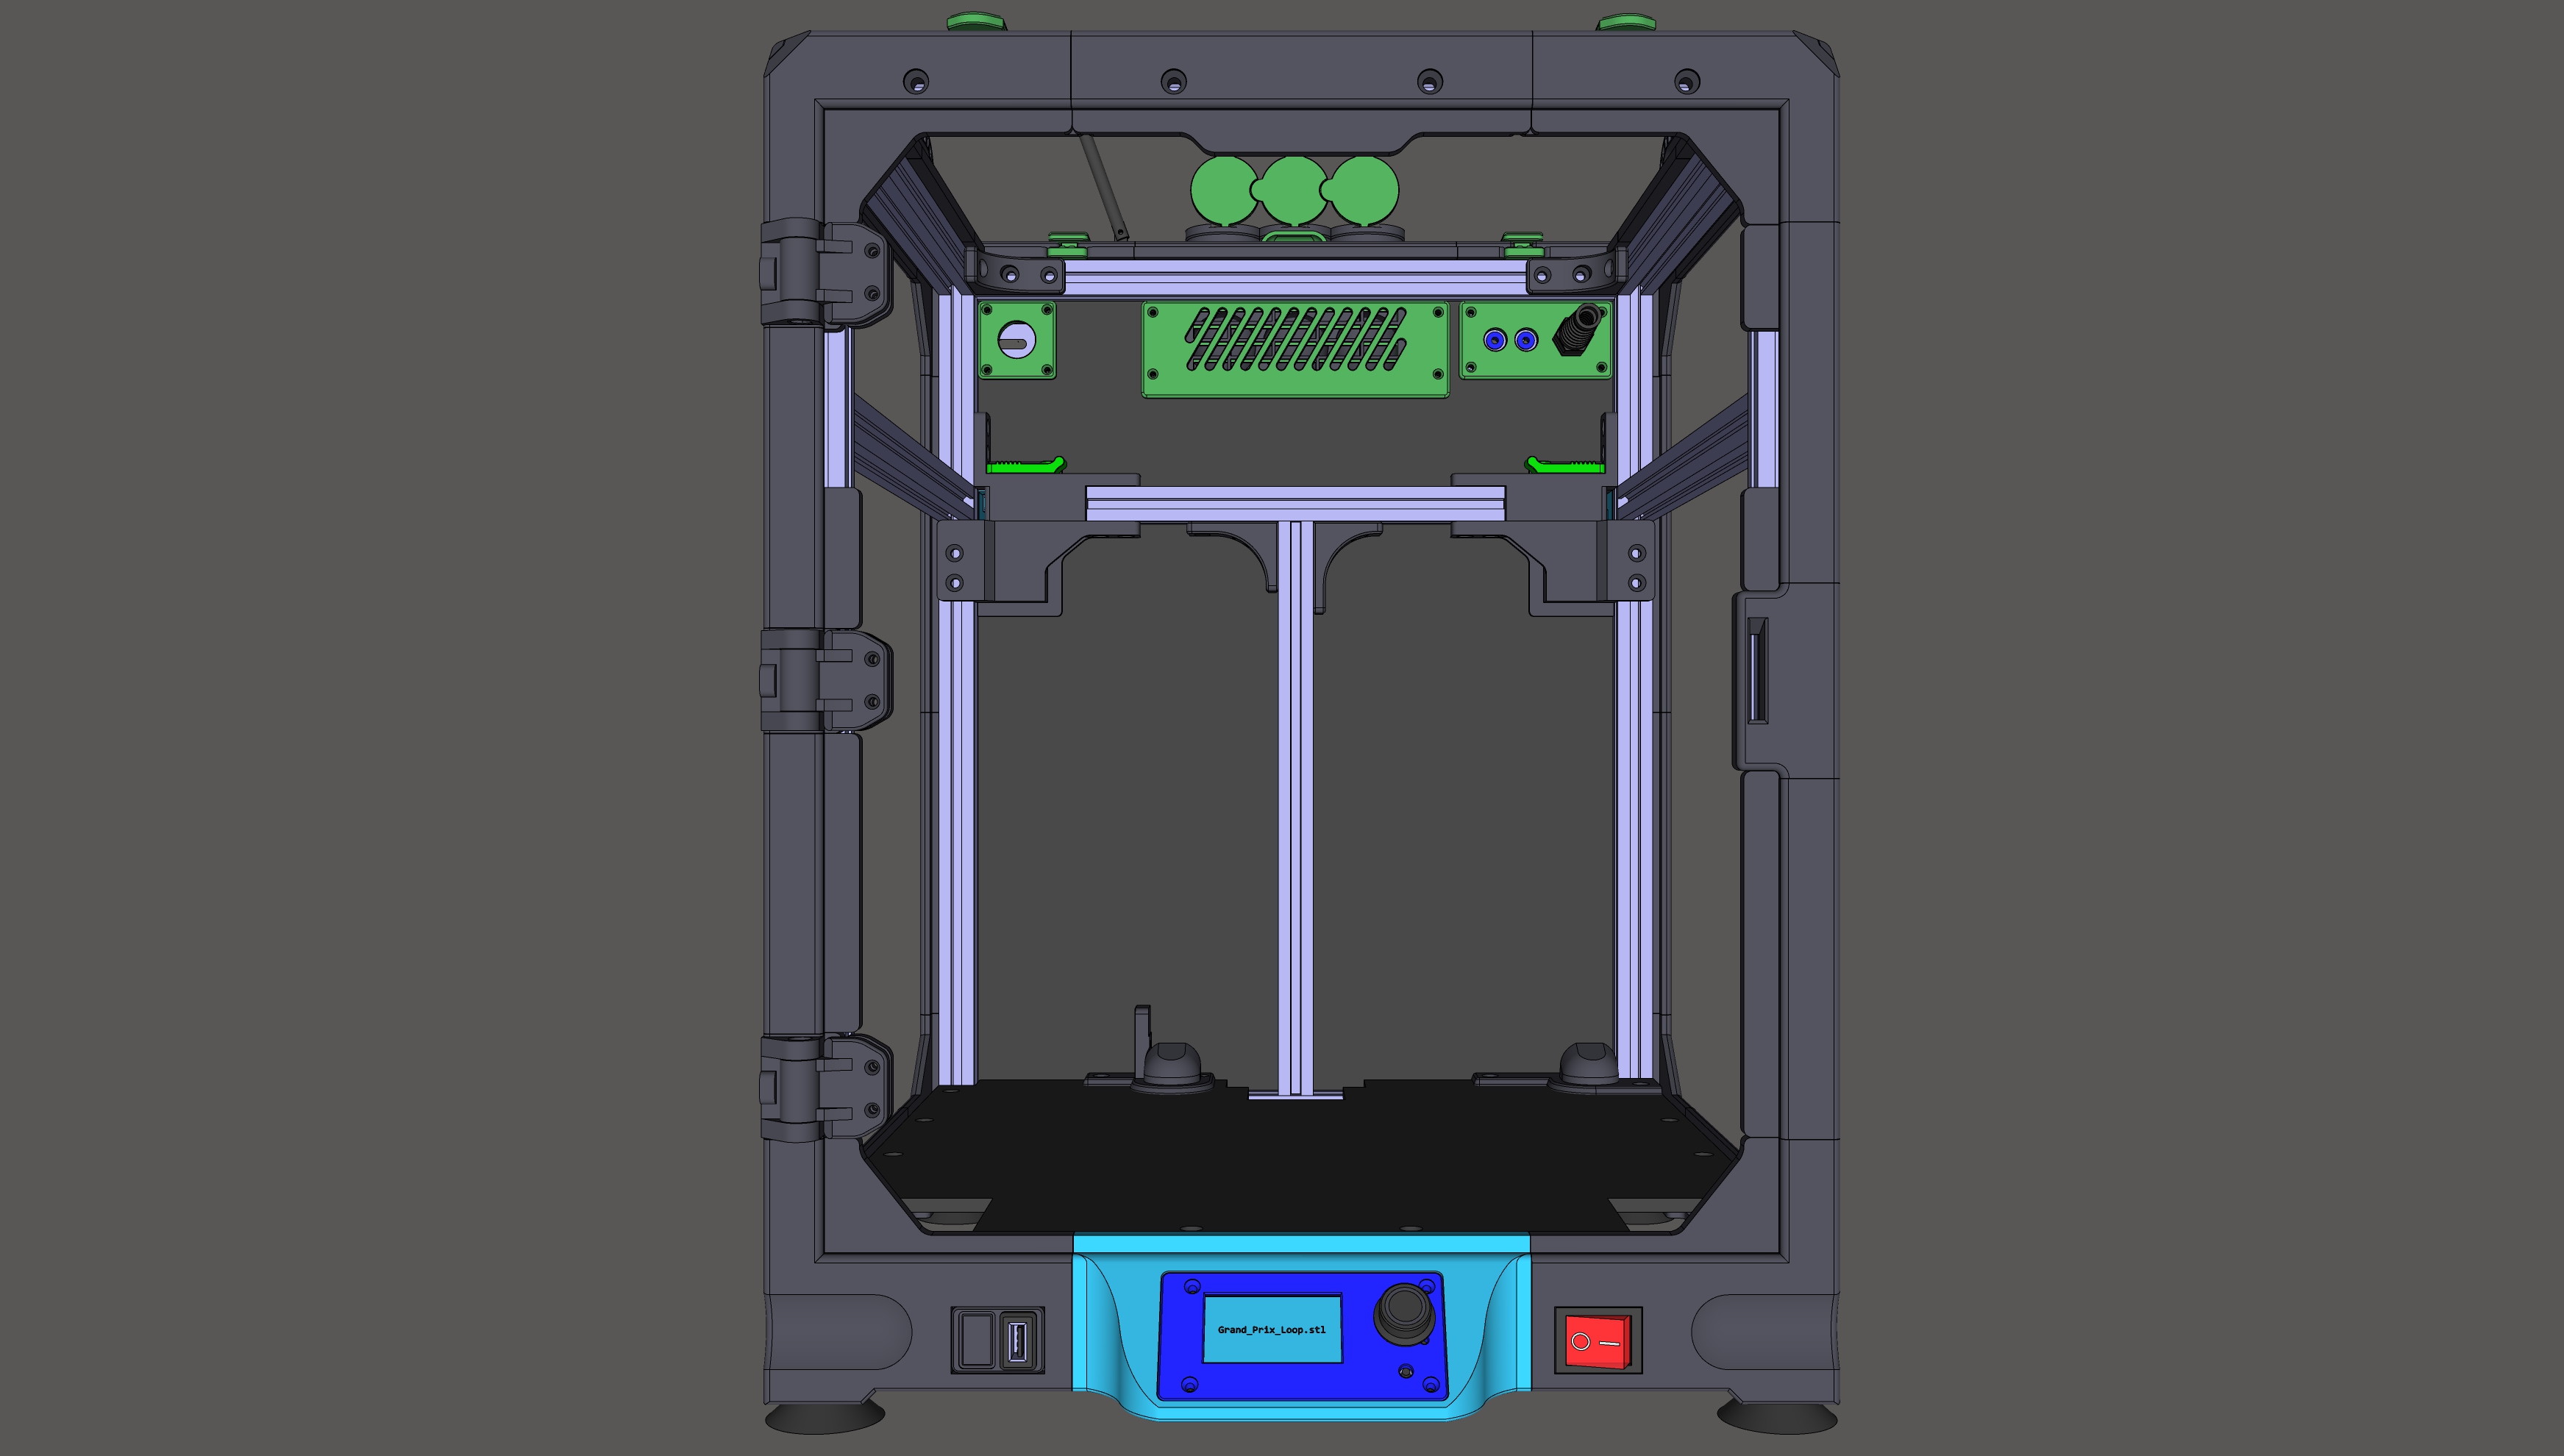
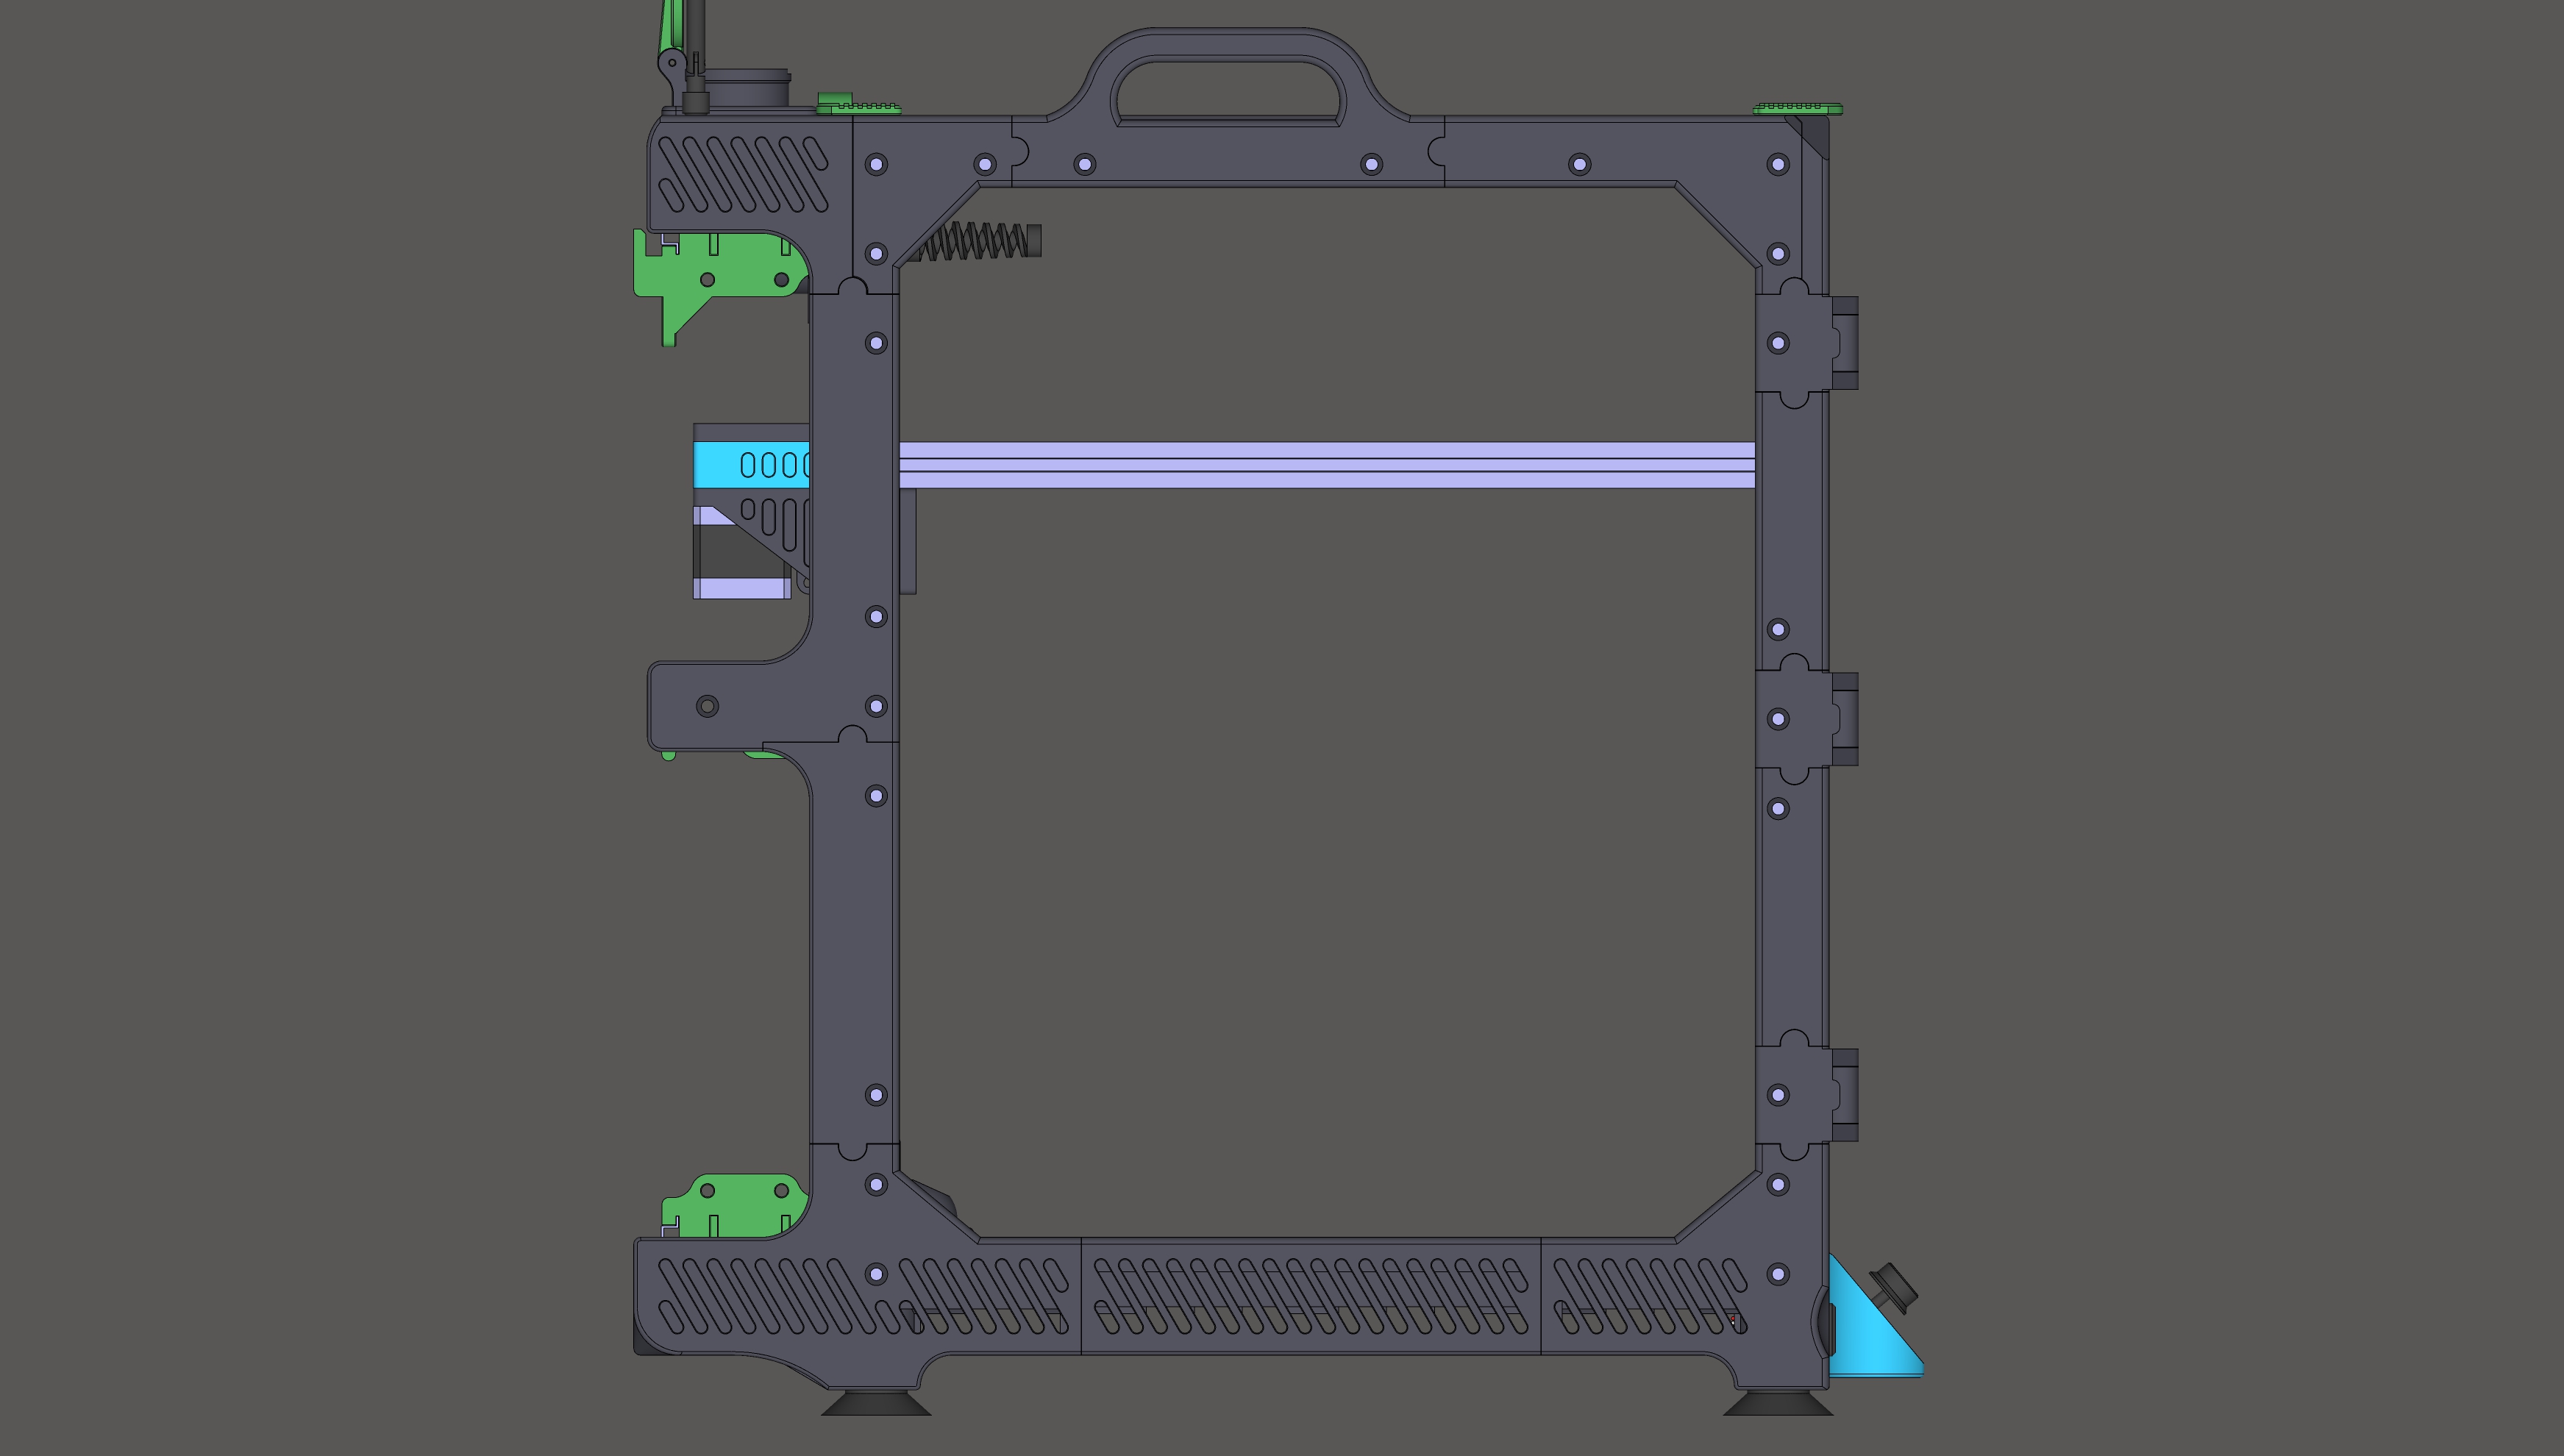
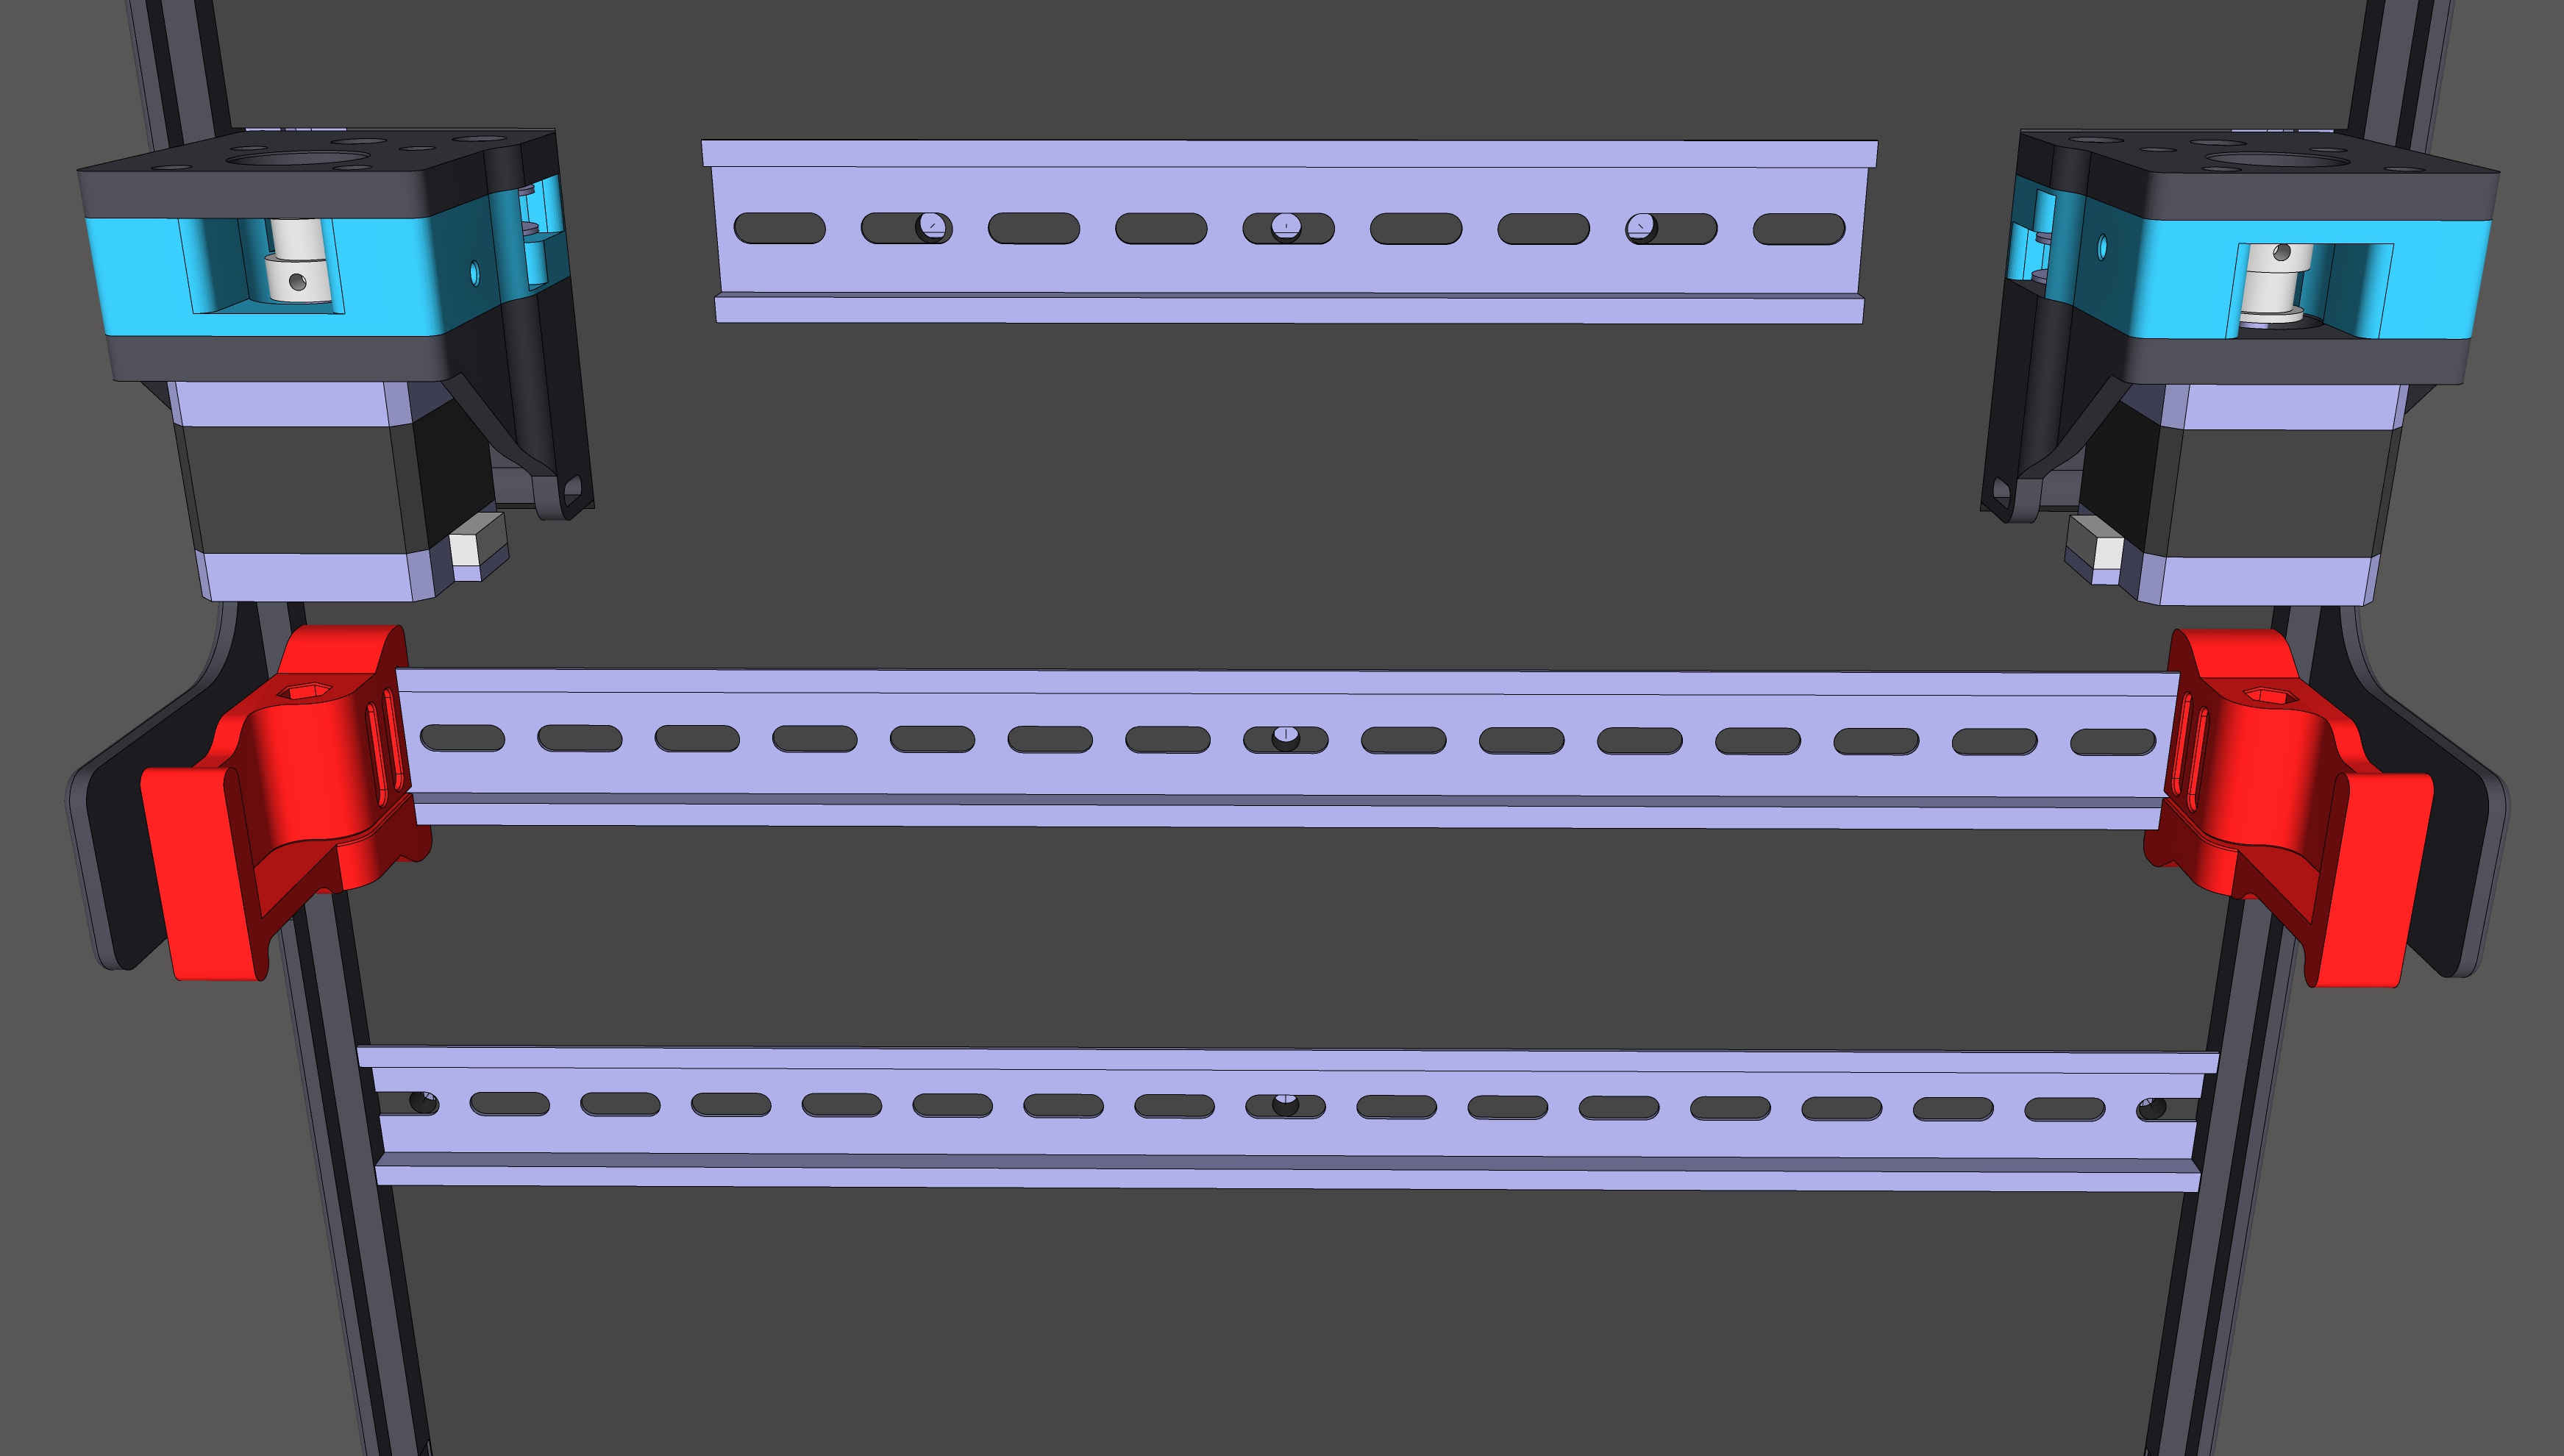
Assign the printed parts according to the pictures:
Front view:
Left side:
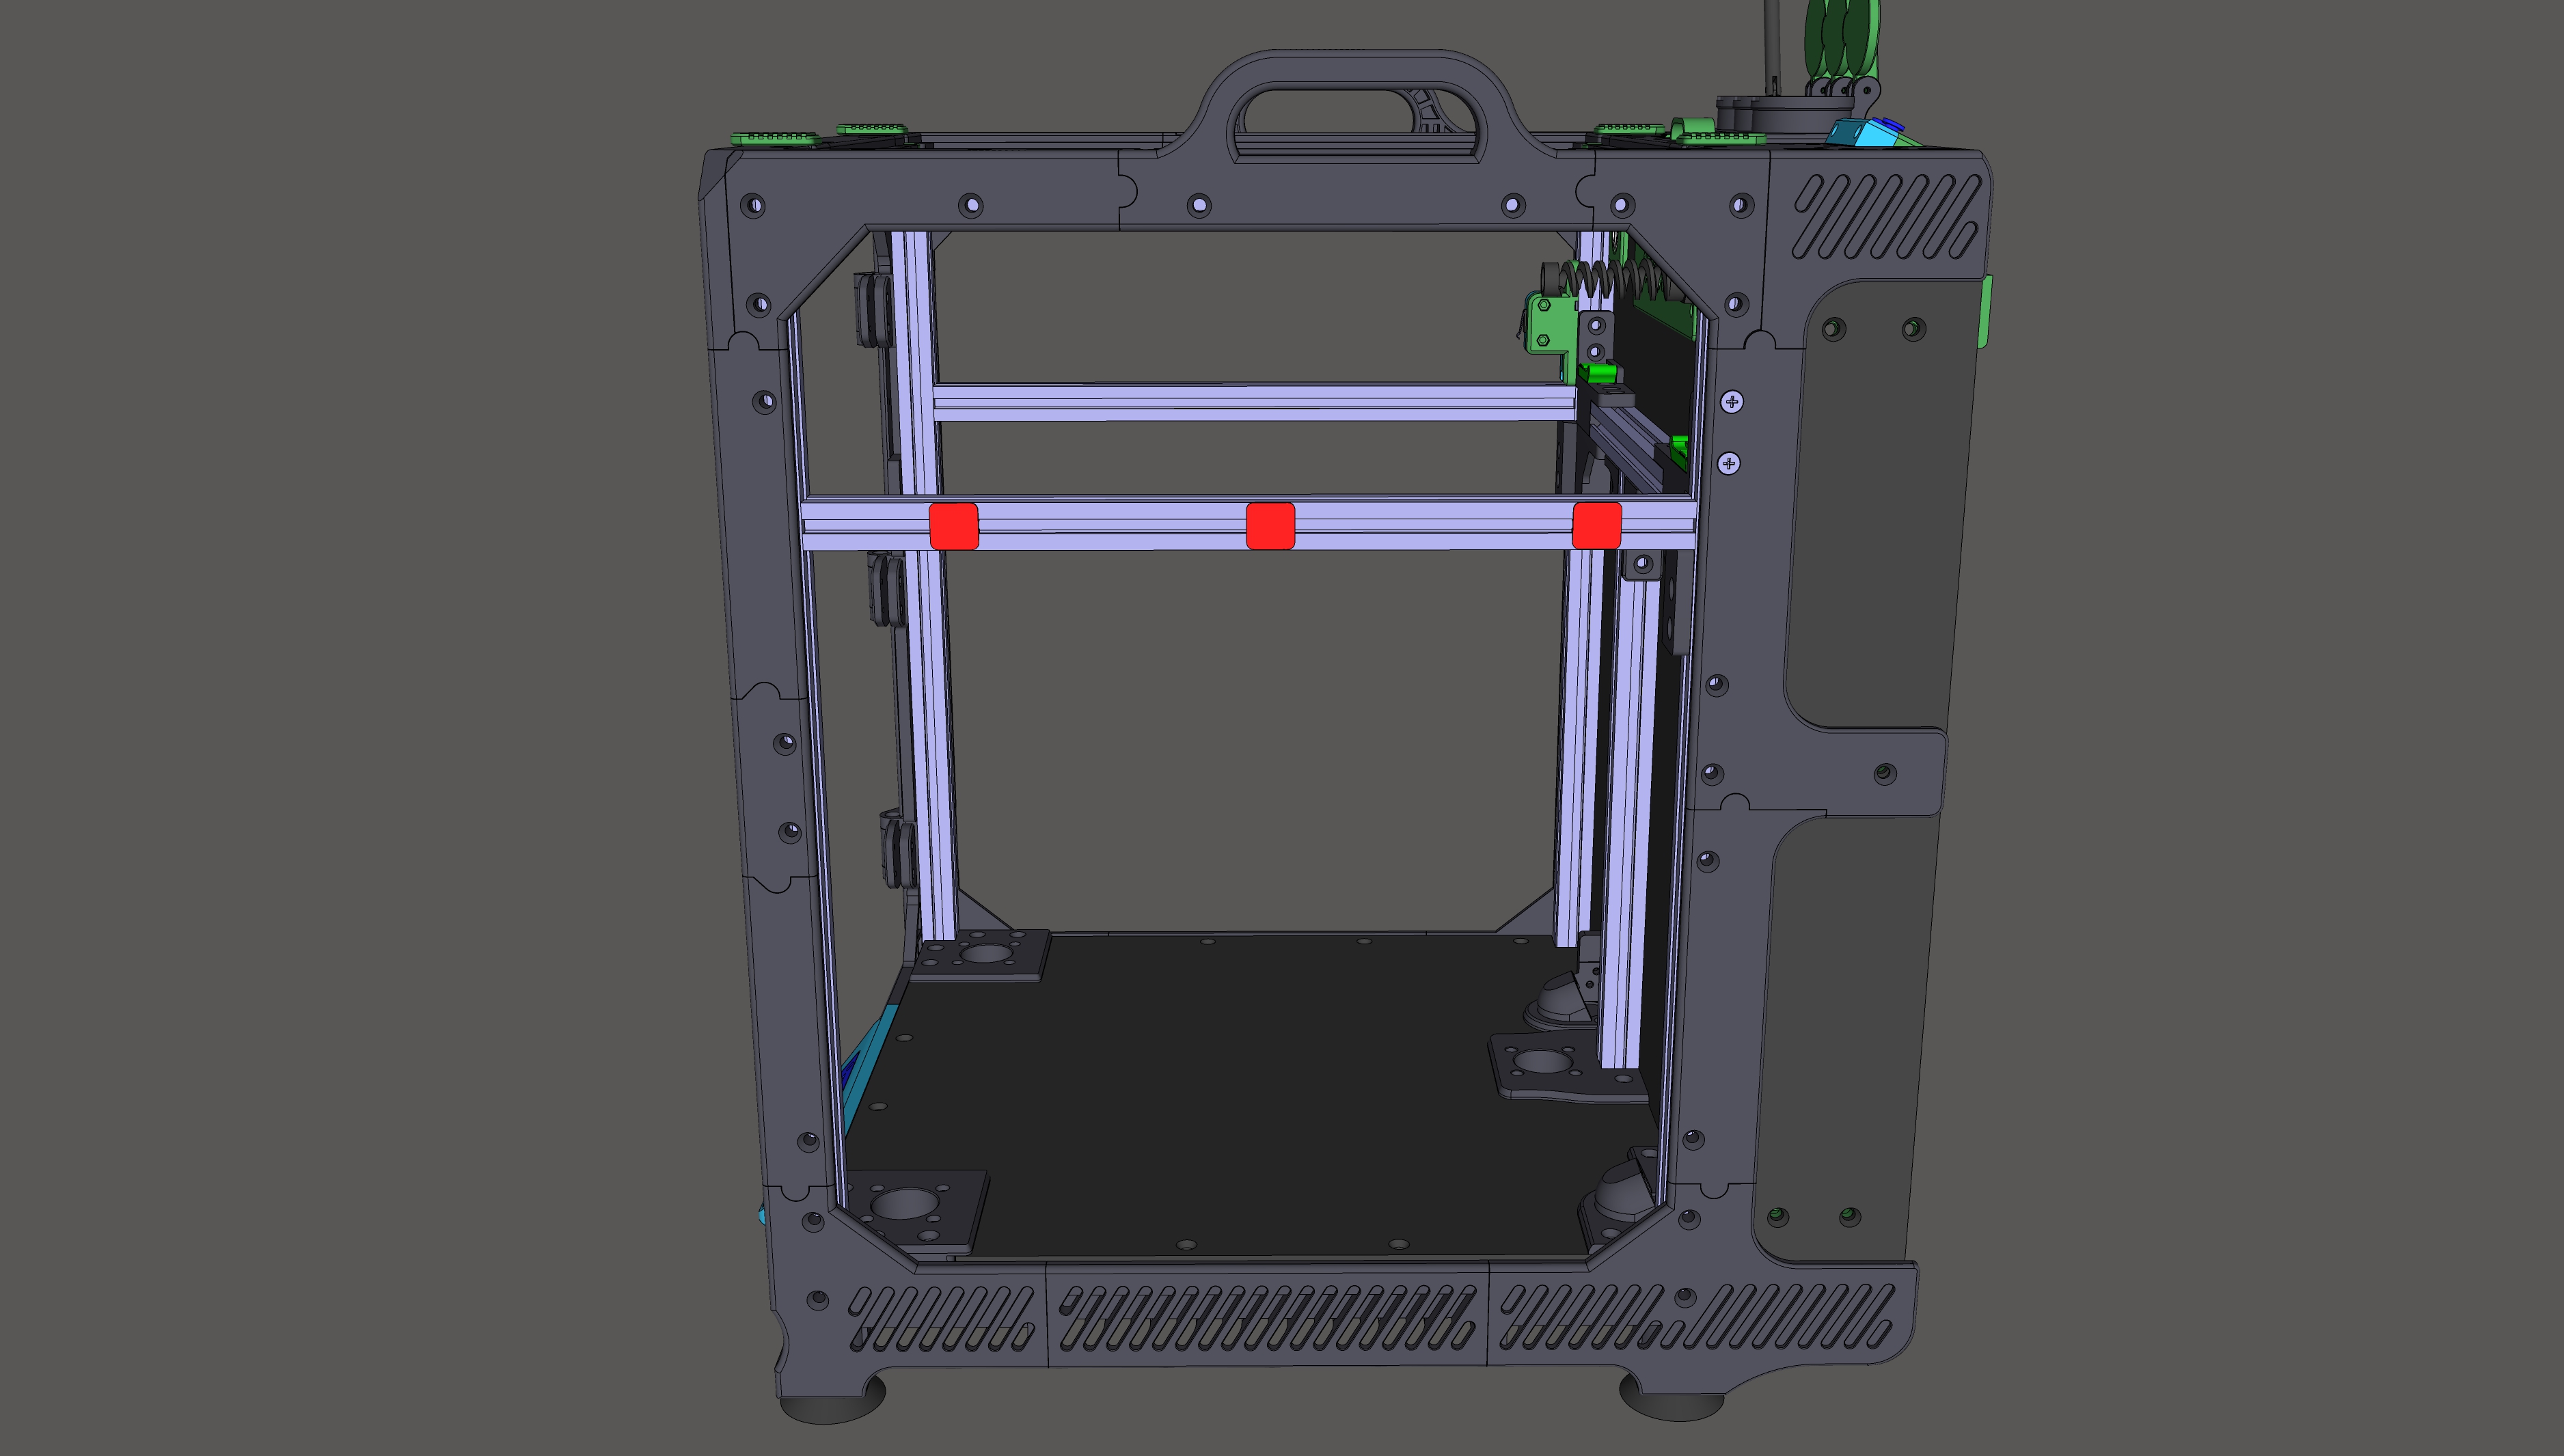
Back view on DIN_Clamps (shown in red):
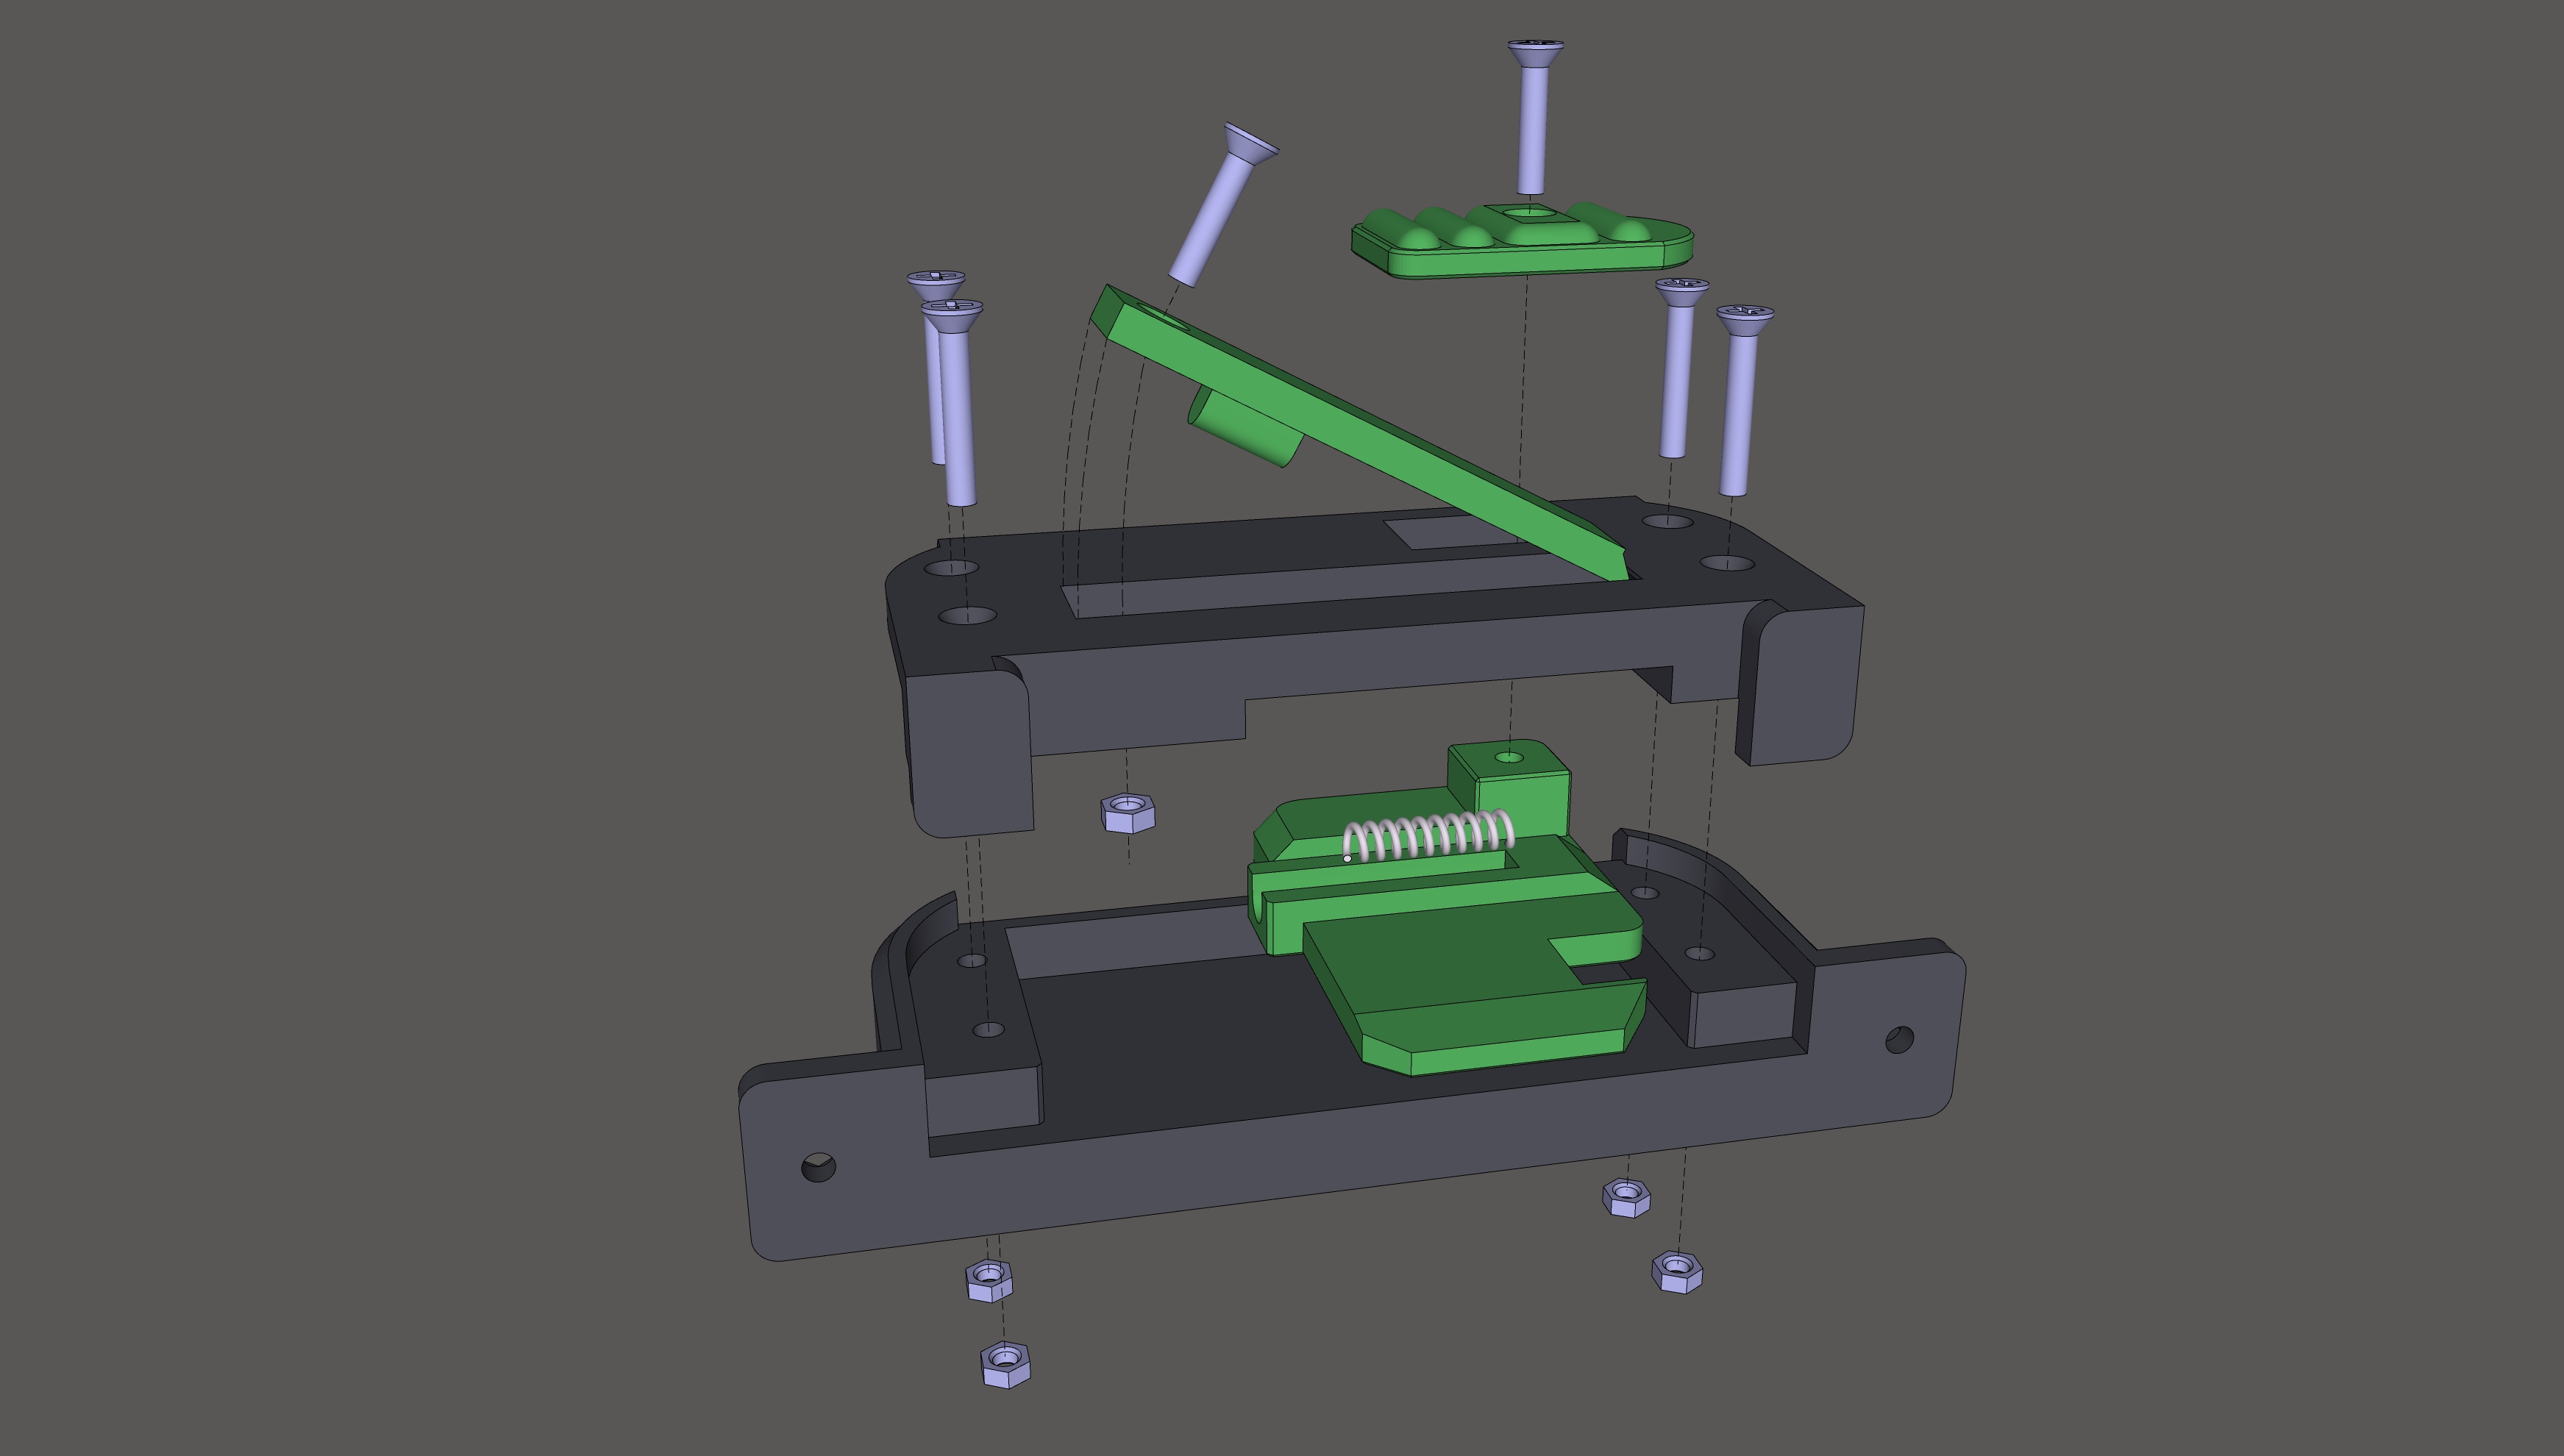
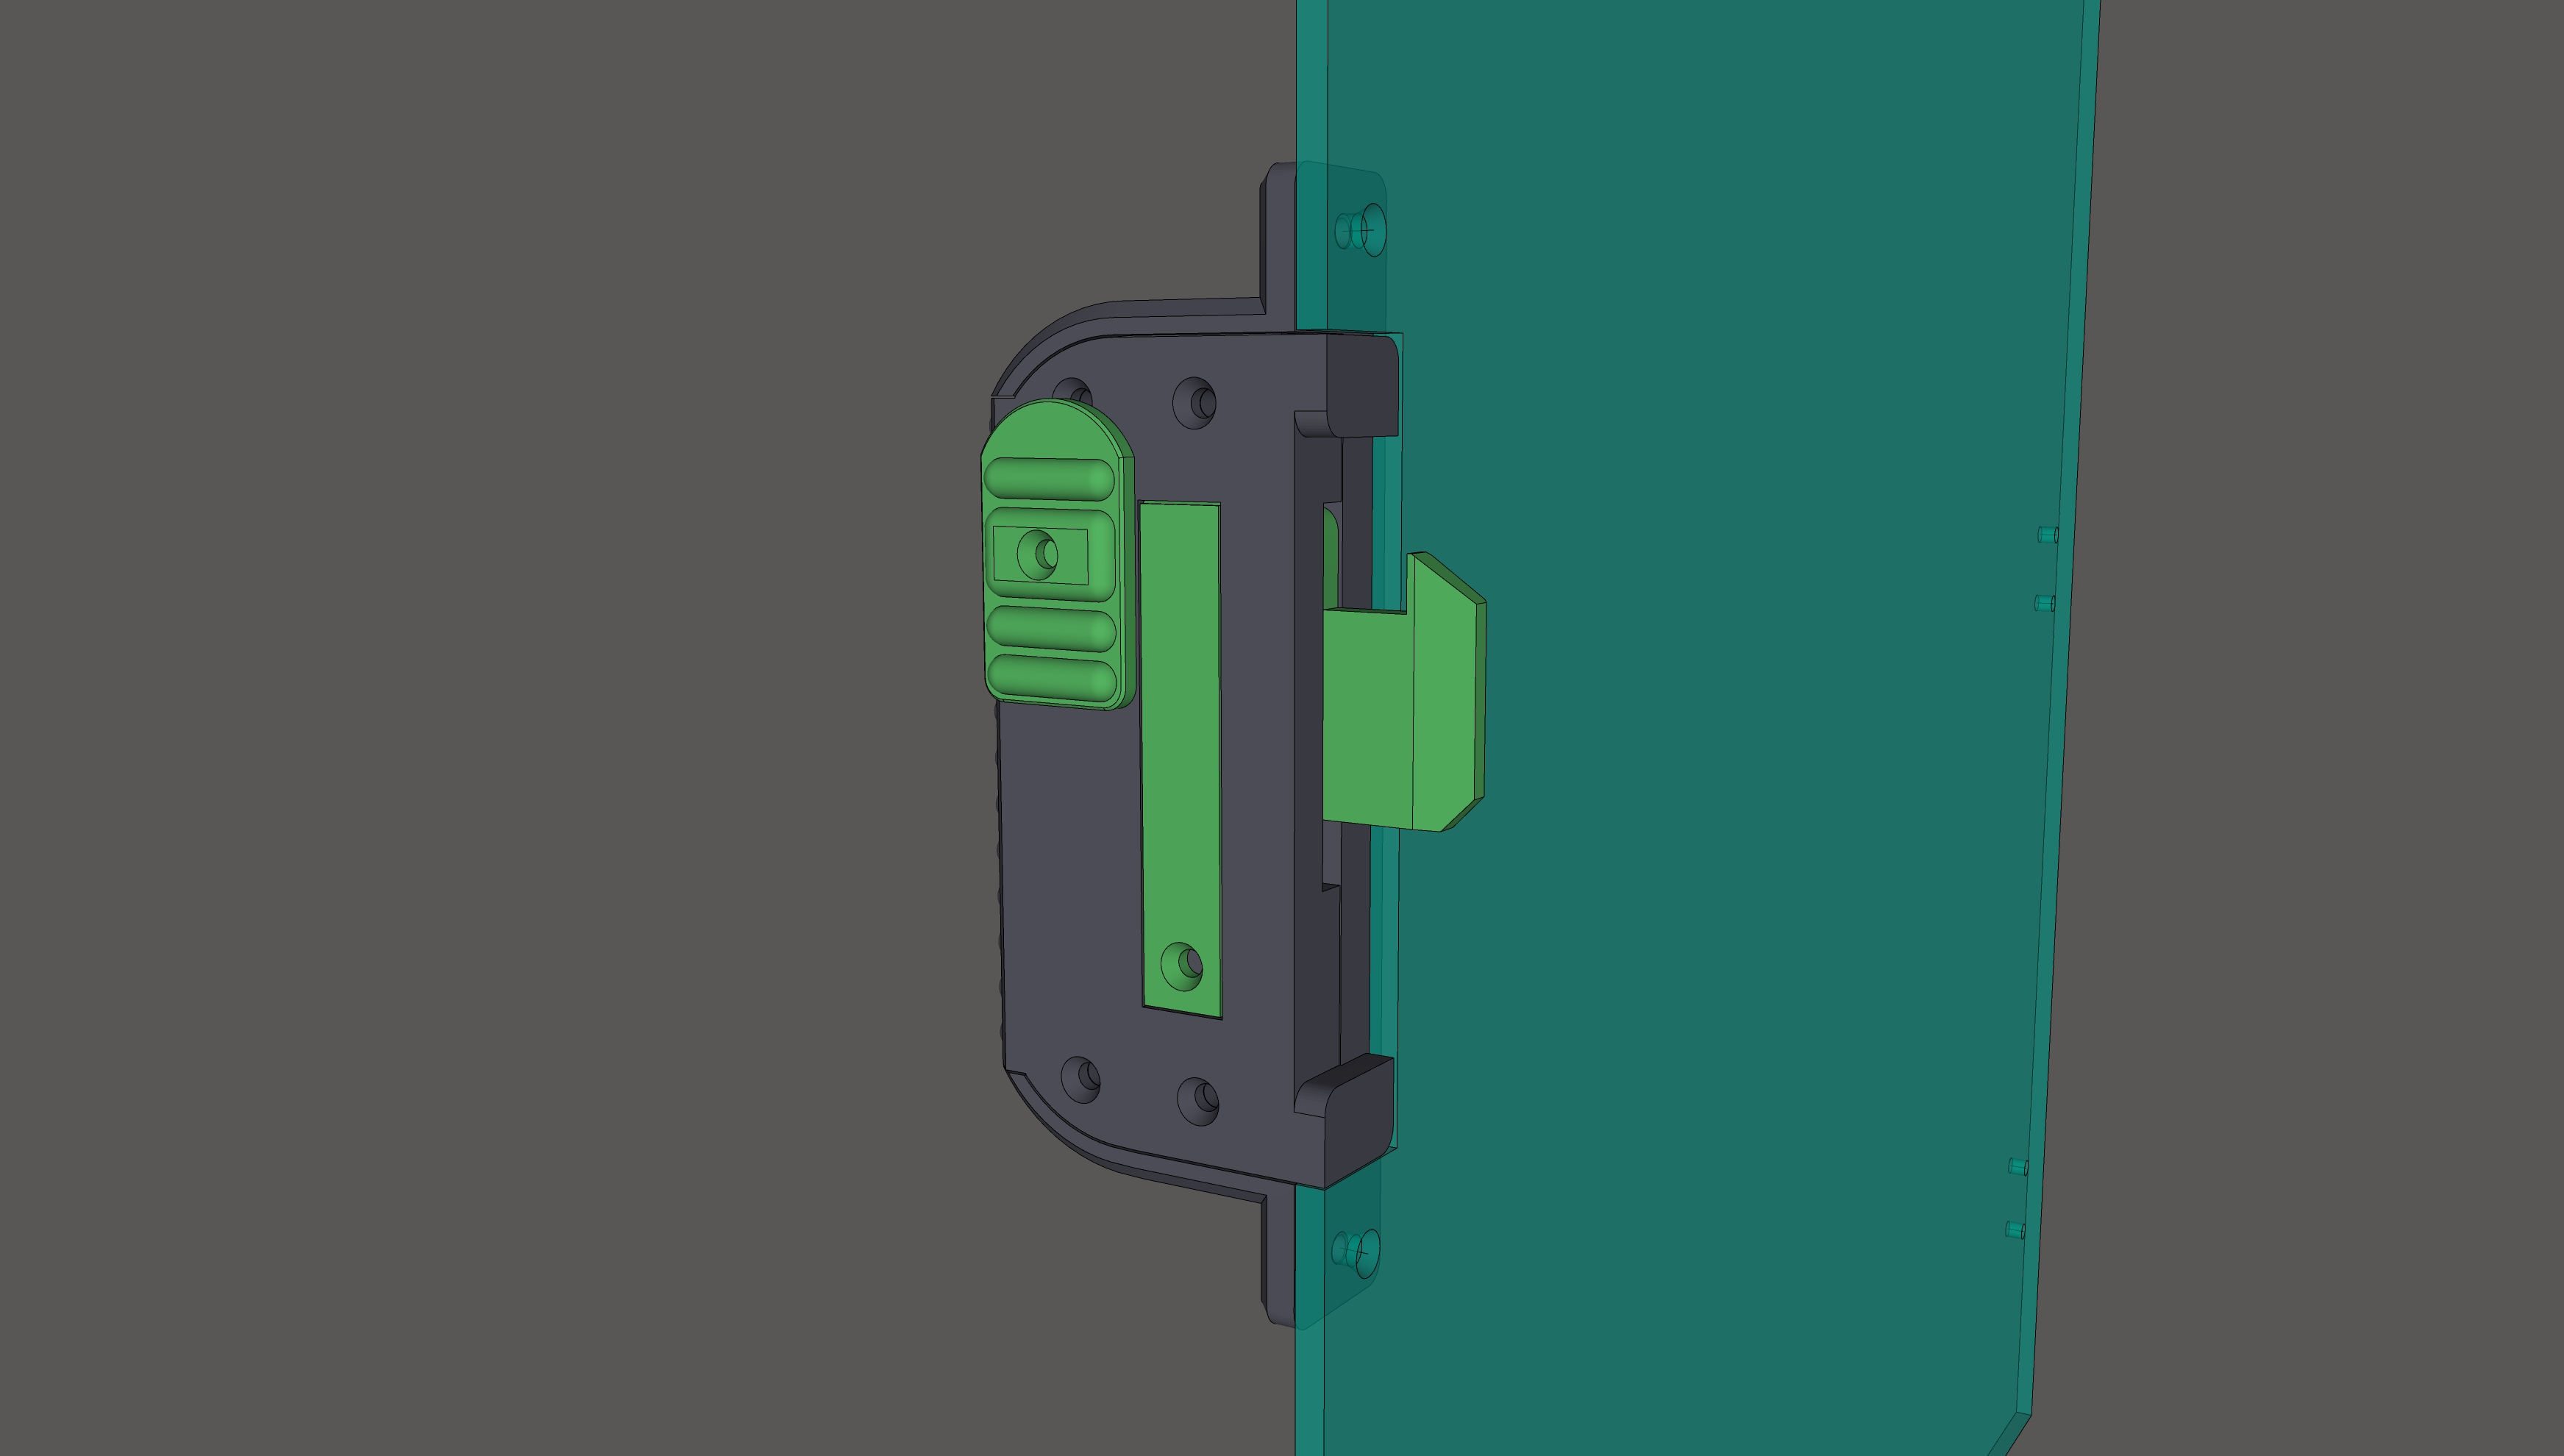
Door Handle assembly scheme:
- insert 6x M3 nuts and pen spring
(Stick foam tape on the opposing part on the frame (Doorl_Lock) - it will act as counter-pressure on the door hook and thus counteract vibrations)
Insert the prepared plywood sidewall panels and secure them with M5 30mm screws and M5 nuts:

Plexiglass distancers:
To allow more space between the aluminum frame and the plexiglass on the Y-axis for MGN9 carriages, install the following on both sides of the frame: Distancer_between_Plexiglass_and_Y-axis_profile.stl

Roadmap:
Drive Mount → Chassis Bottom → Chassis Top → Chassis Middle → XY Axis → Z Axis → Electronics → Extruder → Filament and Spool → Levelup Addons → PrusaSlicer → GitHub
Next Step is XY Axis with MGN Rails and Gantry…

