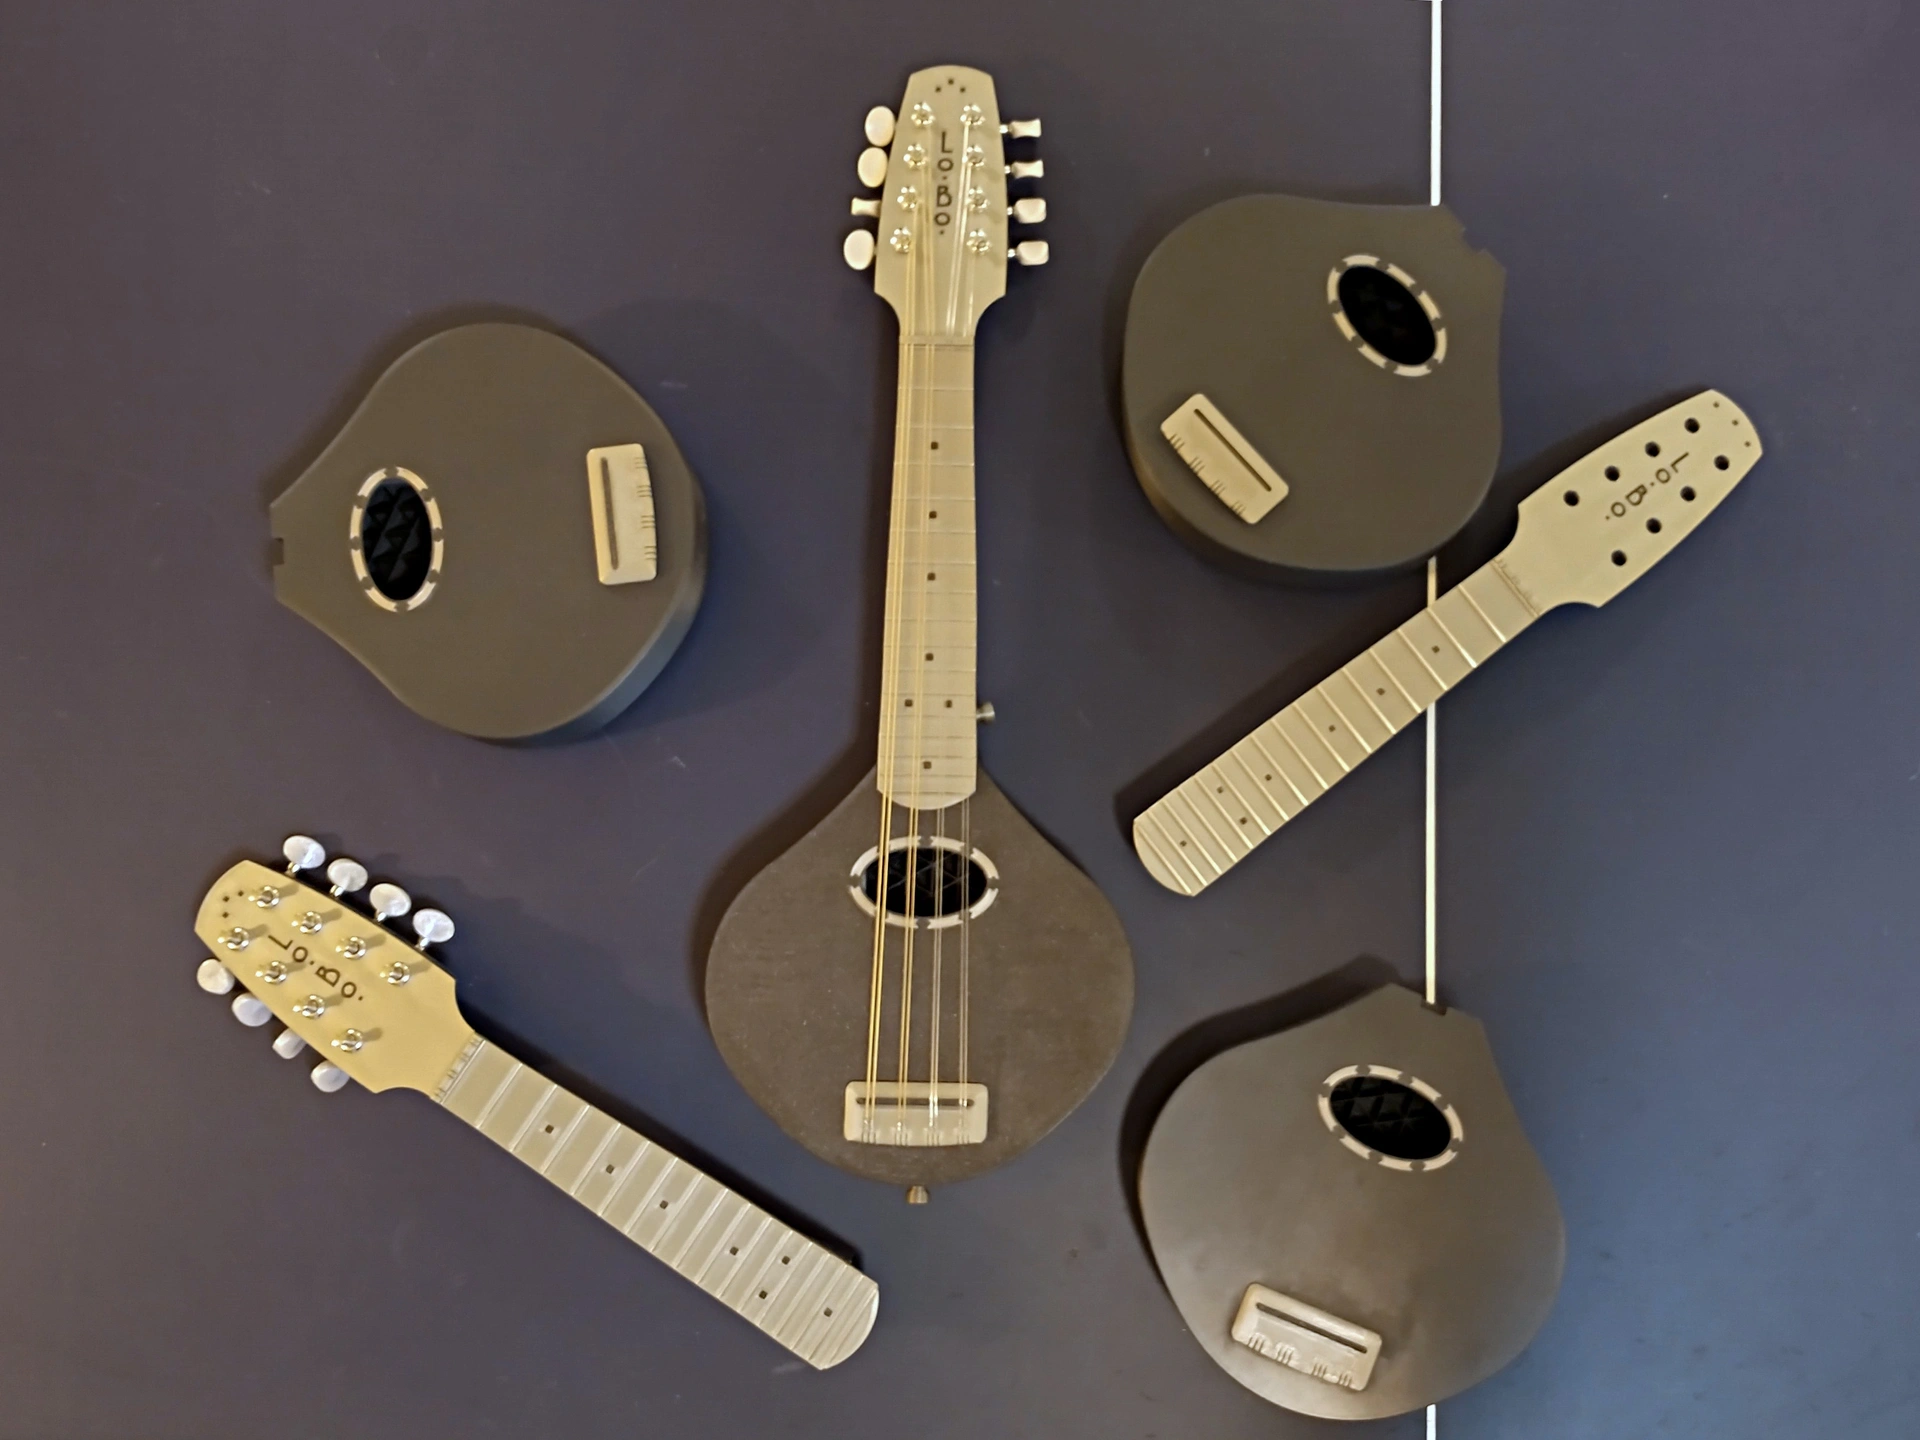
Steel-string mandolin
fab43zone

Mit KI Ähnliches finden


Druckprofil(0)
Modelldatei(0)
 0
0 0
0 0
0
Veröffentlicht:2023-12-16 03:12:18
0
0
 000
000
*** Additional reinforcements have been added to improve stability. ***
I'm making a steel-string guitarsteel string guitarI achieved great success at that time, but it required a huge printer. For those who want a more manageable-sized project, I decided to try making a mandolin. For any plastic instrument with steel strings, the main problem is the huge string tension required - the total tension of this mandolin is about 150 pounds. It not only can't collapse when the string tension reaches its maximum, but also can't gradually deform over time. In this updated version, I added aluminum strips to the reinforced part of the soundboard and also added aluminum reinforcement strips to the neck
Another important challenge was to create a soundboard that could fit on the print bed
The final challenge was to create a lightweight but sufficiently strong soundboard to achieve good projection. I kept the thickness of the soundboard very thin
The additional parts needed
6-32 x 3/8 inch screws
8-32 - ½-inch screws
One ¼-20 x 1.375-inch hexagonal head bolt for a bolt-type neck
¼-inch x 0.55-inch outer diameter washers
¼-20 screw cap
An aluminum sheet 1/16 inch thick
SimilarThis kind ofA range of straight-leg jeans
The tuning keys have a spacing of 25mm, which is similar toThese
Strings: 10-34 lightweight 80/20 strings, wound ends
2 parts of epoxy resin, with a curing time of 30 inches or longer
Selection of consumables
I initially used Sunlu carbon fiber PLA for printing, because when I printed a guitar years ago, the CF PLA filament I used significantly increased the stiffness. However, after printing several versions of this mandolin, I determined that Sunlu CF PLA did not add any additional stiffness, strength, or resistance to deformation. In the end, I reprinted using standard PLA, which likely produced better results. However, some enhanced CF filaments
Regular PLA is one of the toughest non-reinforced materials, but unfortunately, its heat resistance is low. Therefore, you should not leave your mandolin in a hot car, nor should you expose it to direct sunlight. I also recommend loosening the strings when you're not playing for a while to reduce the likelihood of deformation in the plastic parts over time.
Print
Due to the load, all components have very specific printing settings
The backboard, topboard, and headboard all require some special operations:
Headboard:It consists of the board itself and color-contrasting inlays printed separately using printing technology. First, a 2-layer thick inlay is printed in one color, then the consumables are replaced, and a second printing job is started to print the board itself on the inlay. However, between the two printing jobs, the motor and heater must remain on after the inlay is printed, and the homing and print bed leveling must be prevented before the headboard printing starts. The .3mf file I provided has modified the start and end G-codes. Simply start the inlay printing, and when
Back panel:The backplate is actually a single object consisting of two separate parts, namely the backplate itself and a separate object that serves as a lattice reinforcement. The solid part of the backplate has a set of printing parameters, but the reinforcing part uses zero wall, zero top layer, and zero bottom layer printing - only infill
Top board:The top board not only has the same printing laminating inlay technology as the headboard, but also has the same multi-part lattice reinforcement as the backboard. Just print the top inlay first, replace the consumables according to the prompts, and then print the multi-part top board object.
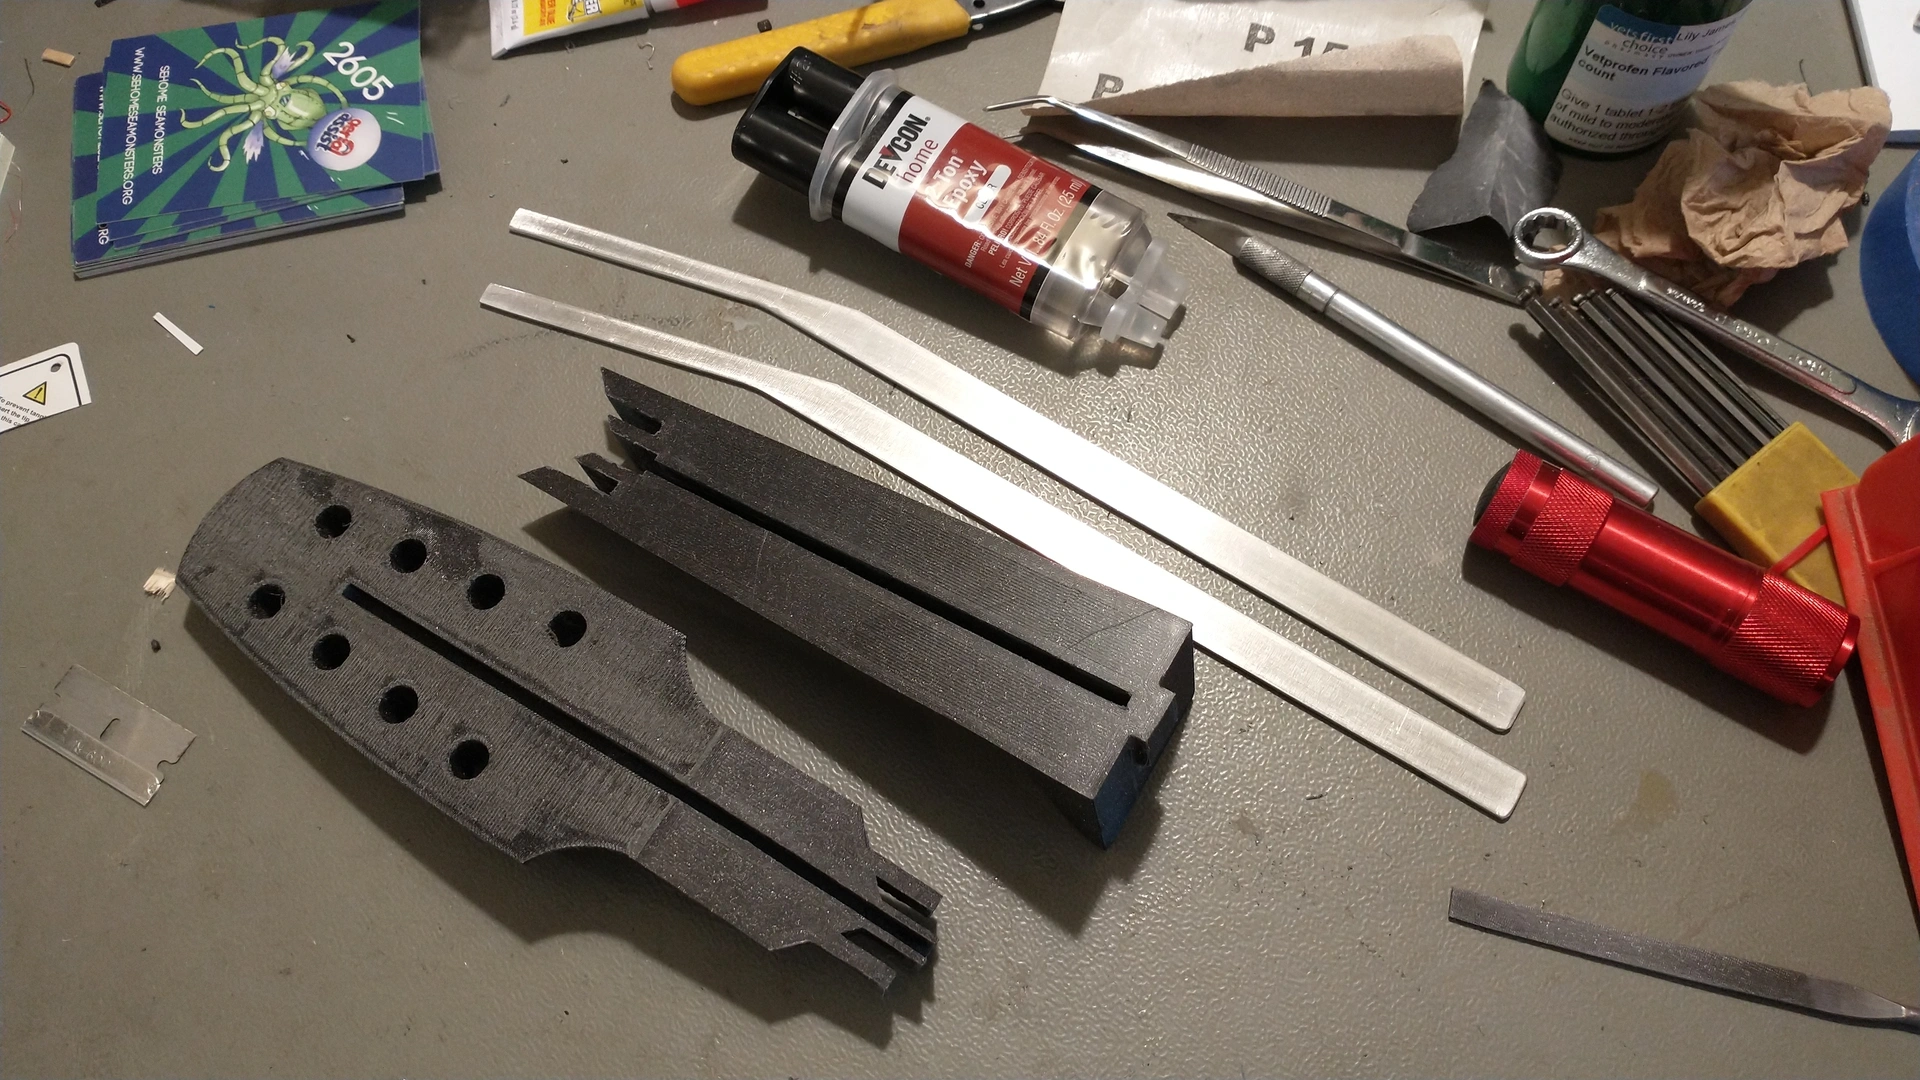
Manufacturing of aluminum reinforcement components
The layout of the aluminum reinforcements is in the attached BRACING.PDF file. You can cut the aluminum sheets with woodworking tools
Assemble
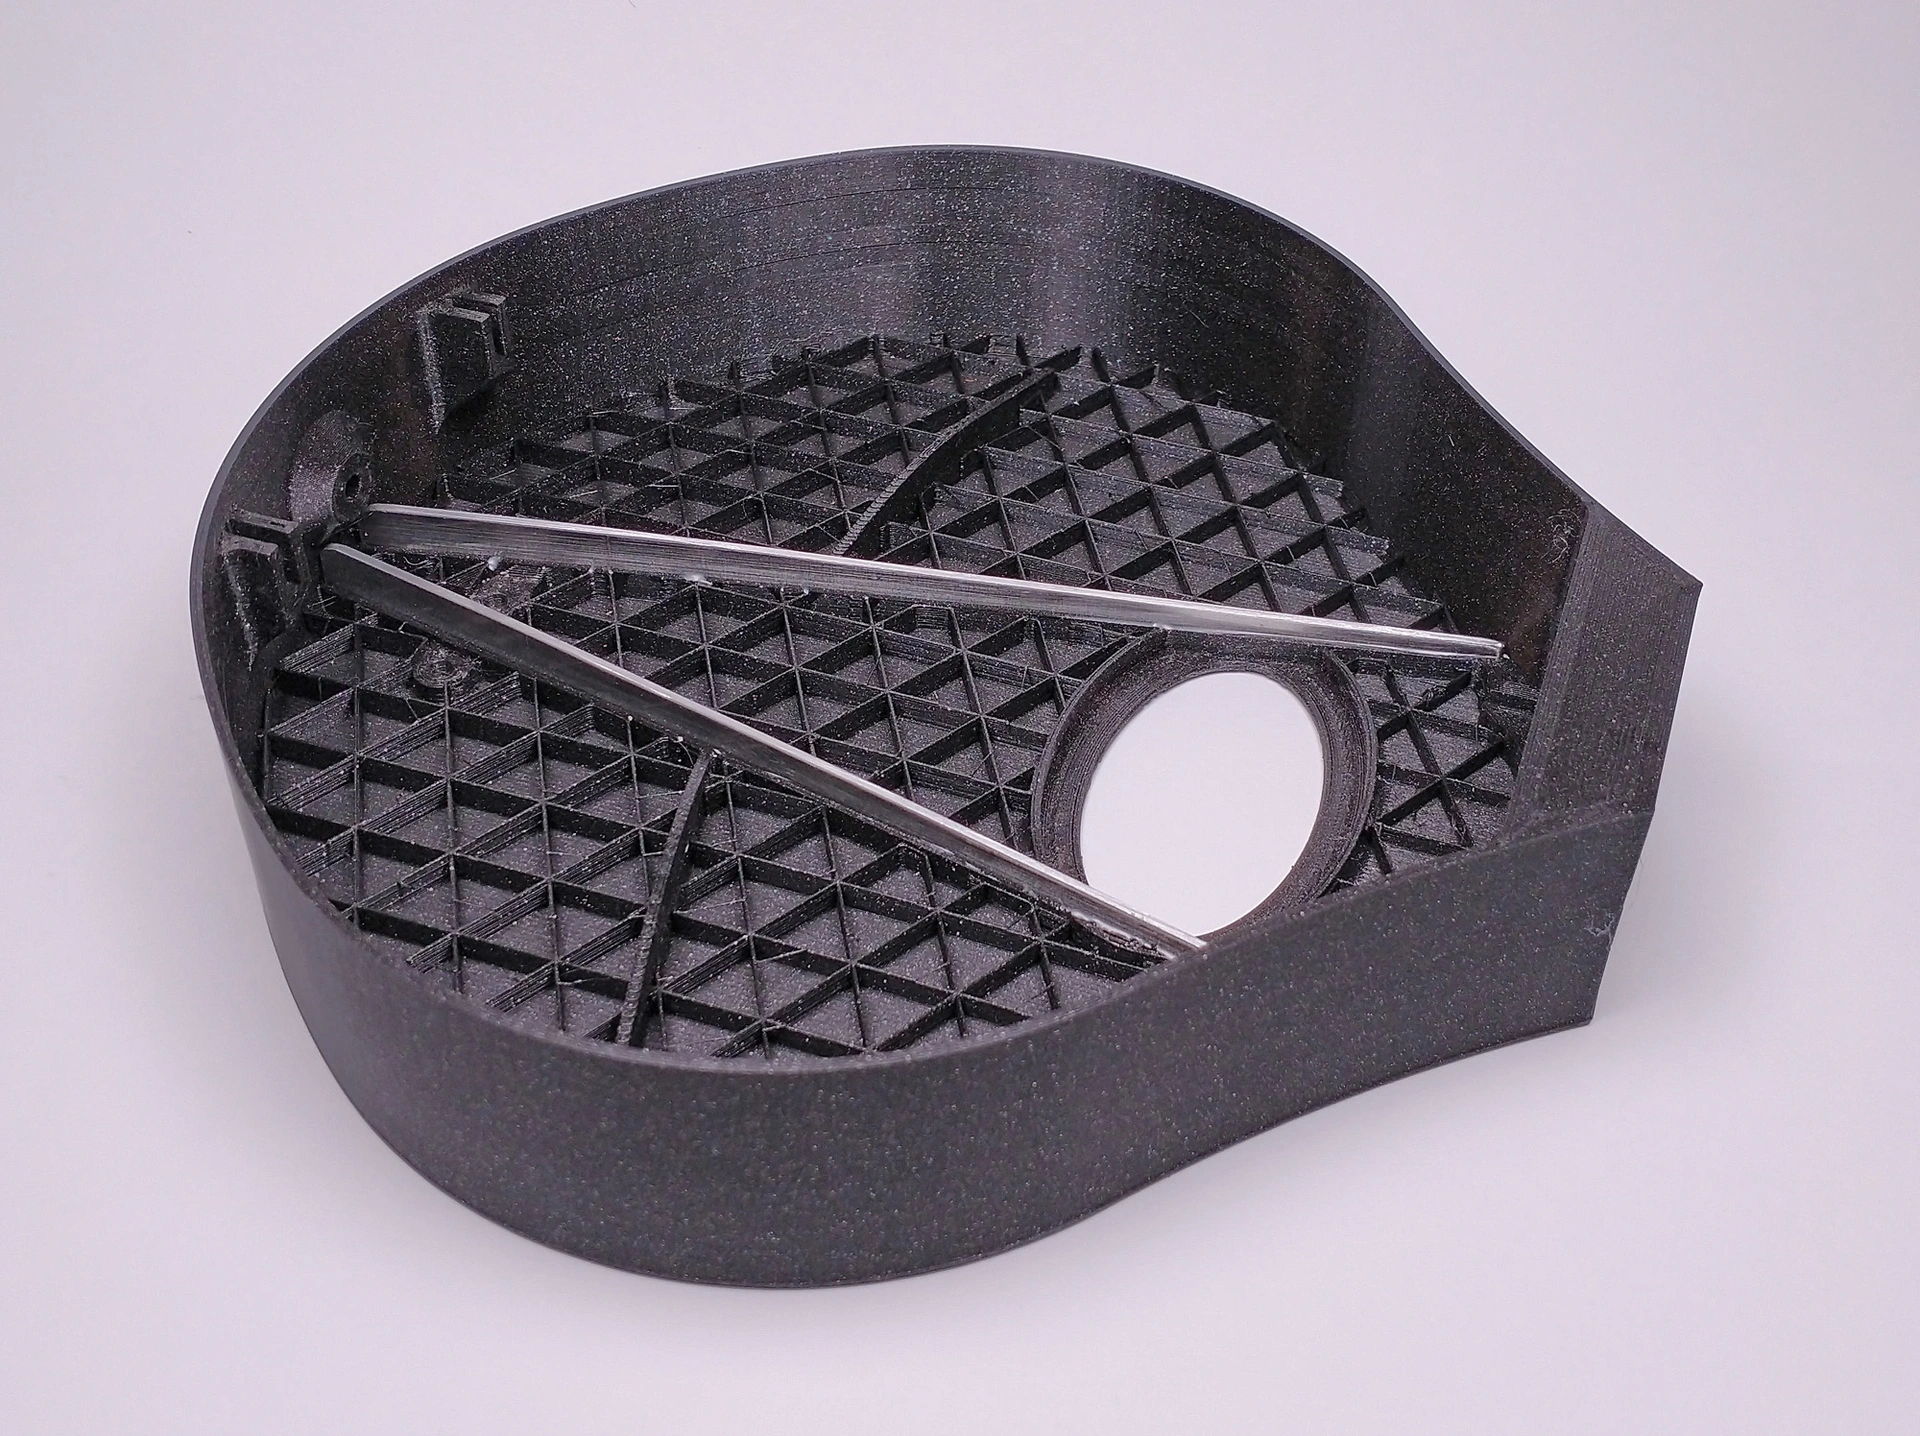
1. First, attach the aluminum reinforcement strips to the underside of the soundboard with epoxy resin. It's best to apply the glue to the reinforcement strips and then press them into place. If the grooves are filled with glue, it will be difficult to squeeze out any excess glue when inserting the reinforcement strips. Before the epoxy resin hardens, you can use isopropanol to remove the excess epoxy resin.
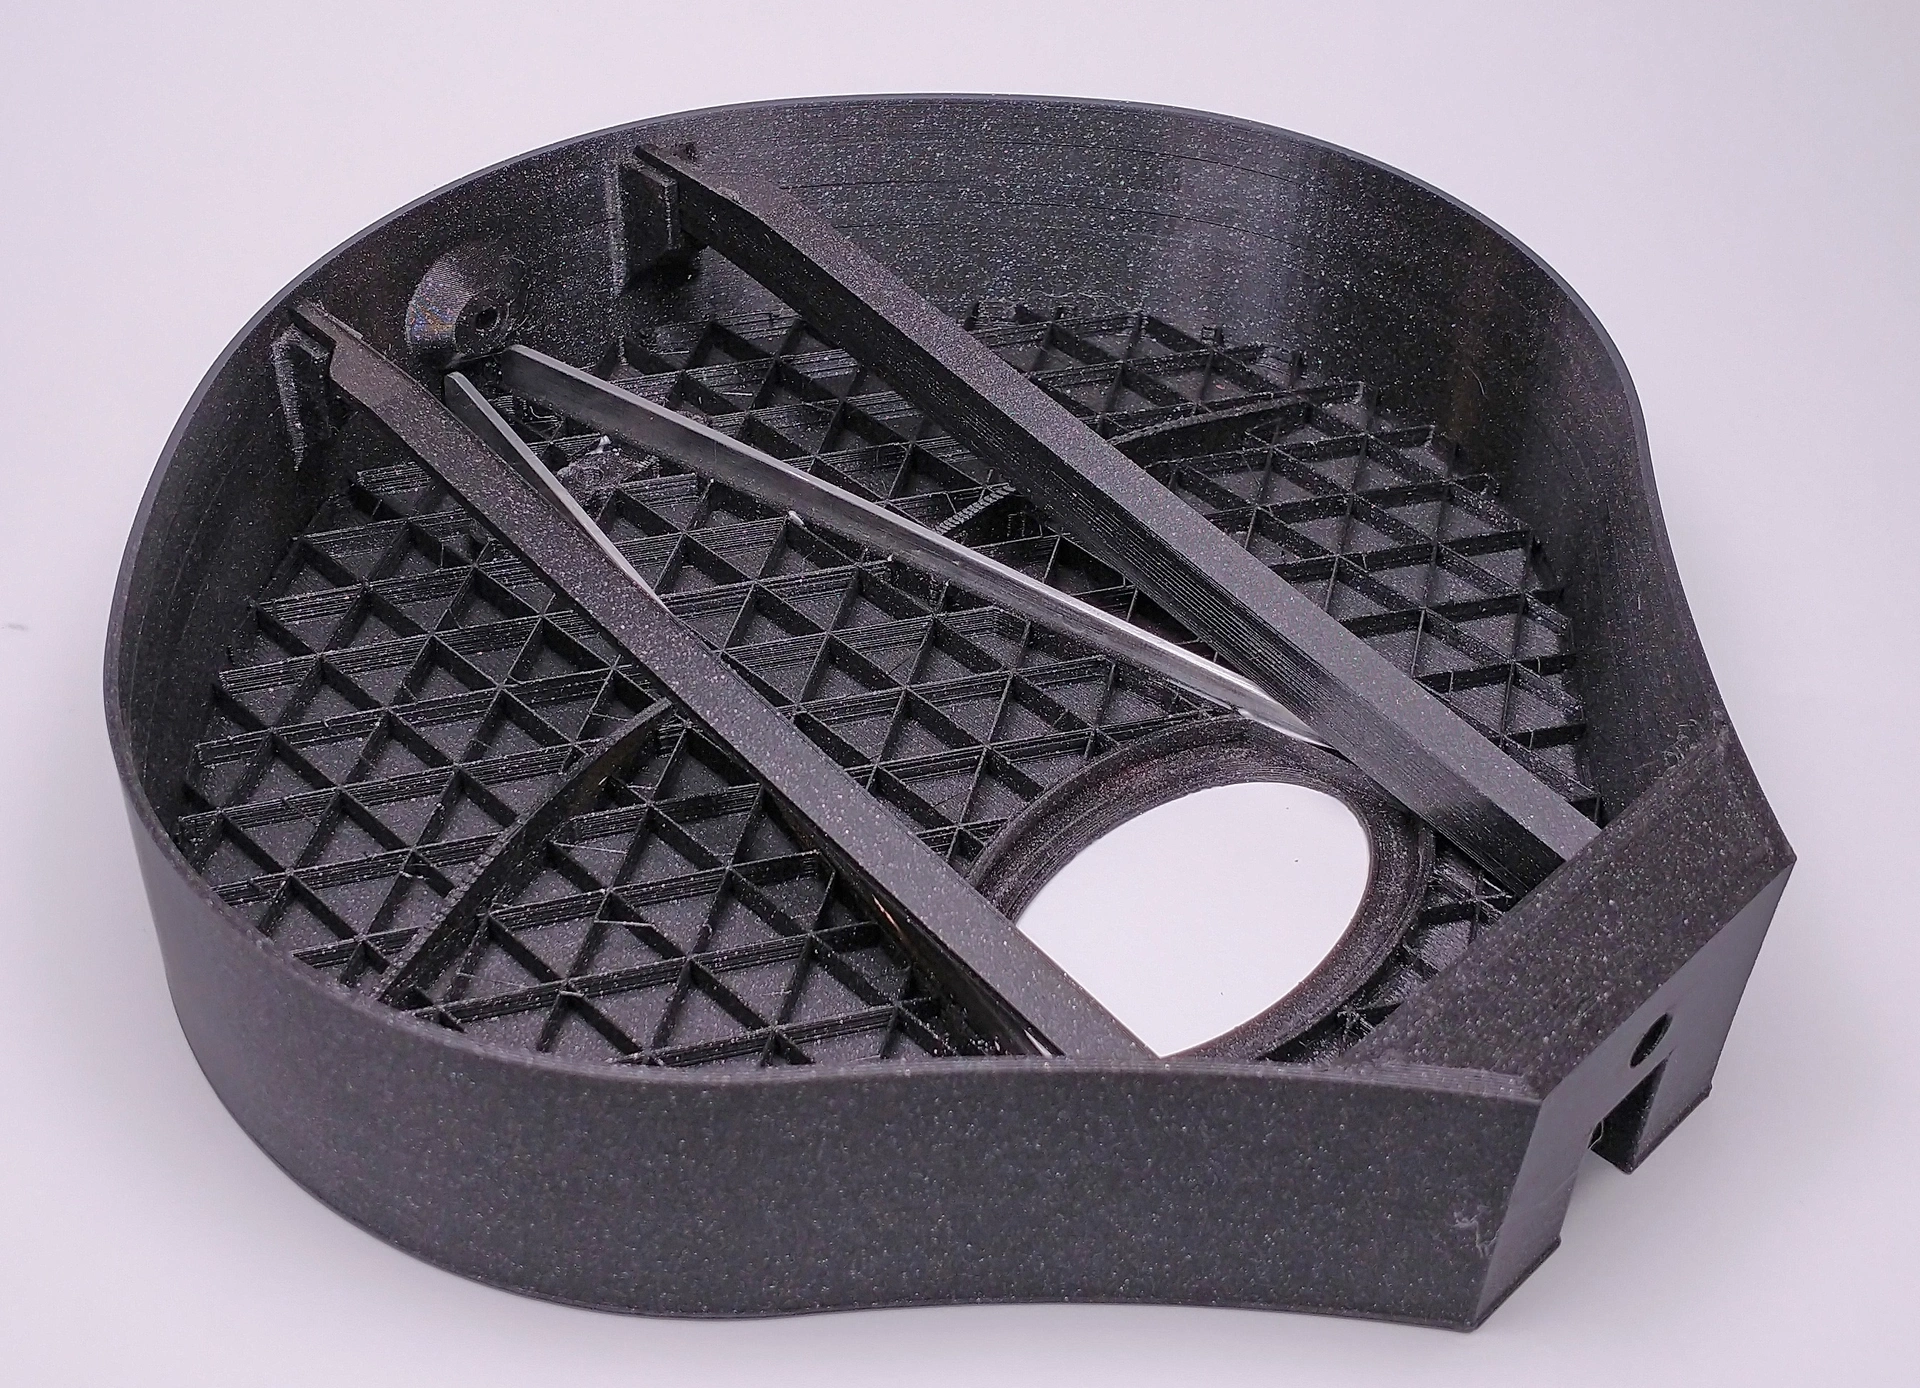
2. Next, stick the support rods in the appropriate positions according to the diagram. Make sure to assemble the support rods and back parts first, ensuring that they fit well together.
3. Next, use three 6-32 screws to fix the bridge on the guitar surface, but do not apply glue. After placing the bridge in the appropriate position, use tape to cover the area near the bridge for glue application. Remove the bridge, apply a thin layer of epoxy resin, and then fix it in place with screws. Wipe off any excess glue and remove the tape before the epoxy resin solidifies.
4. Cover the edges of the top board and the edges around the backboard. Apply epoxy resin to the inner lip of the backboard and the flat part that connects to the body of the guitar. Wipe off the excess glue, then remove the tape covering the glue. Before the epoxy resin solidifies, use several
5. Use epoxy resin to attach the dots on the fretboard to the fretboard. Use a Dremel to cut the frets to the required length
6. Remove the support rods of the neck head and polish the top surface smooth.
7. Paste the two reinforcing strips side by side into the groove of the neck rod. Make sure that the top edge of the reinforcing strips is not higher than the flat fretboard mounting surface or the head surface.
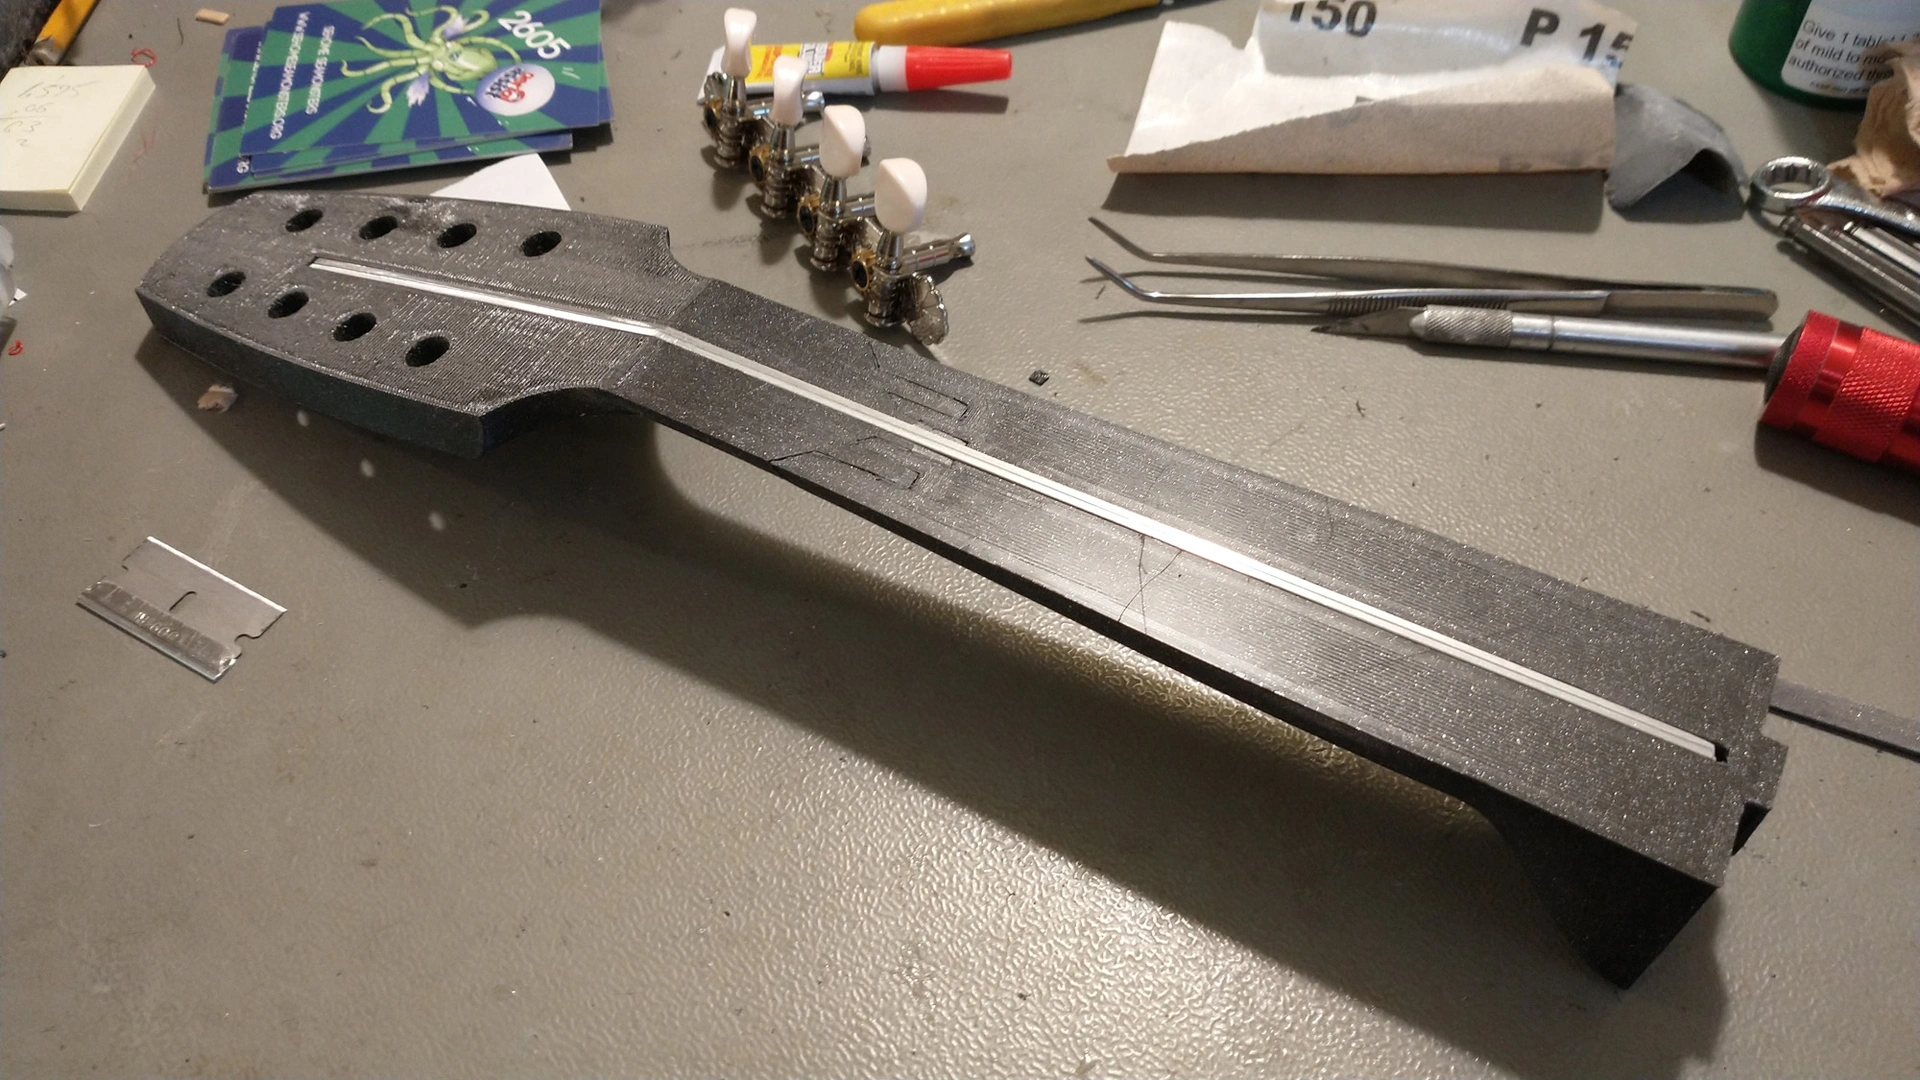
8. Attach the head plate to the head with epoxy resin, ensuring that the tuning pin holes are completely aligned. You can insert the tuning keys into the tuning pins as needed to ensure that the holes are aligned.
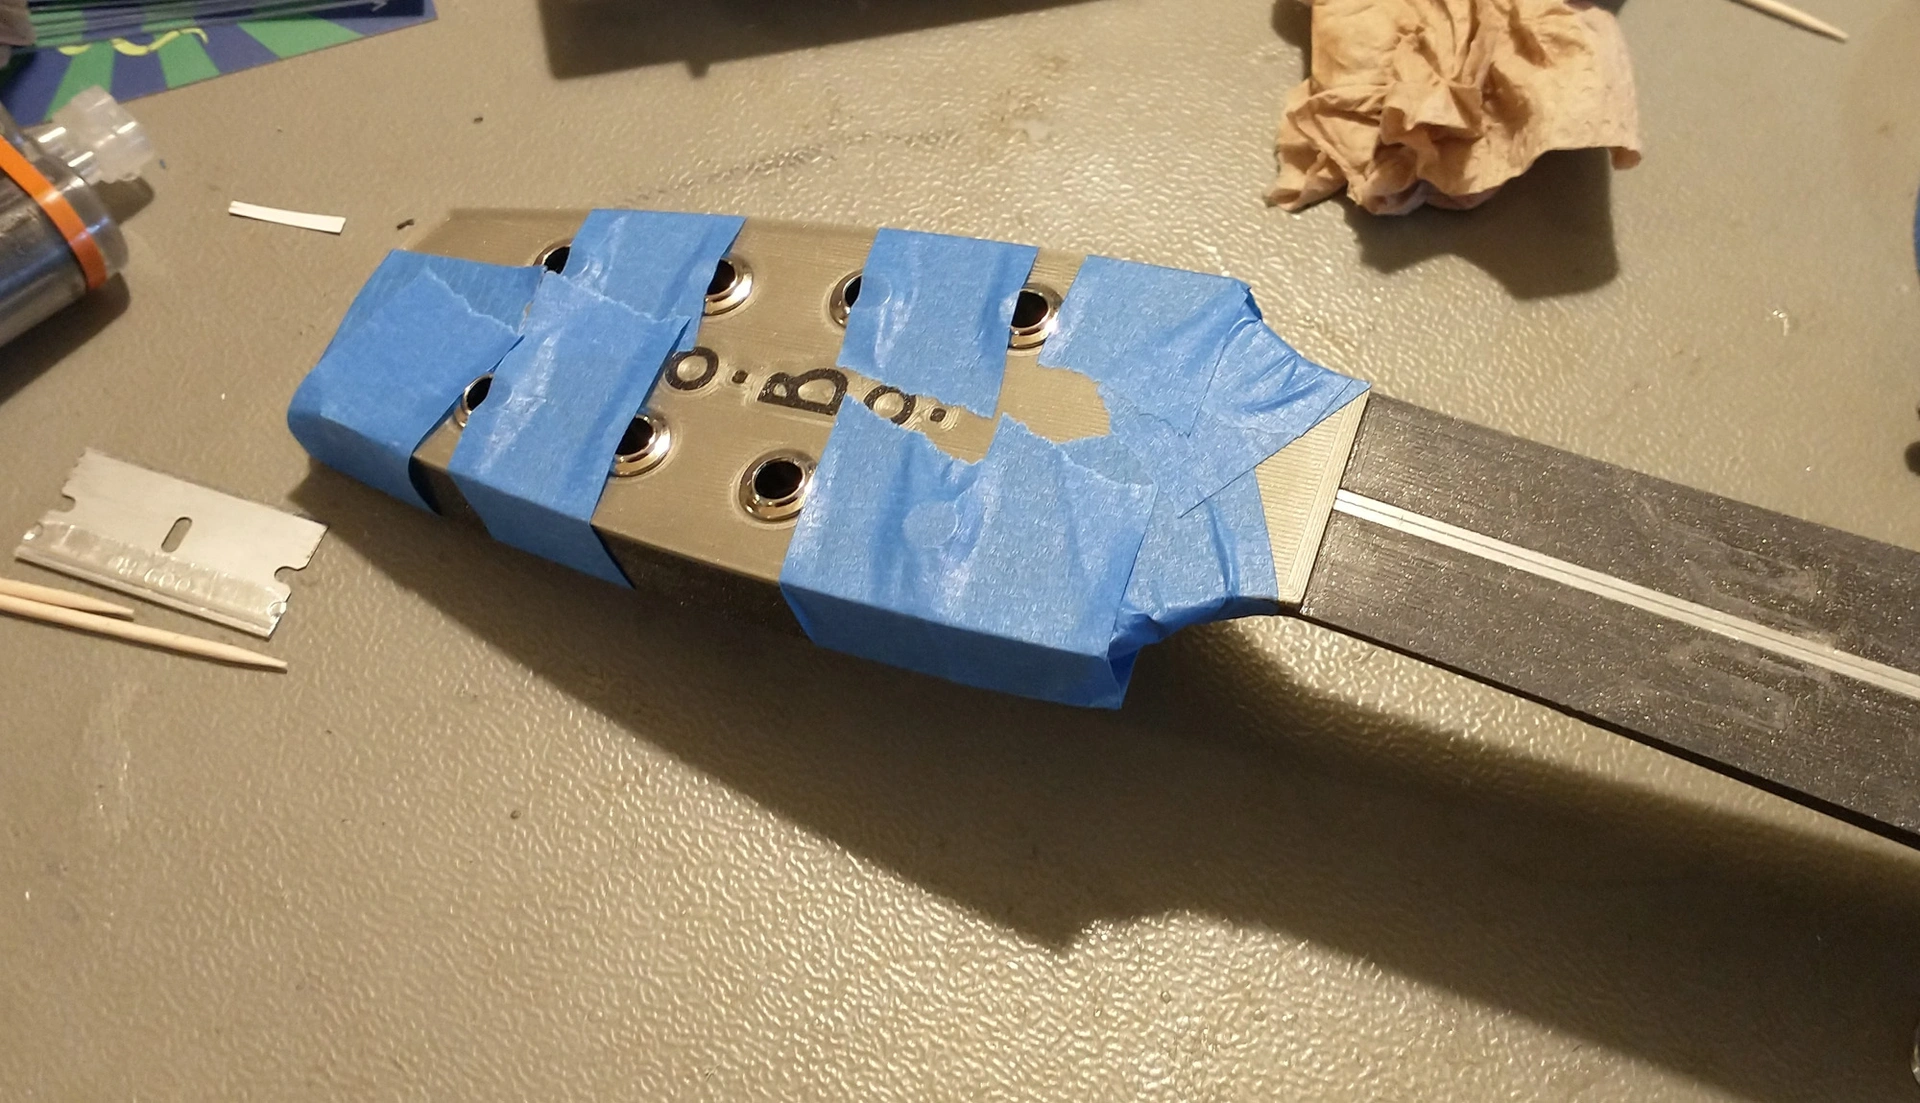
9. Use epoxy resin to stick the fretboard to the neck, and cover the adjacent areas as described above. The fretboard should be tightly connected to the headboard.
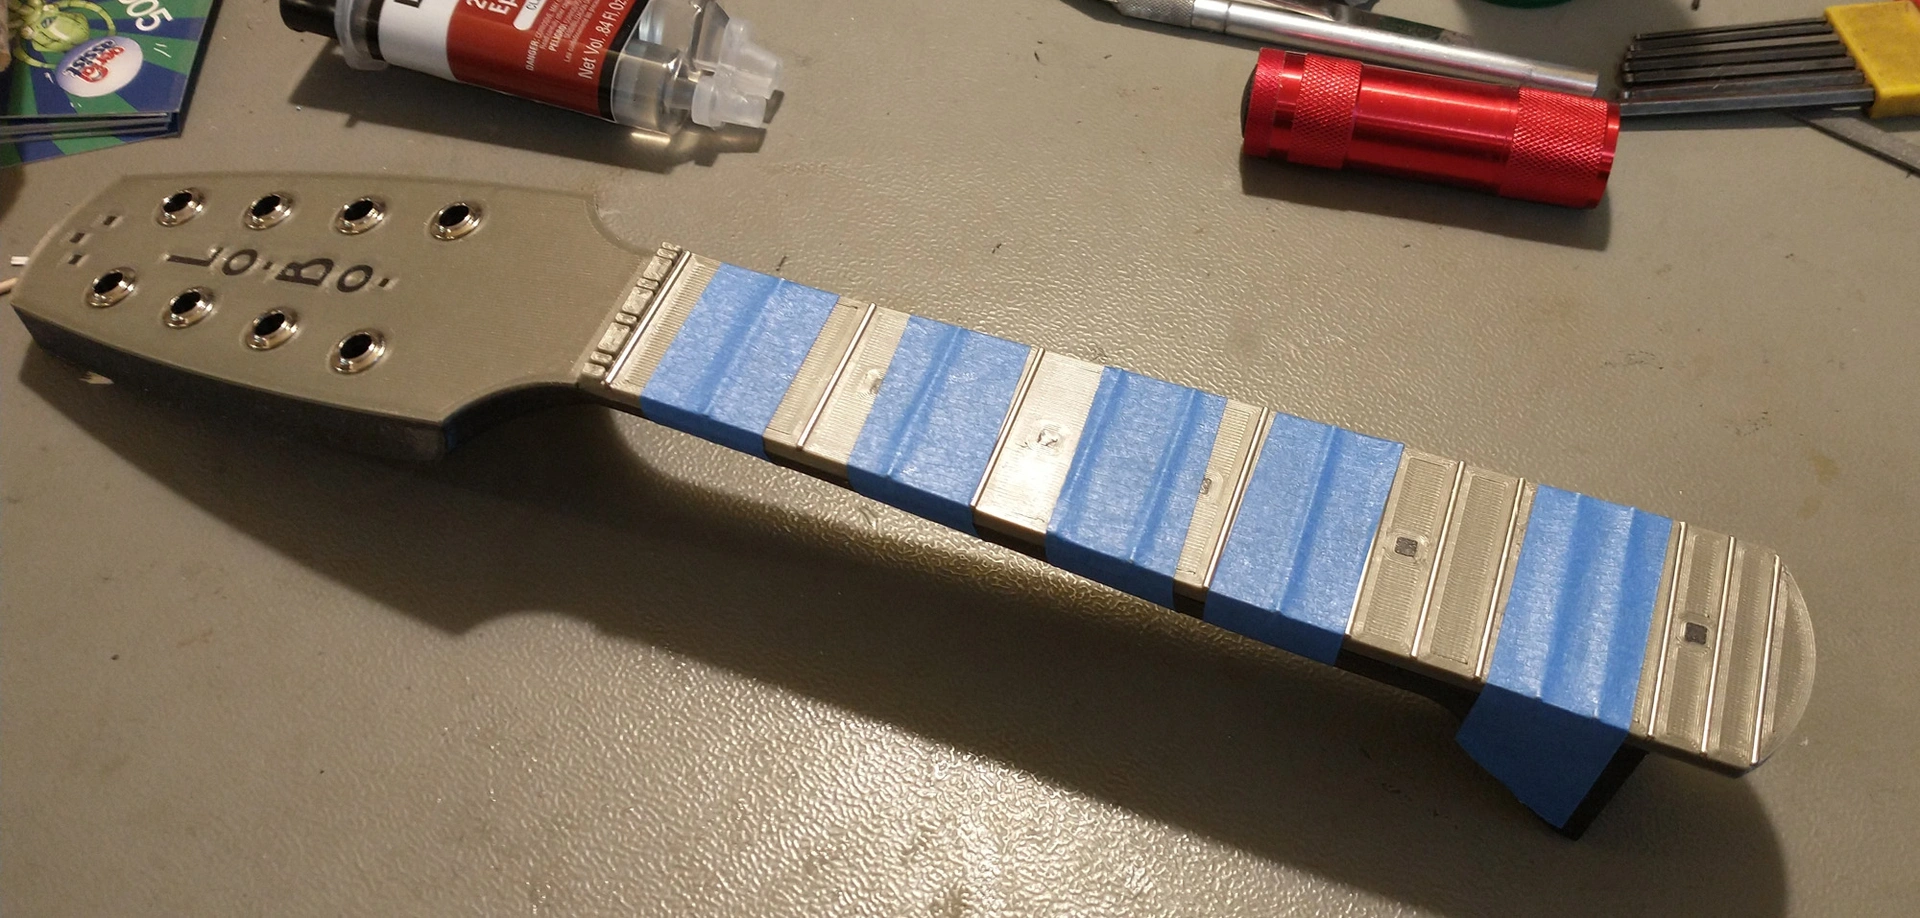
11. Use ¼-20 bolts and nuts, as well as one washer on each side, to bolt the neck to the body. It's a bit tricky to put the nuts in through the sound hole, but it will help if the neck mating surface is facing downward. You'll need a ¼-20 open wrench to secure the nuts through the sound hole, while tightening the bolts with an Allen wrench.
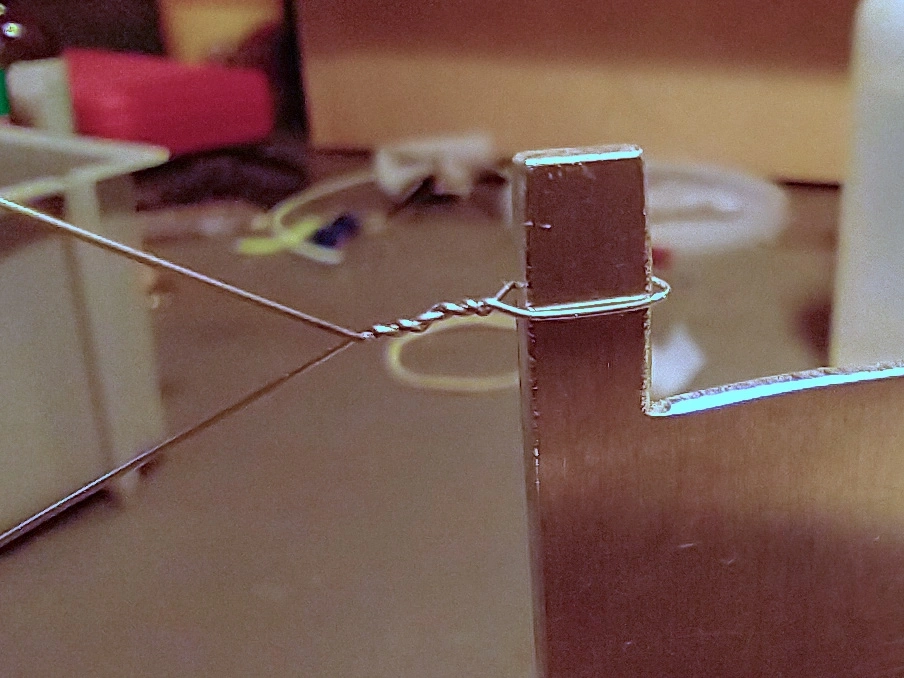
12. Strings. The bridge of the guitar is designed to wrap around the end of the string, but it turns out that most strings' wrapping ends are too long and interfere with the saddle. What I did was to form my own shorter wrapping end at the other end of the string, and then cut off the original wrapping end. To help form the wrapping end, I used a mandrel with a width of 1/16 inch and a depth of 0.25 inch, and twisted the wire together before winding it on the mandrel. For safety, I also welded the twisted parts.
At this point, you can insert the saddle and then tune it. If the action is too high or too low
Wish you a pleasant time playing the piano!
Now, if only I could play the mandolin...
Finally, the crematorium: