
Elegoo PHECDA Cable Chain V1.1
NoahReid

Mit KI Ähnliches finden


Druckprofil(0)
Modelldatei(0)
 0
0 0
0 0
0
Veröffentlicht:2026-03-13 03:22:46
0
0
 000
00005.06.25 a small Fix
a small update on the chain links has been done, when compiling the 3mf file I have inserted a wrong part which leads to the chain levering out at the end. Error has already been fixed and all files corrected.
Here I have constructed a cable chain for my PHECDA laser. I have been testing it for one year now.
To ensure optimum and smooth running, you should replace the original hose with a 6 mm silicone hose.
The 3mf file already contains all the parts in the correct quantity, but here is a list:
1x the Arm
1x the End
1x the Spacer
19x Chain link
10x 10cm Cable ties
3x 12mm M3 Screws
2x 10mm Plastic screws (3mm)
1. Step
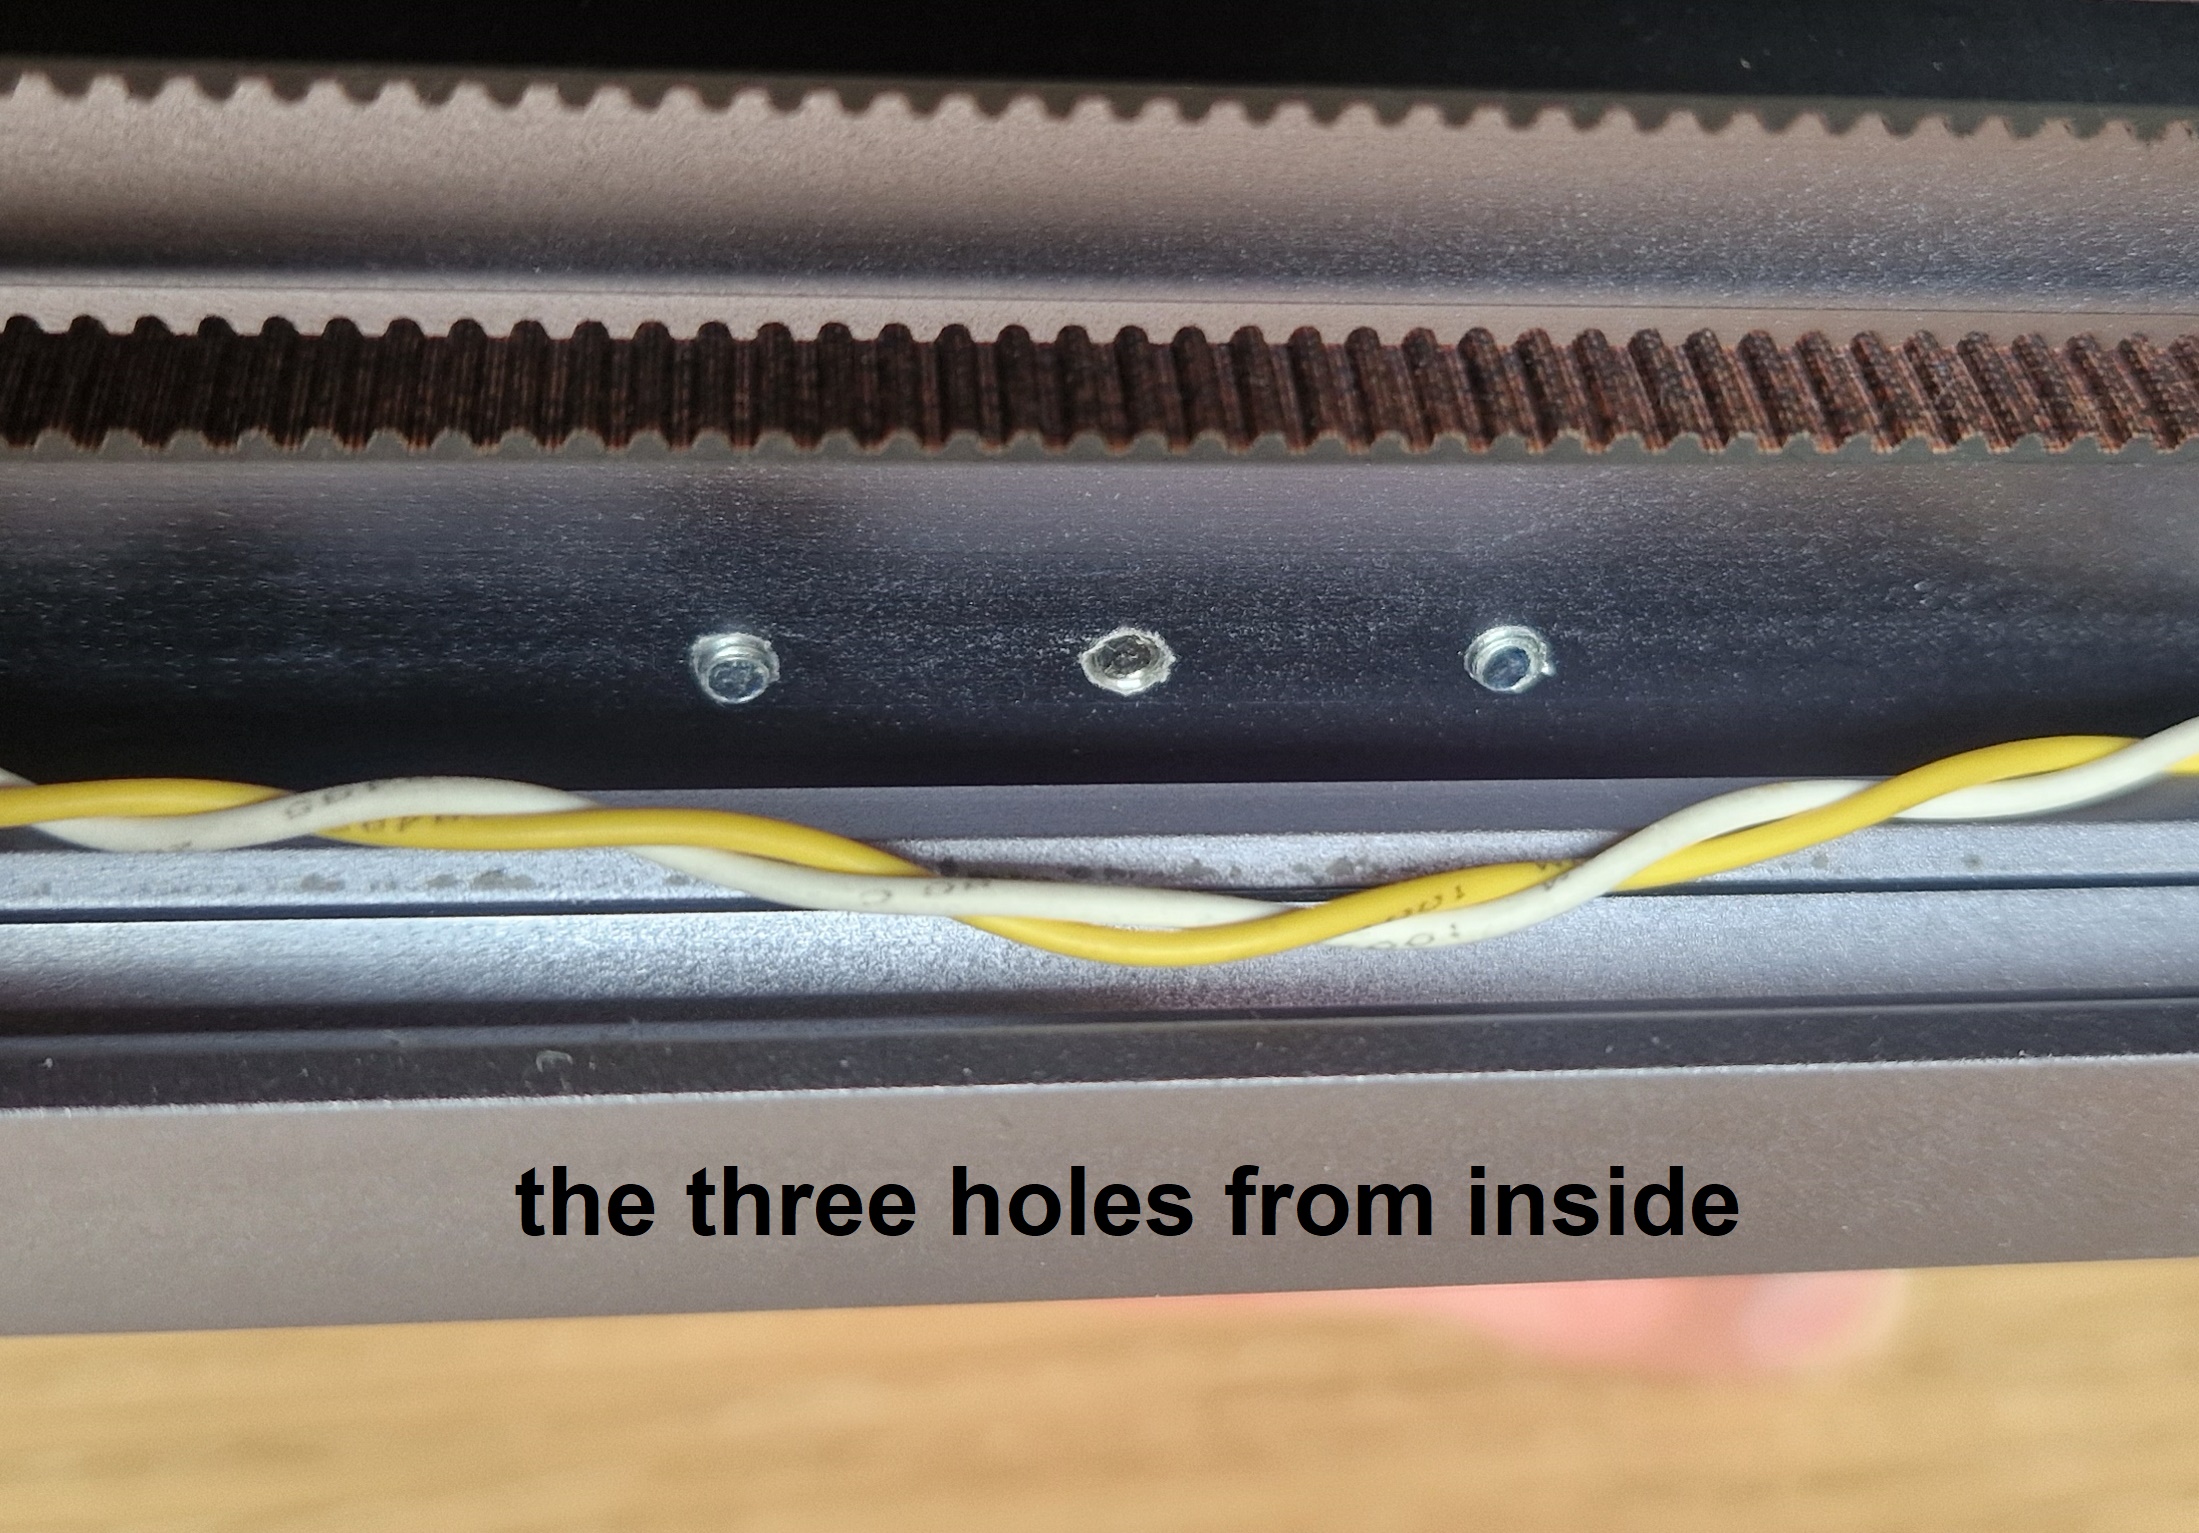
Use the spacer to mark the screw position. Measure 140 mm to the rear on the front right-hand aluminum profile and mark the drill holes through the three holes. Make sure that the spacer is flush with the lower profile edge. I drilled these with a 2.5mm drill bit and then screwed in an M3 thread. However, you can also drill a 3mm hole at this point and tighten the screws with a nut from inside.
The Spacer MUST be mounted under the arm, otherwise the chain will touch it self, so insert the three screws into the arm, through the spacer and then screw it to your PHECDA.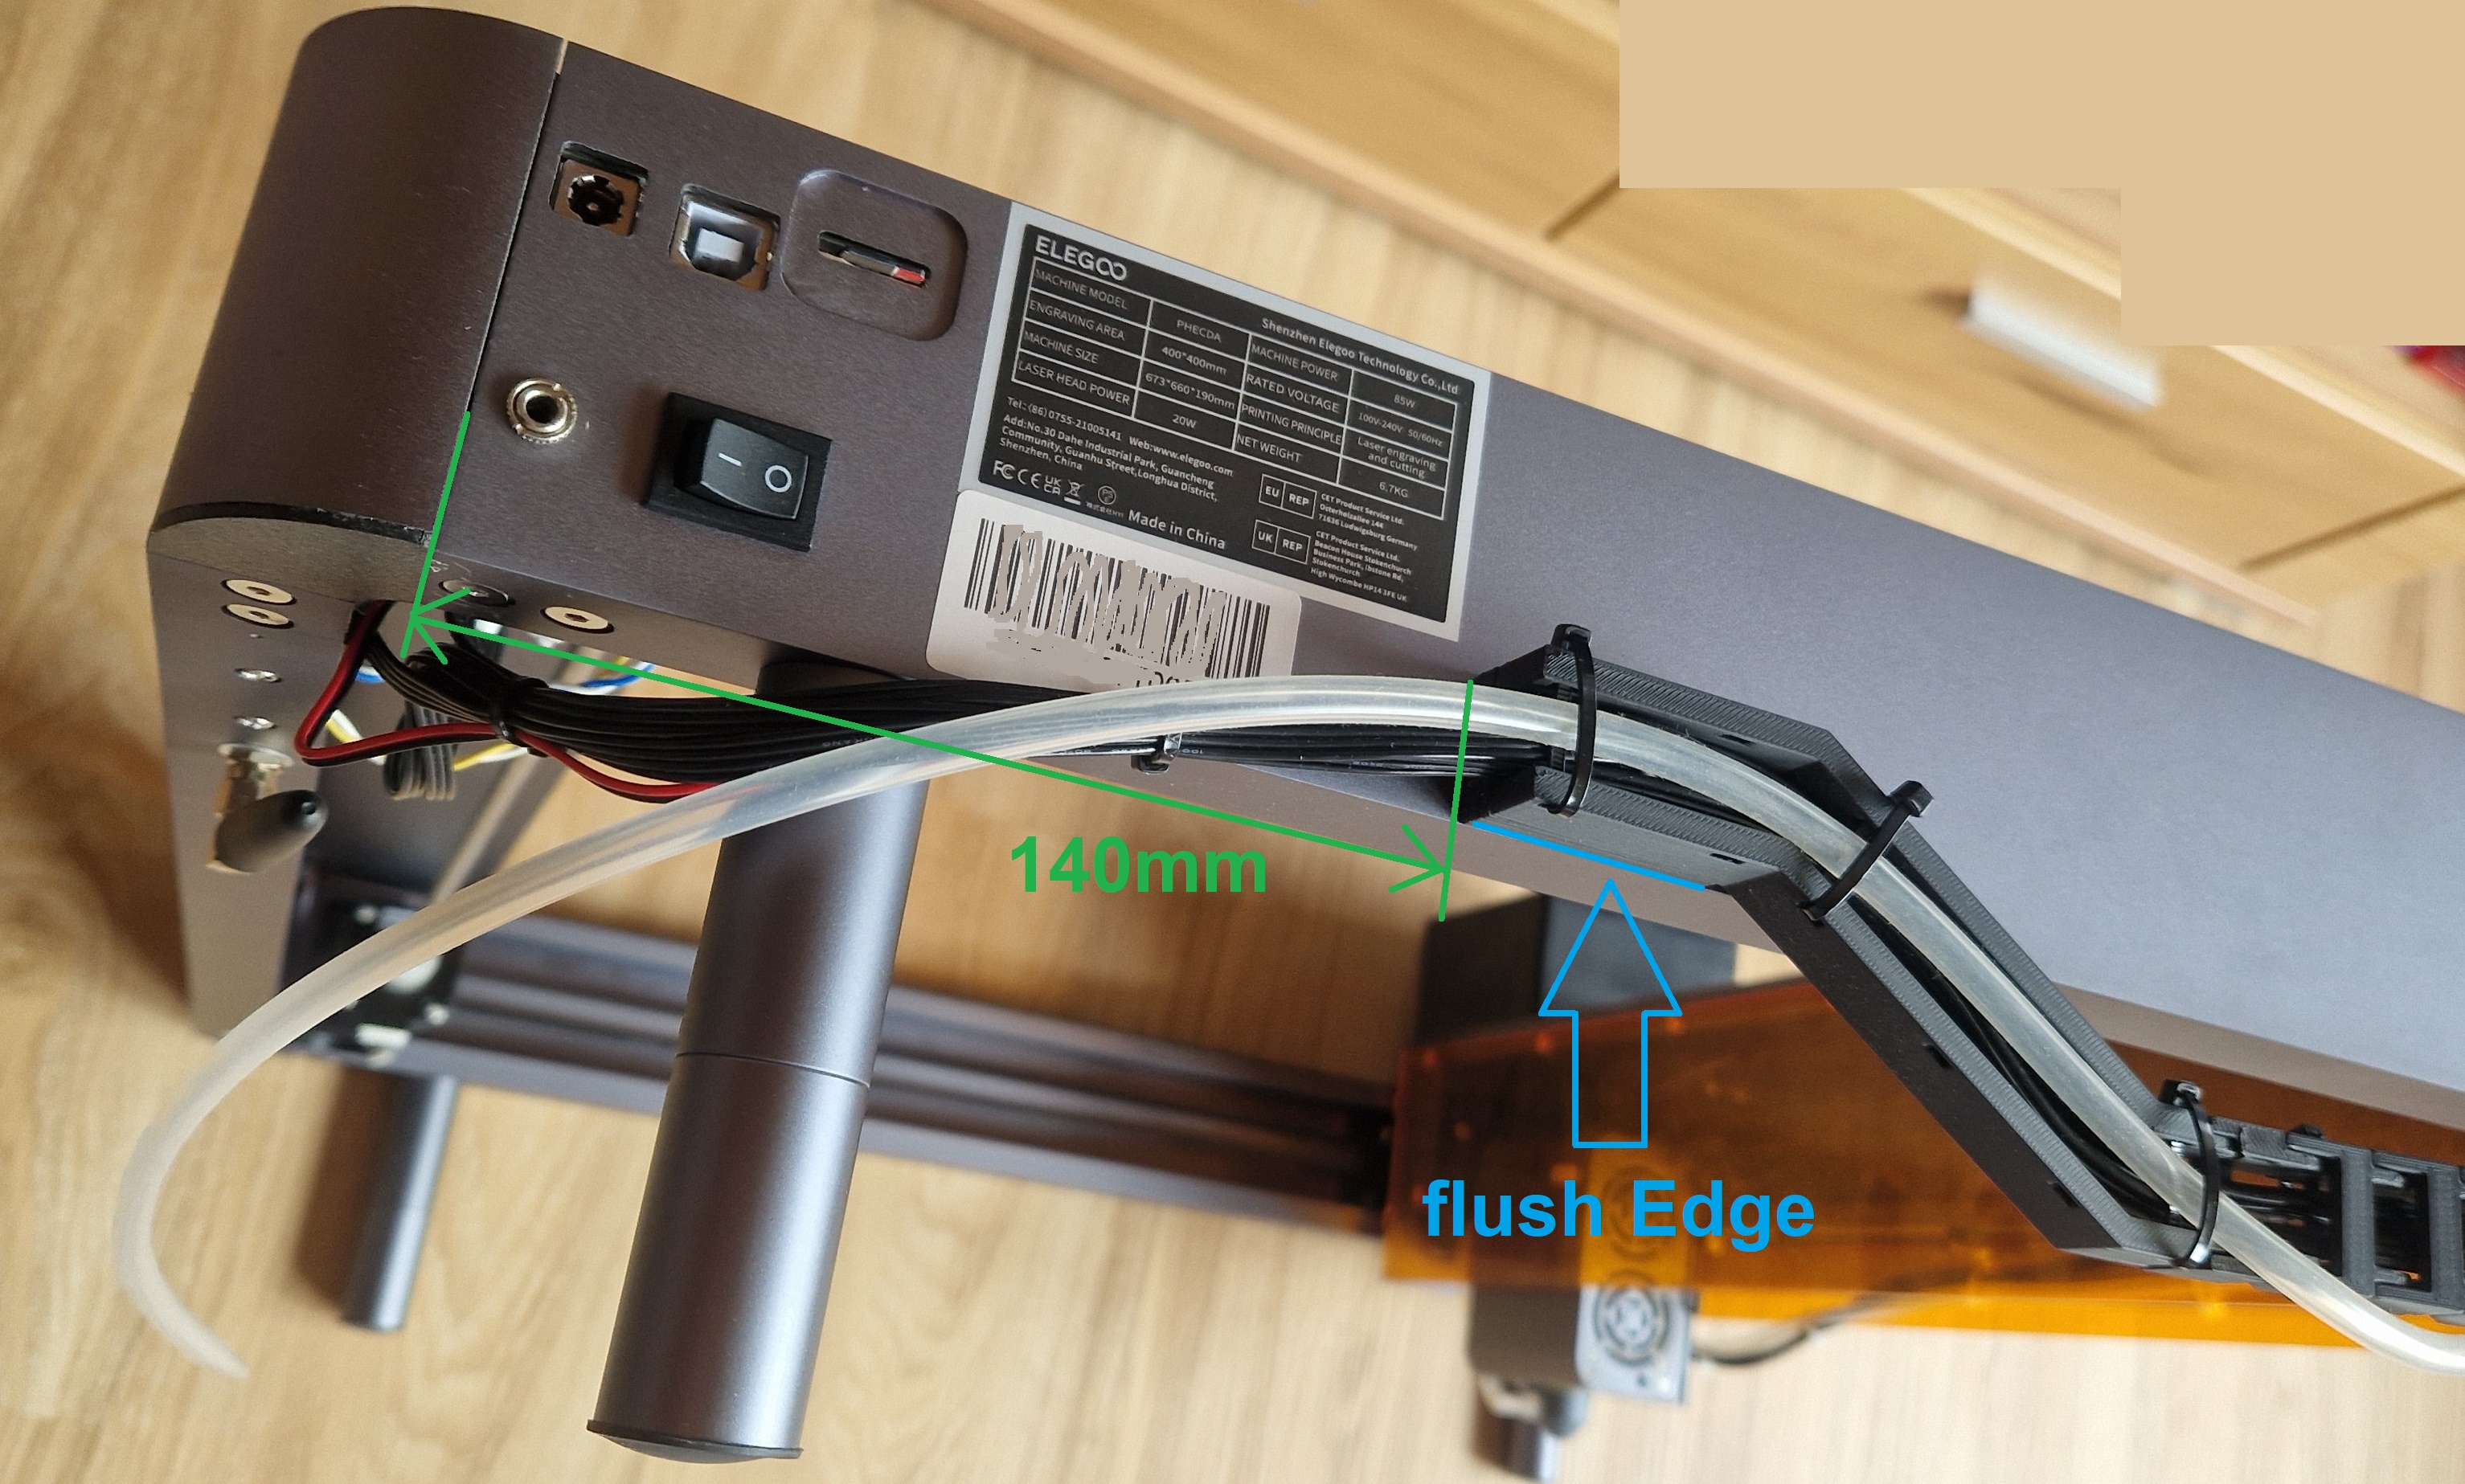
2. Step
To mount the chain end, drill two 3mm holes on the right side of your Y-slide where the previous cables were fed through.
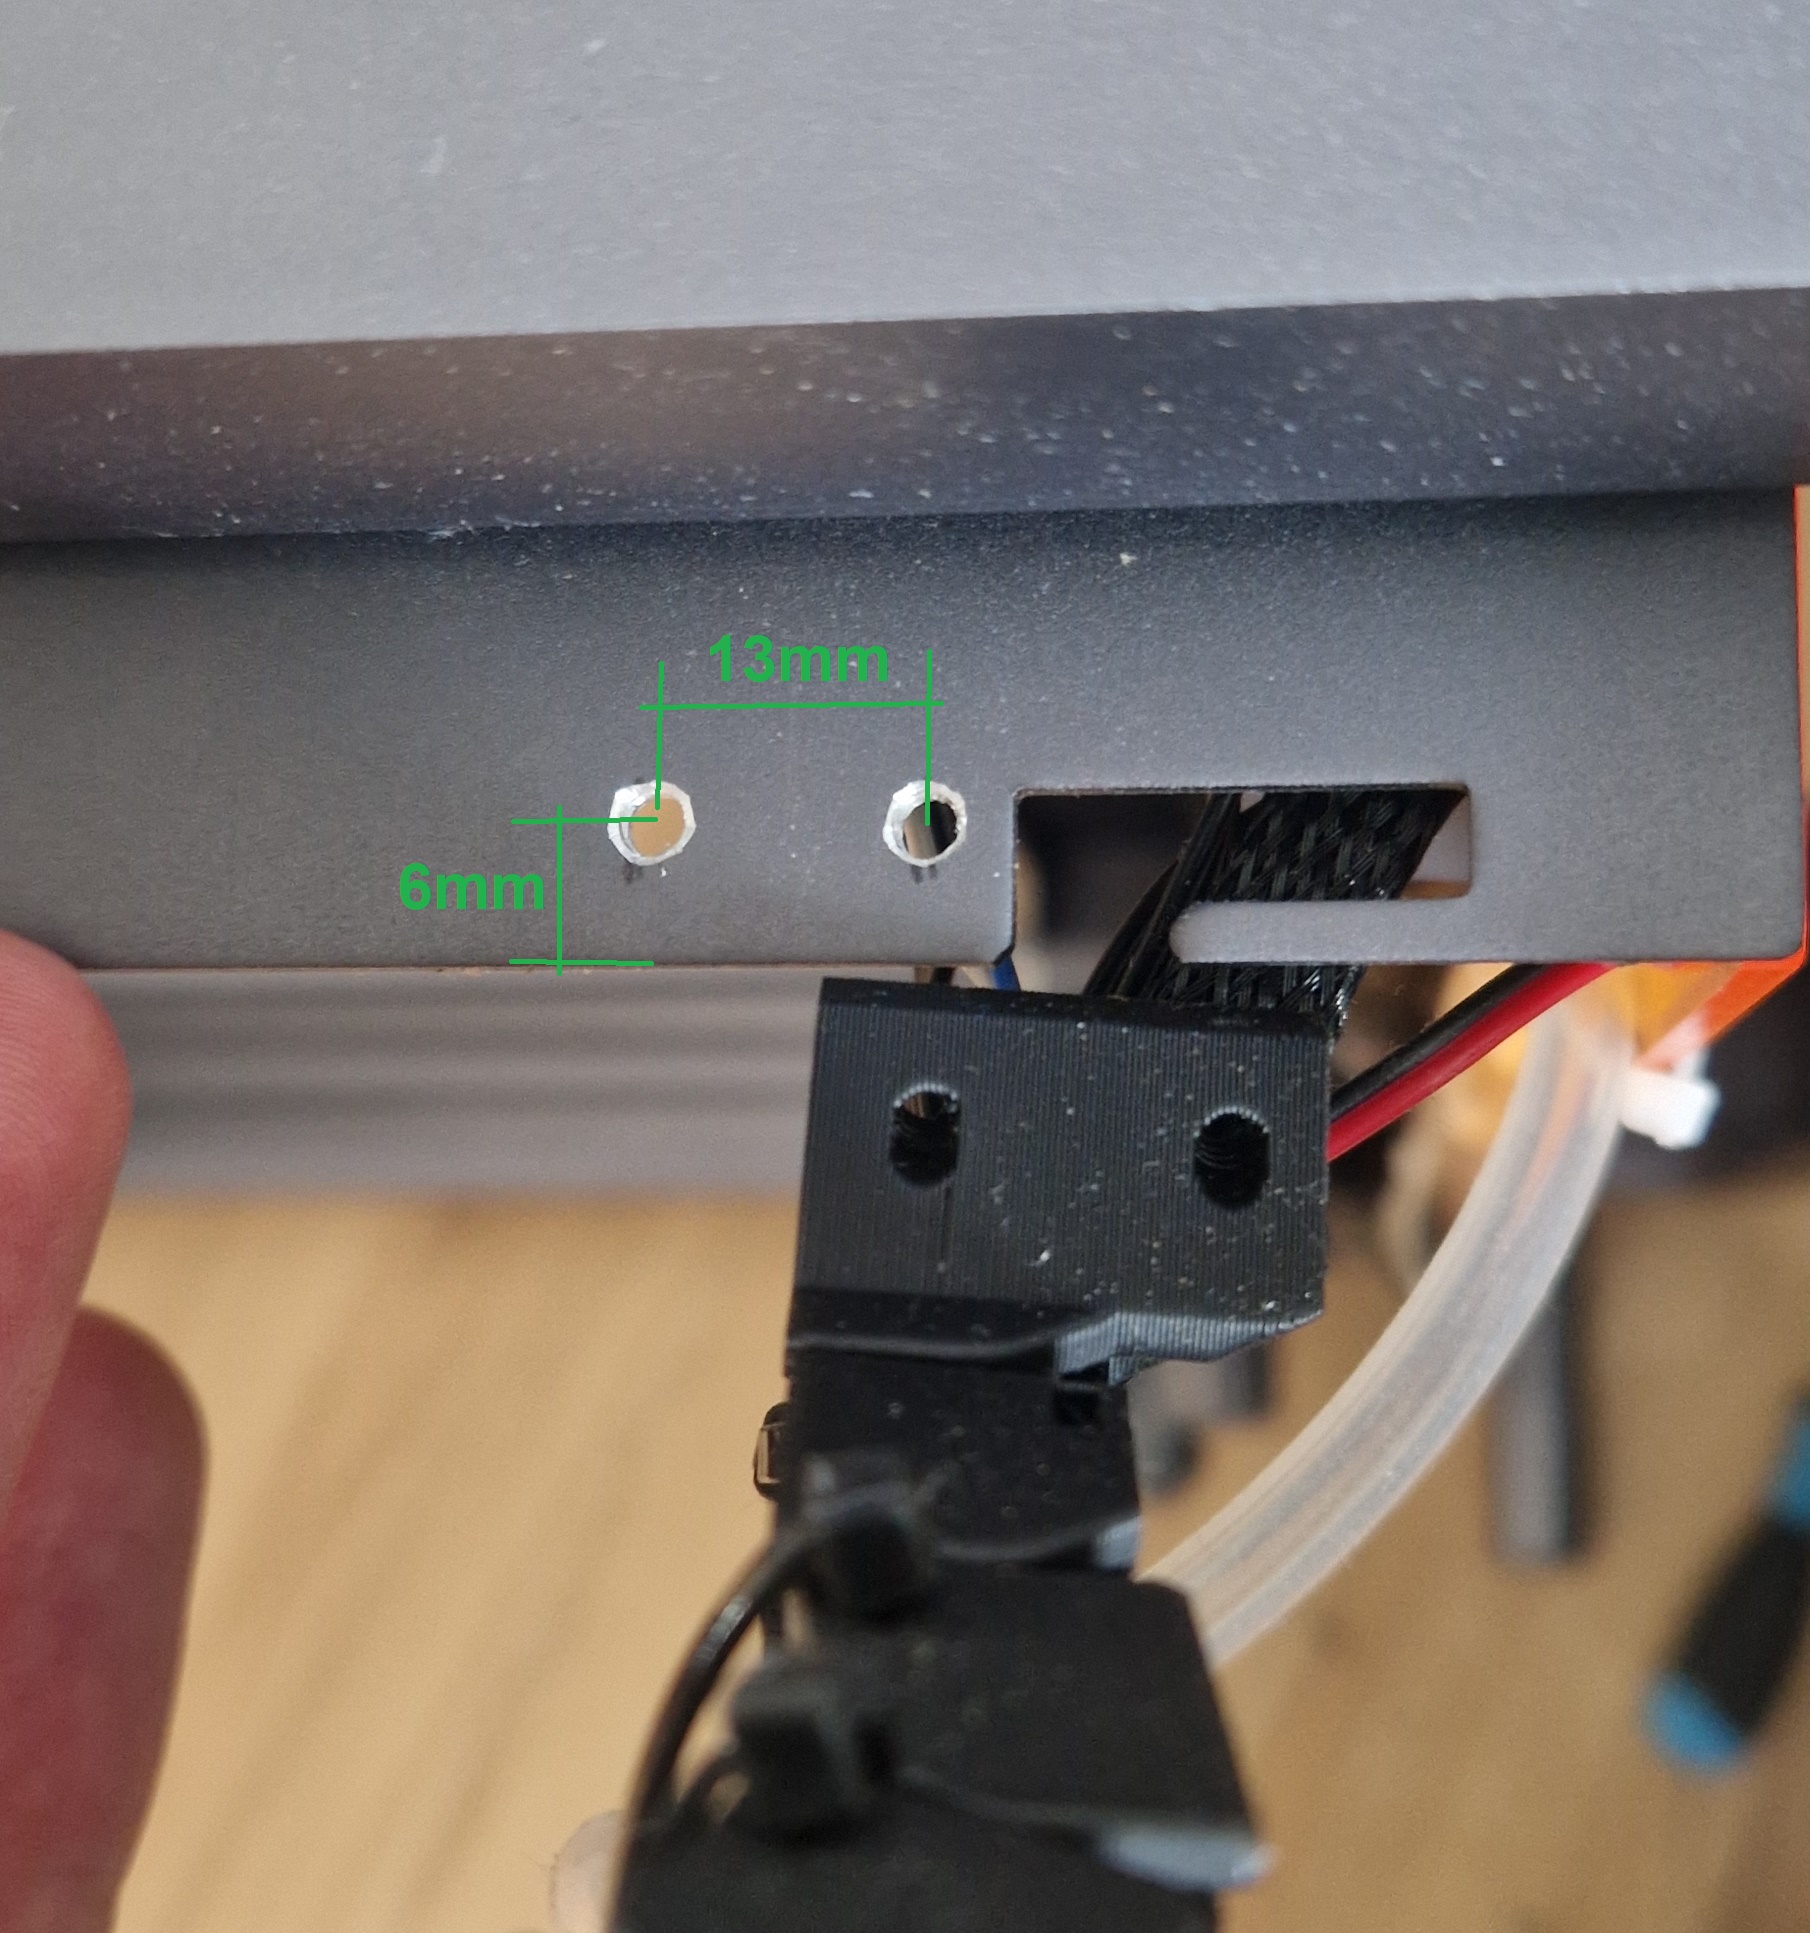
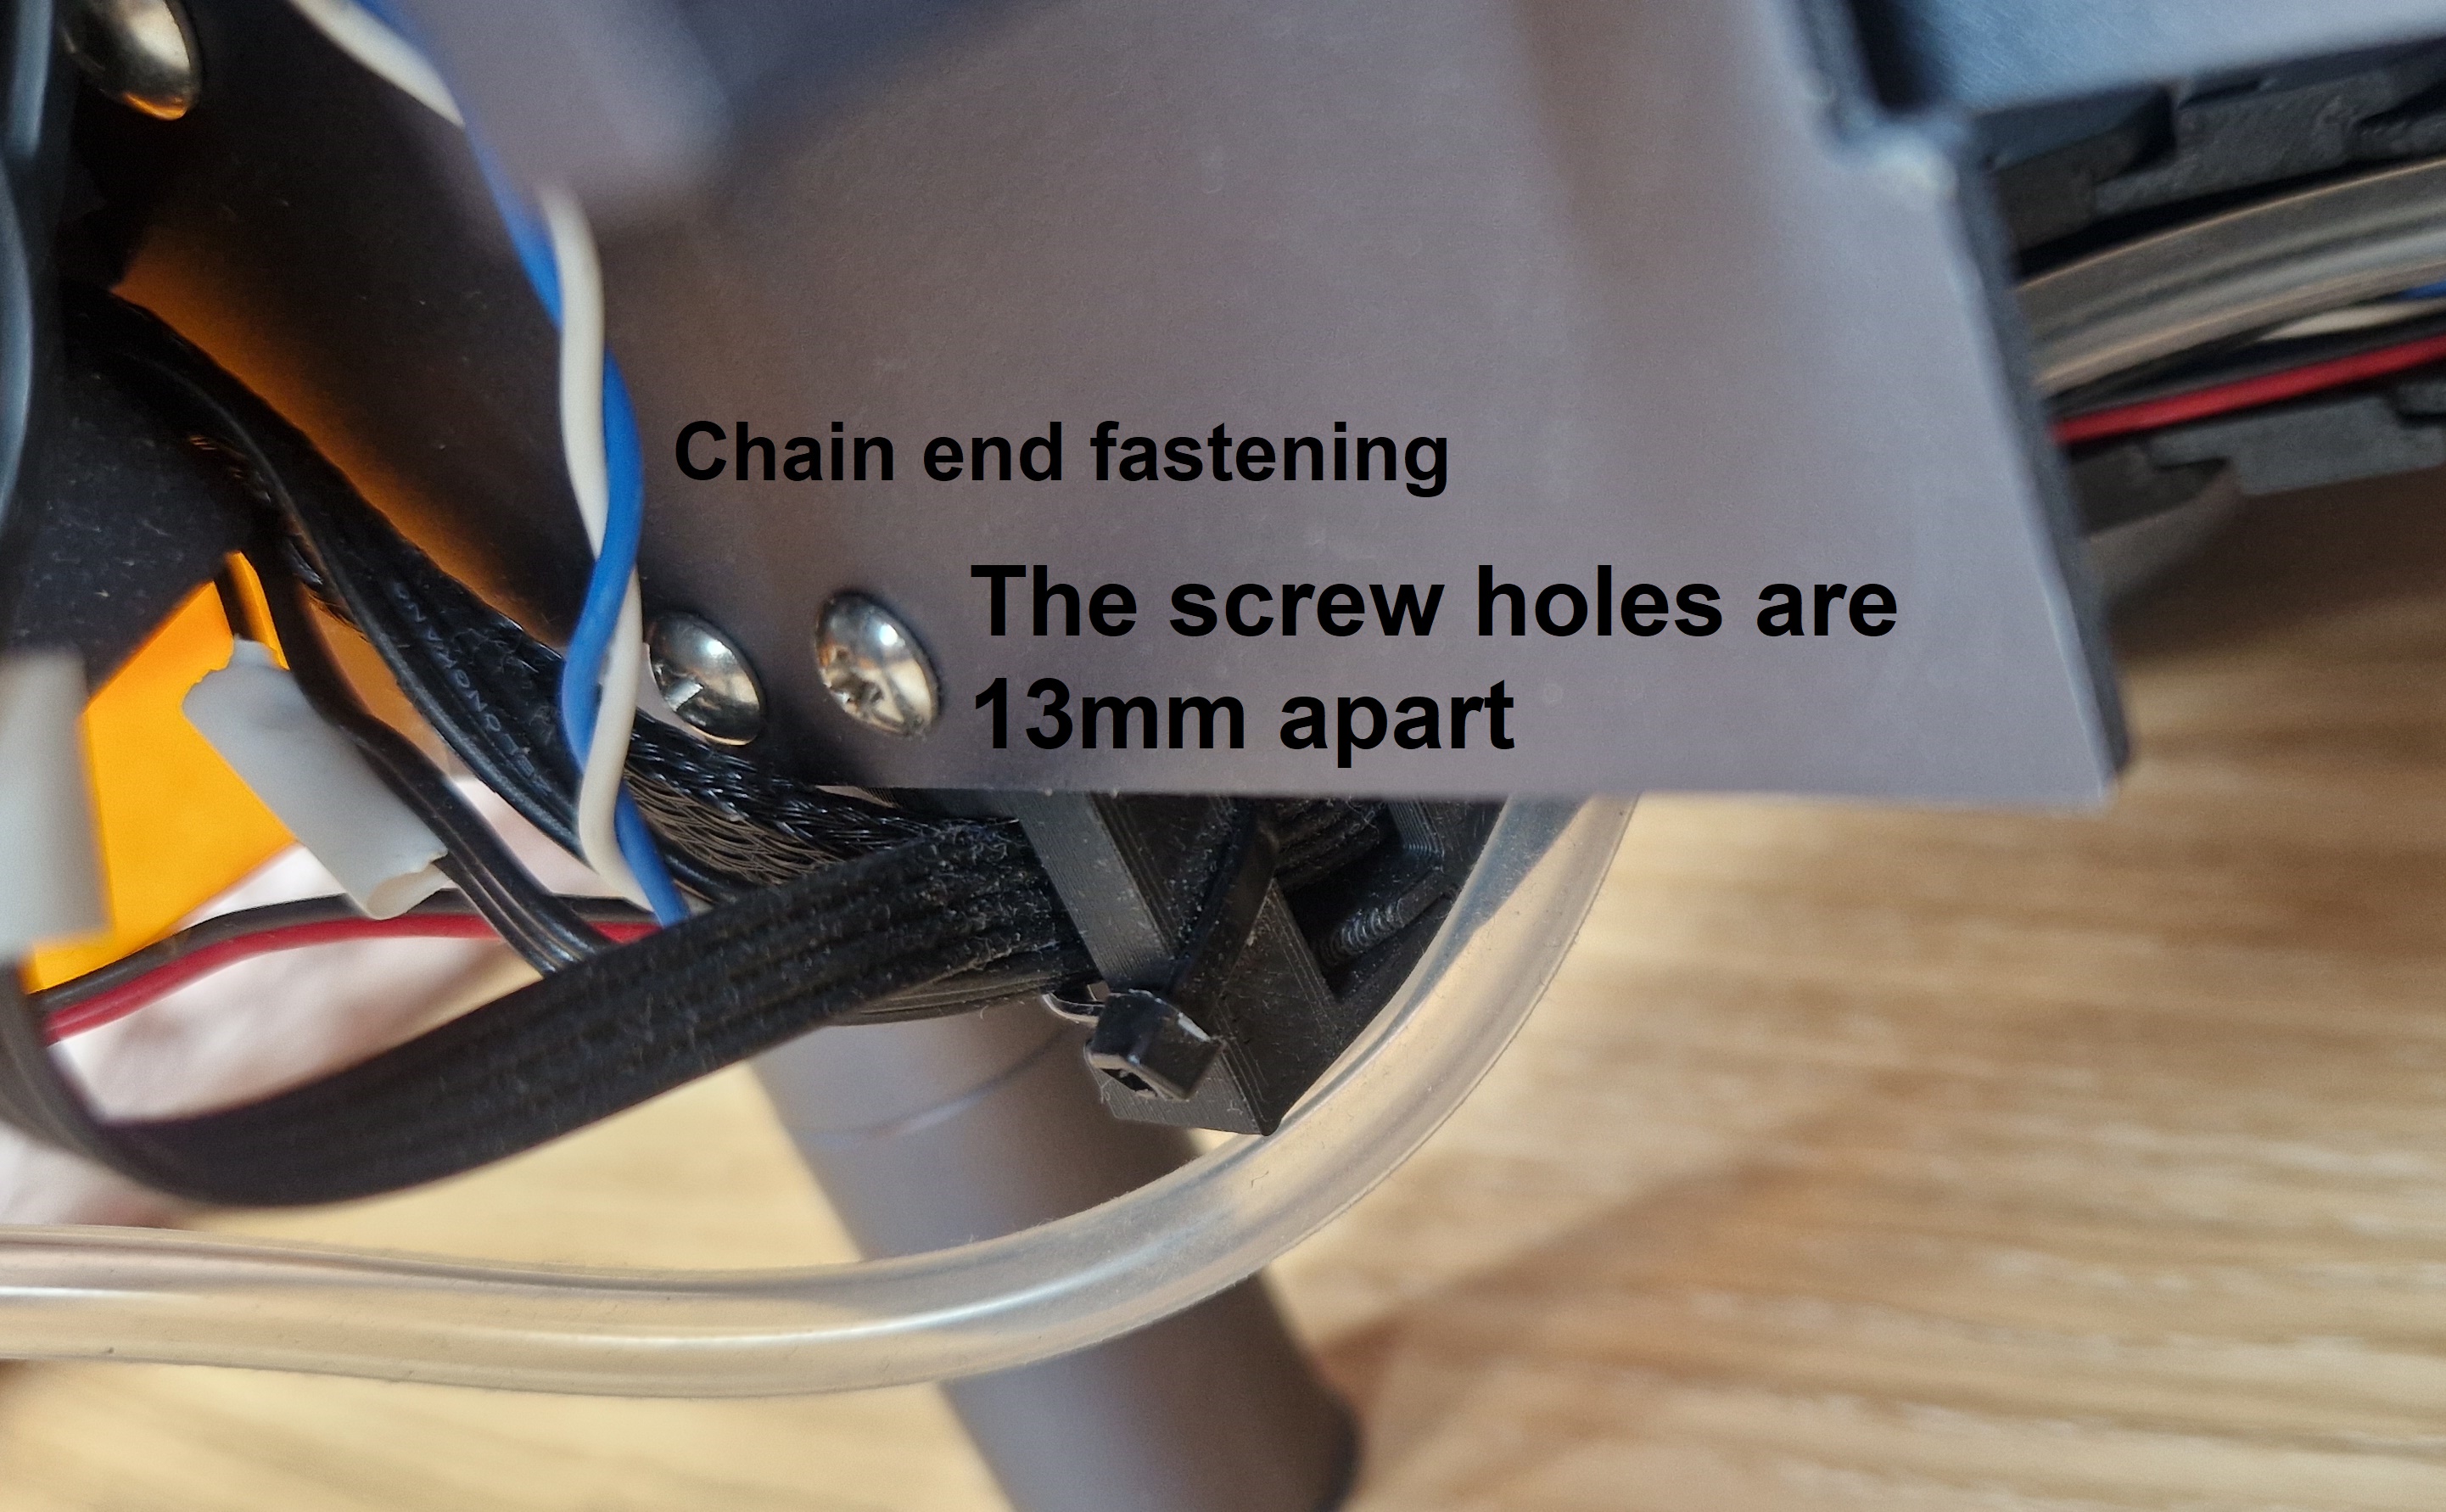
Fasten it with the two plastic screws
3. Step
Put the 19 chain elements together, BUT ATTENTION the first and the last one have to be put on the other way round,
so that they sit the wrong way round in the chain. To ensure that the chain can swings out.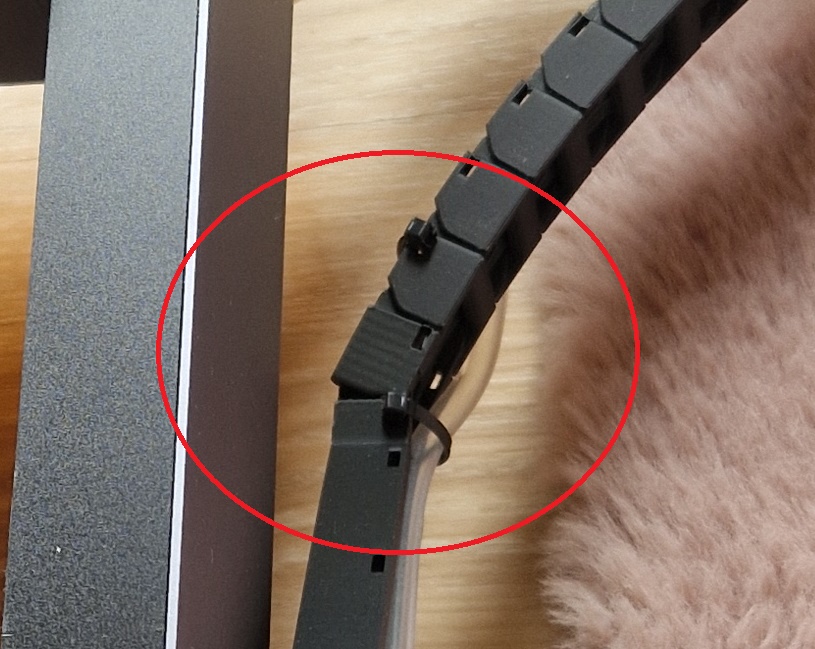
4. Step
Now click the cable chain into the arm and the end piece so that the chain can fold inwards.
Then you can insert your cables and the hose into the chain and secure them with the cable ties, using the two holes in the chain links. Three cable ties are sufficient on the arm, in this version two extra holes have been added to insert the ties from below so that you can lay the hose underneath the chain, this does NOT have to be threaded into the shaft.
In my pictures the hose routing is still a little different as it is an earlier version, this is all better thought out in this final version.
When laying the cable, always ensure that the cable and hose are loose and that nothing is kinked. To ensure this, move the Y-slide back and forth from time to time and check that it moves freely during installation.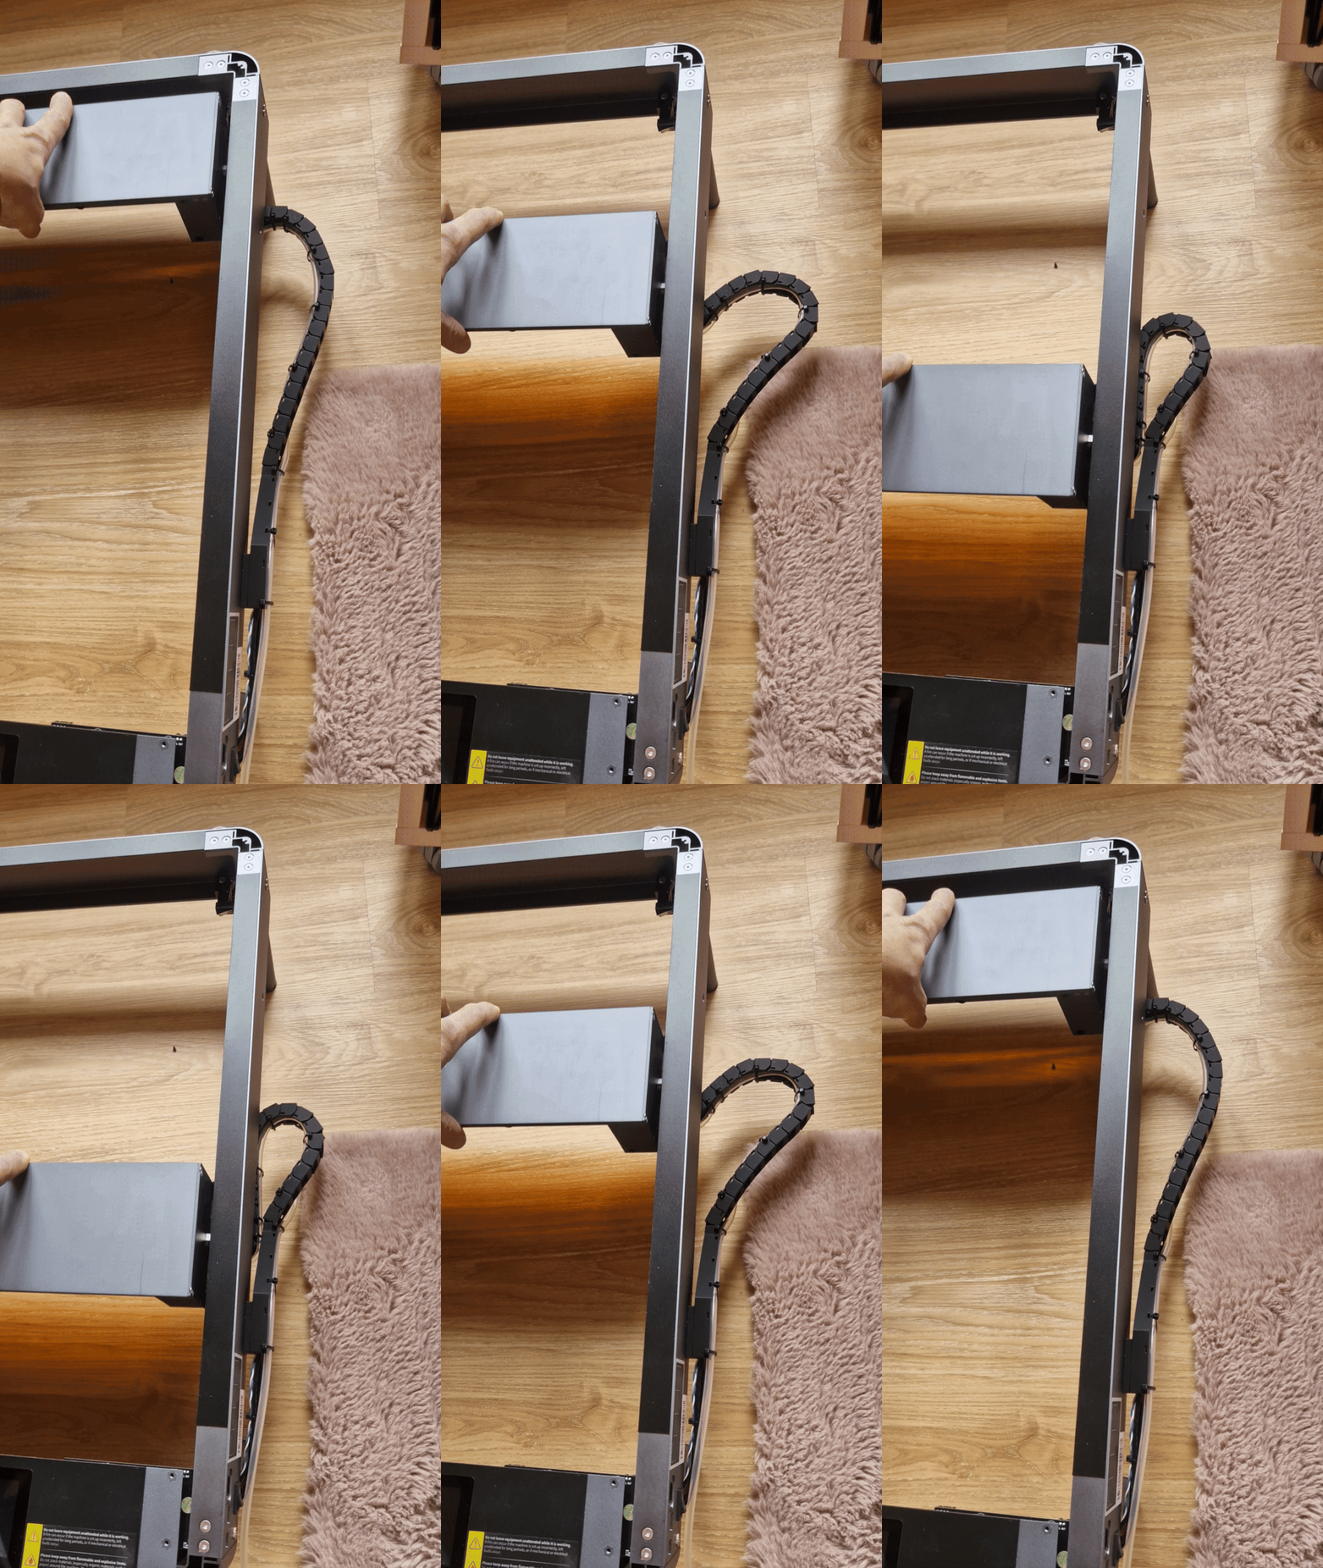
NOW YOU HAVE A CABLE CHAIN
There will be some more addons for the PHECDA coming soon so please follow me.
And if you think what I'm doing is great, please give me a boost to encourage me to create more content.
