
Parametric cabinet profiles
jennifer816

Mit KI Ähnliches finden


Druckprofil(0)
Modelldatei(0)
 0
0 0
0 0
0
Veröffentlicht:2026-04-06 11:45:49
0
0
 000
000I measured wrongly and hung up kitchen cabinets a little bit too high lol.
I have very crooked walls and all the cabinets were different heights, so pretty much each segment had to be different depth and height, but that's where 3D printing shines!
I designed the profiles to snap (top arc should be nicely flex) under the cabinet and hook behind ceramic tile backsplash. Those can also be used as a neat way to hide cables, I hid cables for kitchen counter lighting.
I added some models, but I think it would be best for you to play around with variables to suit your needs. Here's the URL to OnShape document.
https://cad.onshape.com/documents/120e5cef969286dea1a5a92f/w/a8e636183314d2694718de16/e/756c5e9bb350e9853f300ca6?renderMode=0&rightPanel=variableTablePanel&uiState=66375504ea7d80165f2e6708
OnShape variable table documentation: https://cad.onshape.com/help/Content/variable_table.htm
I printed mine with white PLA (PETG would be probably better for kitchen use, but we'll see how it holds up), 0.8 nozzle and following slicer params:
I found that 2 walls at 1mm width were strong and could flex enough. My Neptune3 Plus handled it at 30 mm/s. To find the best dimensions I printed several small test fits based on some initial measurements:
A quick visual representation of what the variables mean. 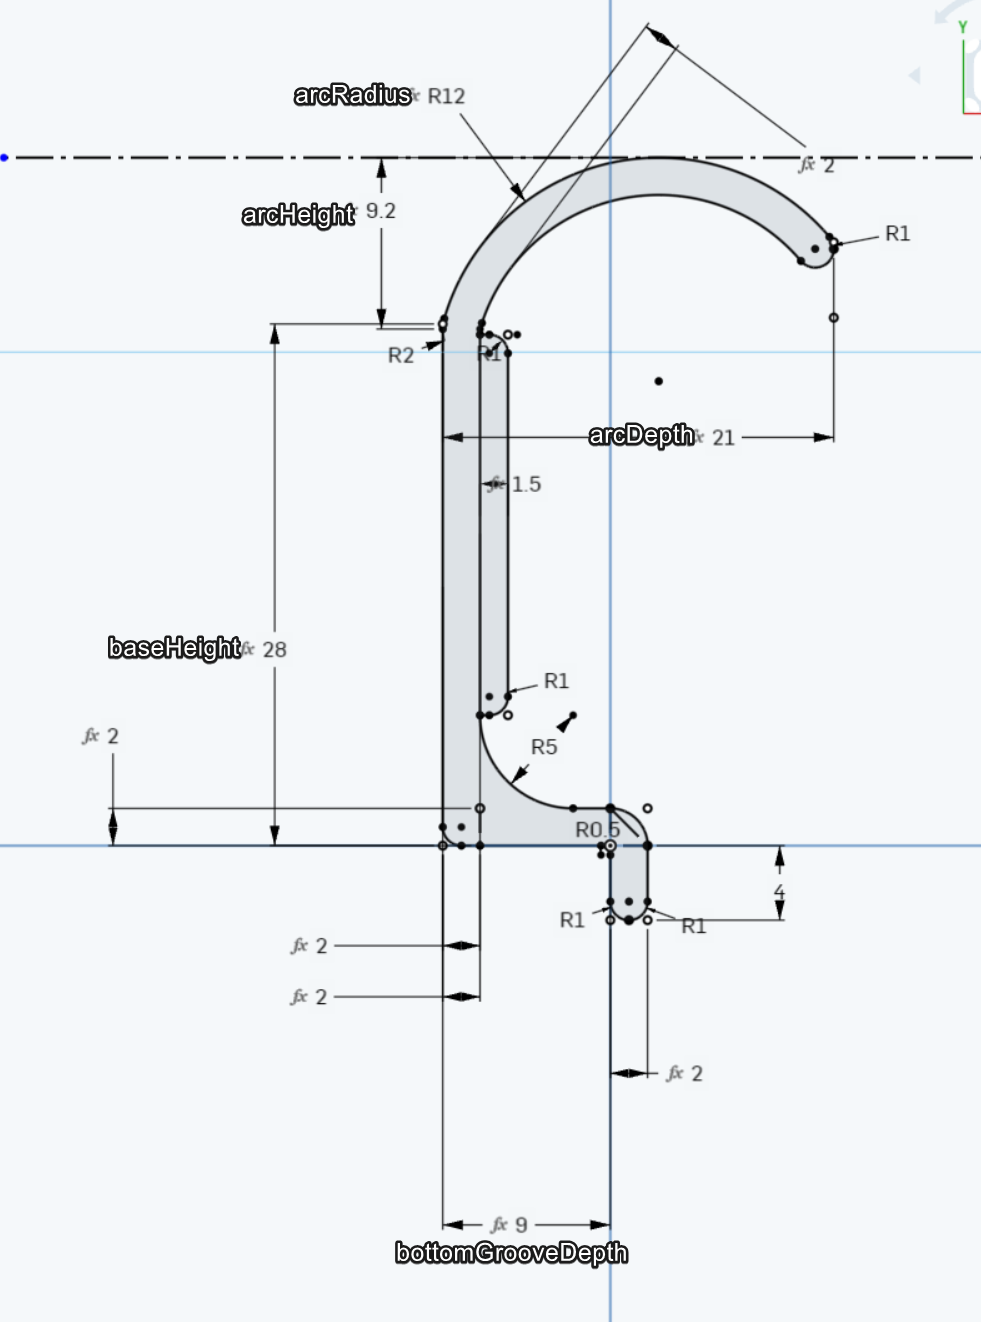
There's some unused geometry in the sketch that I was too lazy to clean up.
