
Unifi Intercom Viewer Wall Mount Wedge (UA-Intercom-Viewer) - "Fixed" Model
Sandy Scale

Mit KI Ähnliches finden

Druckprofil(0)
Modelldatei(0)
 0
0 0
0 0
0
Veröffentlicht:2026-08-21 13:31:29
0
0



 000
000This is a "fixed" version of the model originally made by @Basti - I converted the STEP to an STL using FreeCAD, then extruded a new rounded cuboid to remove the broken portion of the model in Tinkercad Yes, I need to learn how to use a proper CAD package!..
Thank you to @Basti for the design - this is remix is licensed as Public Domain in line with the original.
Slicing Instructions
Lay the model flat on the build plate, with the larger screw holes pointing upwards.
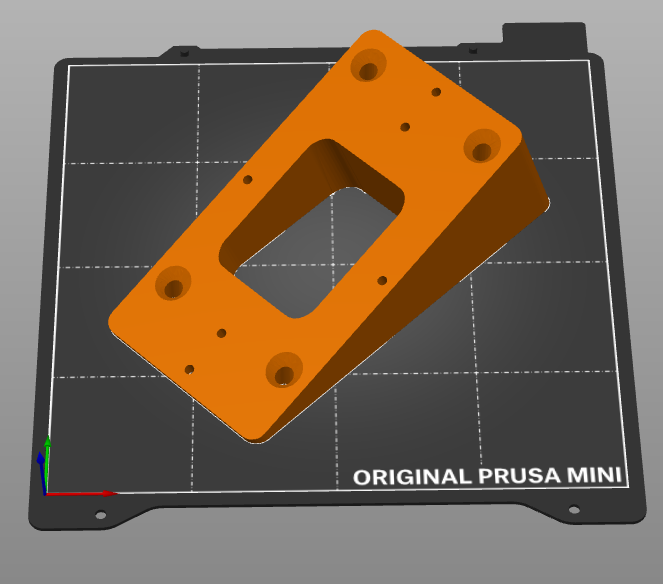
Doesn't need much infill to print, but do consider whether something may impact your screen (i.e. in a school hall, like we required this for!).
Print Settings:
I used the standard 0.20mm (Speed) profile on my Prusa Mini+ with the following amendments:
5% Infill
Gyroid Infill Pattern
0.8mm Perimeters*
*I chose to increase the perimeters due to the fact that I was using 5% Gyroid Infill: I wanted to ensure that the screw posts were sufficient enough to tolerate being held against a wall with a big ol' screw. I also have a 0.4mm nozzle, so chose to run as two passes.
